I have owned my current residence for several years, and as such, have encountered many problems with the house and its component parts. Fortunately, most of the problems have been small ones.
Index to the Projects
Click for details
Problems are a natural part of owning anything, and a house is no exception. While I have not had much hesitation at fixing a dripping faucet or quieting a squeaking door, other problems have come up that have given me a bad feeling in my gut (initially). [Part of the bad feeling comes simply from fear of the unknown.] With each problem, I immediately think “How in the world am I going to fix this?” or “Really, is this something I can fix?” or “Am I going to have to buy a new (whatever)?”
After the initial shock of seeing the problem (if it is a problem that I have never before dealt with), I usually look at the immediate environment (to see if the problem extends to something else) and then walk away.
No, I don’t walk away in defeat. I walk away to give myself some time to think about the problem. I am the type of person that needs time to think about the problem that has come along.
Fortunately, I am also the type of person that likes a challenge, and I have a lot of energy to try to fix things or solve a problem. I remember years ago someone saying “Don’t look at a problem as a problem; look at it as an opportunity.” For most of my life, I did not abide by that saying, but for some reason, now that I am older, I almost relish the idea of working on problems. I don’t actually want problems to happen (I have too much fun working on programs or other hobbies), but when a problem does happen, I face it with an entirely different attitude than I ever did when I was younger. I work up a gusto attitude and dive into the problem (well, pacing myself during my work). I don’t always succeed in solving the problem, but at least I try hard, and that alone makes me feel good about myself. And feeling good about myself makes me happy.
So now that I have finished my ramblings, I come to the real purpose of this article:
Describe the problems and their solutions.
I have encountered (and solved) several problems in my house over the past few years. (I won’t talk about the problems I could not solve and have had to hire a professional to handle.) I have had to rely on online information, YouTube videos, and books for each plan of attack. I have not just materialized the solutions out of thin air. The YouTube videos, especially, have been extremely helpful many times.
An important point that I want to make is that my solutions are not unique in this world. There are many guys (and gals) out there that have solved the same problems as the ones I have solved. All of my solutions have come from other people’s past work. I am simply describing problems and solutions that have been part of my life.
Another point is that I hope that someone looking for a solution might find my words helpful, even if they just give him an idea to work with.
Problem: Kitchen faucet
Problem #1: The faucet flowed as a weak stream. I cleaned the aerator, but that did not help much. I tried other fixes but to no avail. I even ordered a new cartridge, but that did not solve the problem. Finally, in desperation, I used needle-nose pliers on the pointed head of the diverter. I turned it back and forth (it had been stuck). That did the trick! Water flowed freely.
Problem #2: The hot water side flowed weakly. I examined the cylinder inside the handle. No dirt there. I removed the 12″ inlet hose under the cabinet. No dirt there either. I was puzzled for a week. I then looked down in the cylinder again (at the hot and cold inlet holes). Water would come into the cylinder thru the holes, and so the problem had to be from that point to the faucet opening (the aerator). Being desperate again, I used an ice pick to poke into the holes. Some obstruction in the hot water side broke into smaller pieces. I could then push the ice pick about 2″ into the hole. I cleaned the other side just to be sure it was open. When I reassembled everything and turned on the water, both hot and cold flowed big time. Problem solved!
Problem #3: The hot and cold water flowed poorly; the water from the hand-held sprayer flowed normally. Once again, I examined the aerator and other easy-to-get-to parts. No obstructions could be seen. I went under the cabinet (a very difficult place to work) and disconnected the hose leading to the split connector. I cleaned the hose by using water and hitting it against the cabinet top (on papers) several times. During that process, several tiny pieces of dirt/pepper-like particles came out of the hose. Finally, I reconnected the hose and tried the faucet again. Water flowed freely. Time spent: about 2 1/2 hours.
Problem: Kitchen electric oven
The oven would not maintain the desired temperature. I thought “I hope I can fix this without spending too much money; new ovens can cost $1000 or more.” I didn’t have the owner’s manual. The oven is about 40 years old. All I could see on the oven was “General Electric P7 Automatic Cleaning Oven.” Not much to go on. Nevertheless, I began searching the internet, and, remarkably, I found the lower bake element for that oven (which turned out to be the whole problem). The picture on the web page looked just like the element in the oven. I took a chance and ordered the element ($77). When it arrived, I cut the power to the oven and unscrewed the element and then put the new element in place. I turned the circuit breaker back on and tried the oven. No smoke or sparks. That’s good. The new element maintained the temperature. My wife was pleased. My big thrill with this project was that I was able to find the part without knowing the model number of the bad part.
Problem: Garage door opener
This has been my most enjoyable project – even though at the beginning, I thought I would certainly have to buy a new opener.
I noticed the problem with the opener in October 2014. The opener would make sounds but would not raise the garage door. Once again, I began this project by searching the internet. I found a schematic of my particular opener. The arrangement of parts inside the housing looked intimidating. But I thought the worst that could happen would be that I would completely ruin the unit and would have to buy a new one. So, I decided to try to fix it. I bought a set of parts, consisting of the two main gears and ancillary parts ($26). After the set arrived, I began removing the parts of the unit. I took pictures (and wrote some notes) of each step in the process. I worked slowly and tried hard to remember all that I saw. Using the new parts, I reassembled the opener. [I had to do a couple of steps twice, but not a big deal with that.] I applied the new grease liberally and finished the work. I had to adjust the travel-up and travel-down settings because I had moved the chain during the repair process. The opener worked like a charm! (It is still working great after nine years.) Time to disassemble: five hours. Time to reassemble: four hours.
This was one of the most-complicated projects I had ever attempted. The single problem with the opener was that the main gear (made of hard plastic) had lost its threads (over the course of more than 20 years). So, by being adventurous, I saved myself the price of a new opener and the time I would have had to spend to replace the old one. Plus, I learned how a garage door opener works.
P.S.
One of the reasons I decided to try to fix the door opener is because of something that a fellow programmer said to me one day at work. Joe Garza and I were talking about work (probably discussing some complicated programming techniques, right?) one day when somehow we got onto the subject of garage doors. [Perhaps I had mentioned to him my recent problem.] At any rate, he told me the story of how he fixed his door’s problem of it not going up and down properly. The problem was that the spring had become too loose. He adjusted the tension in the spring by using two rods (one to turn the spring a small amount and the other to temporarily hold the spring in its new place). After locking the spring, he would perform those movements and then check the door to see if it would now balance at any point in its natural travel. He would repeat that action until the door was balanced by having just the right amount of tension in its spring. I thought that his solution was quite good. Thanks Joe for your story that helped me several years later.
Problem: House eave
Wood on the front corner of the house had become rotten over time. Instead of hiring a carpenter to replace the bad wood and underlying eave, I decided to try to work on that problem myself. I figured if I reached a point where I could not go any further with the repairs, I would call someone. I began by carefully measuring each piece of wood that would need to be replaced. I went to the local house repair supply store and looked for a sheet of plywood about 2′ by 8′ (since that is the size of the eave sheet). I could not find any wood of that size. I was puzzled (again, as with the other projects) and went back home. After a day or two, I went back to the store to try to find someone who could help me find the wood. No employee was available. I thought “Why does this store not have that size of wood? It has many other sizes. Why not this special size?” Then it hit me – the eave piece is just a part of a regular 4′ x 8′ sheet of plywood. I then found a sheet of the right thickness and also was able to find an employee that would cut the plywood to the right width. Using the new wood, I primed and painted each piece of wood I needed to replace all of the rotten wood. 
Then another problem arose. How could I hold the 2′ x 8′ sheet of plywood just under the joists and nail it in place at the same time? After more thinking, I came up with a solution, using something dealing with pulleys that I had learned in Mr. Gerlack’s Physics class in high school.
I nailed a large nail into the joist close to where the soffit vent (which I had cut in the middle of the sheet: 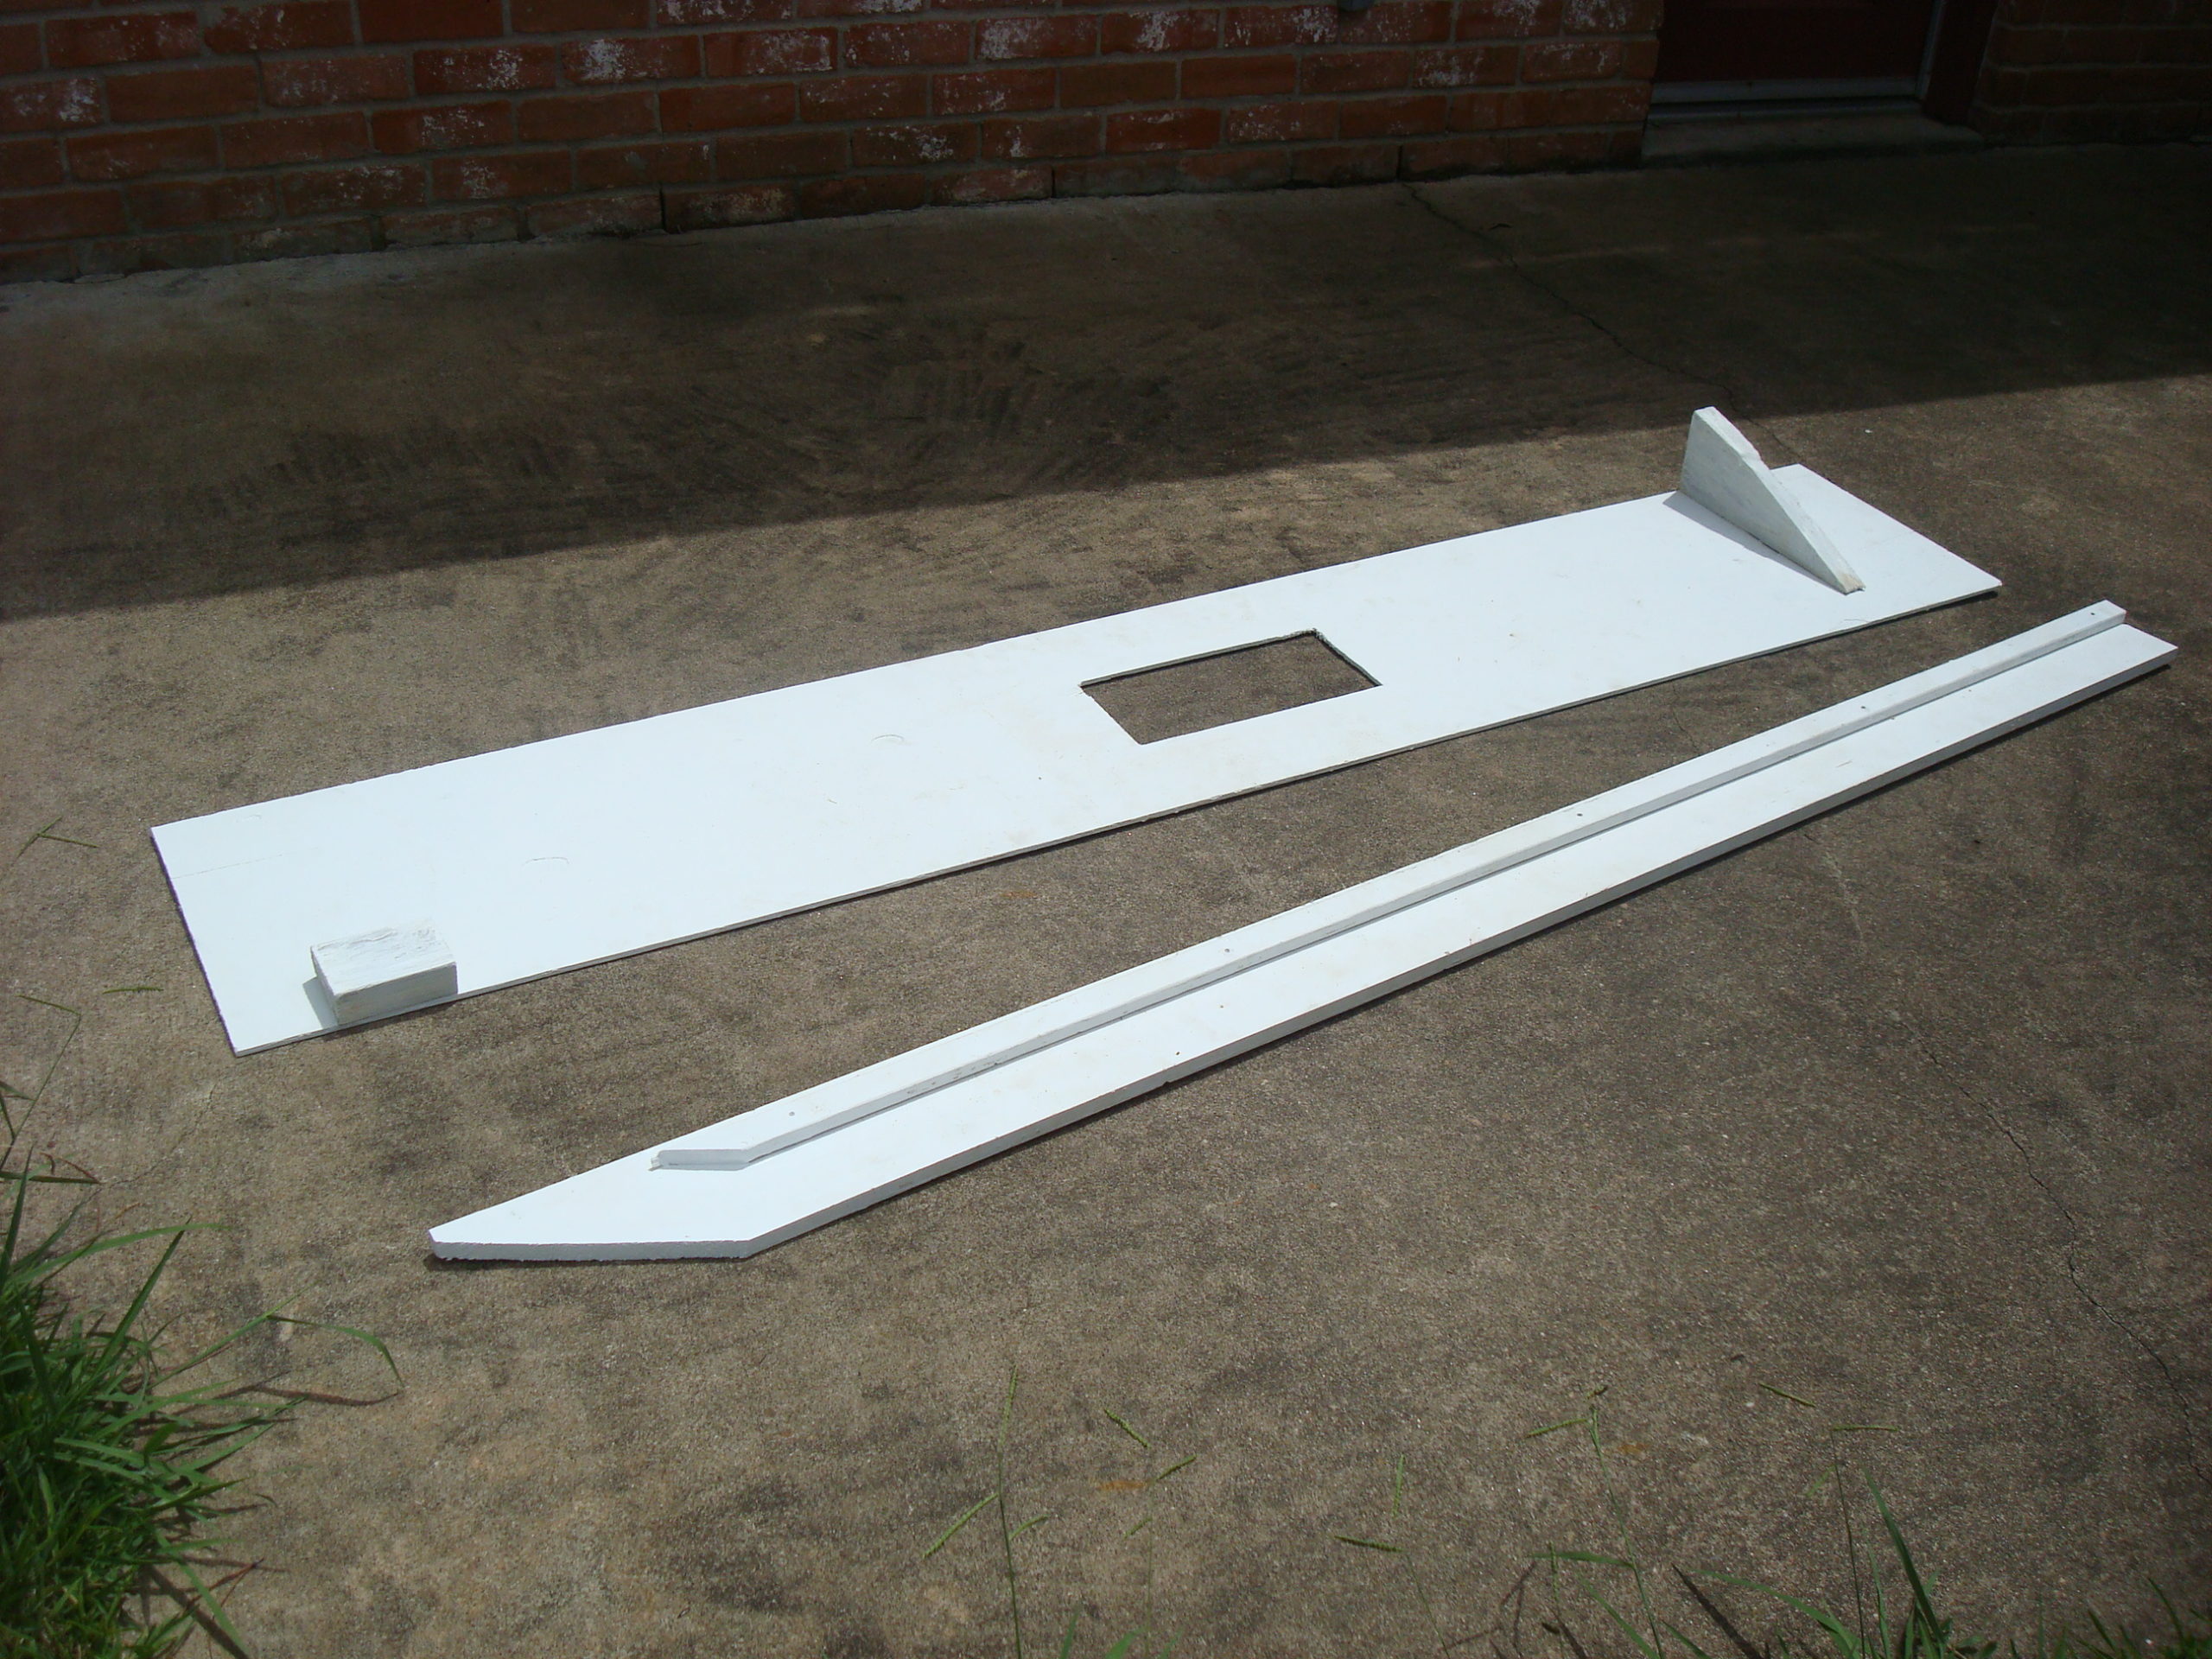 ) would be and then bent it (so it looked sort of like a “U”). I tied a long string around the middle of a 3 foot long stick and ran the string up thru the vent hole in the eave sheet and looped it over the nail and then passed it back down thru the vent hole in the plywood sheet.
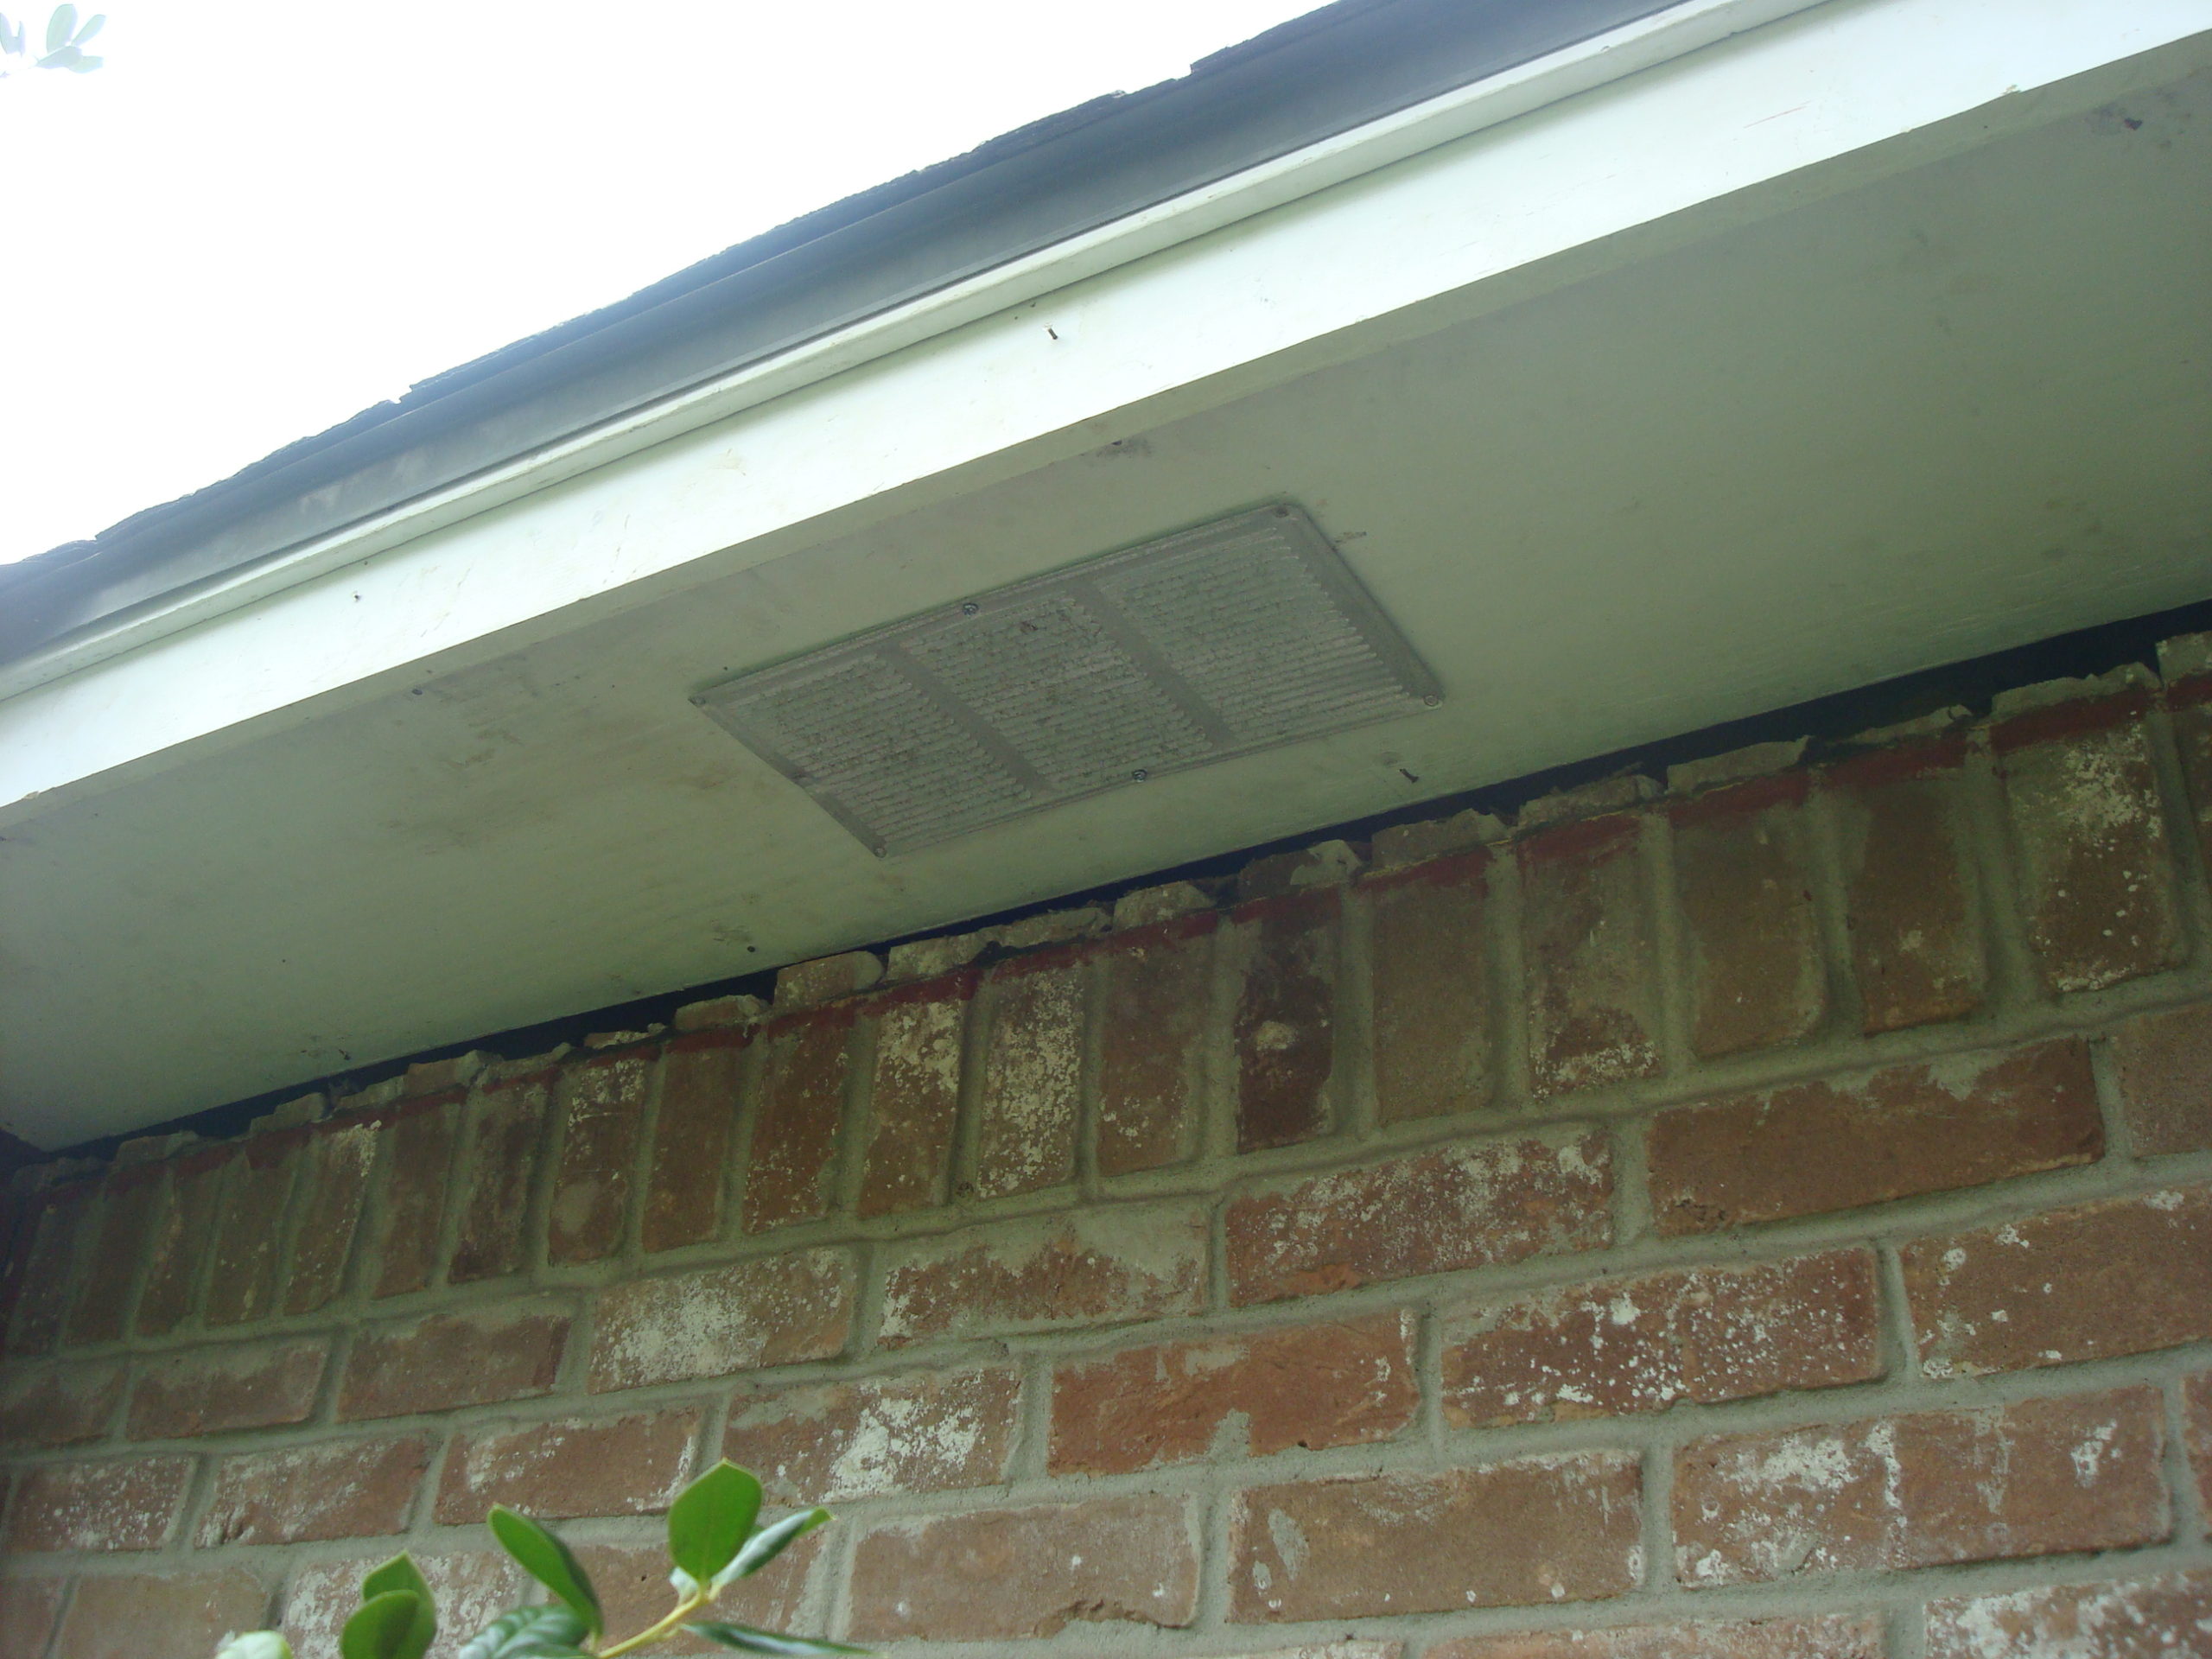
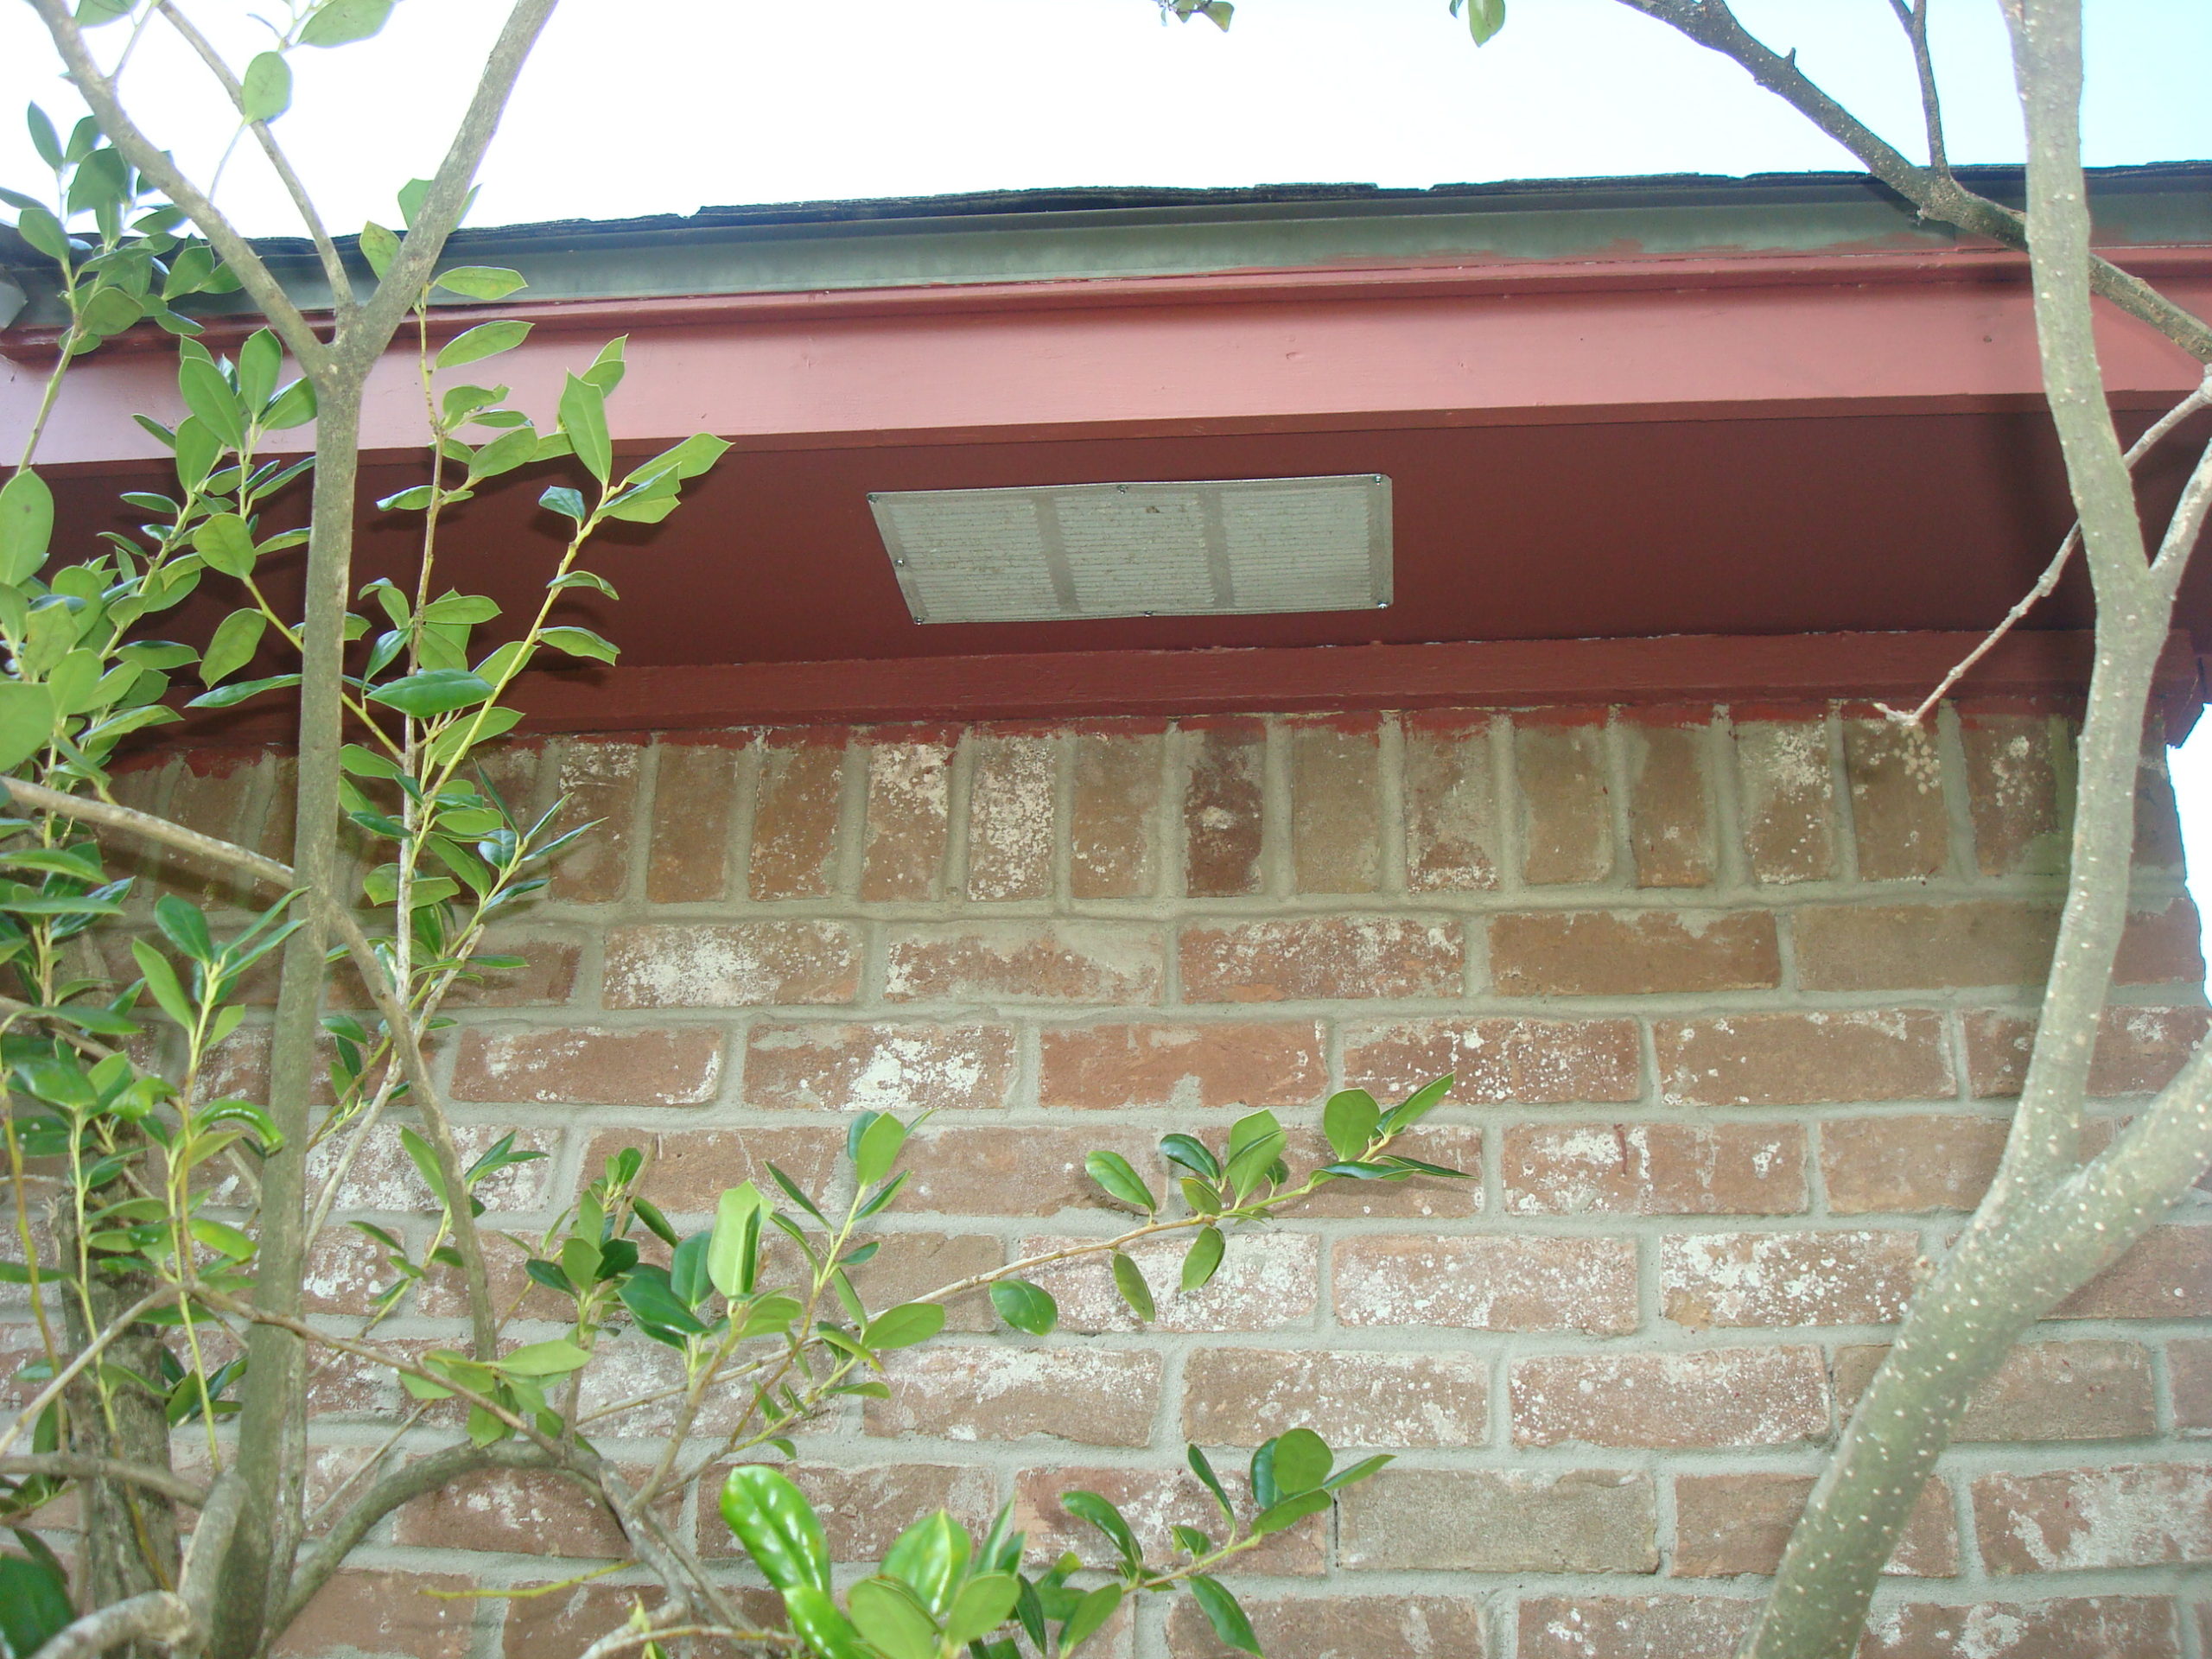
 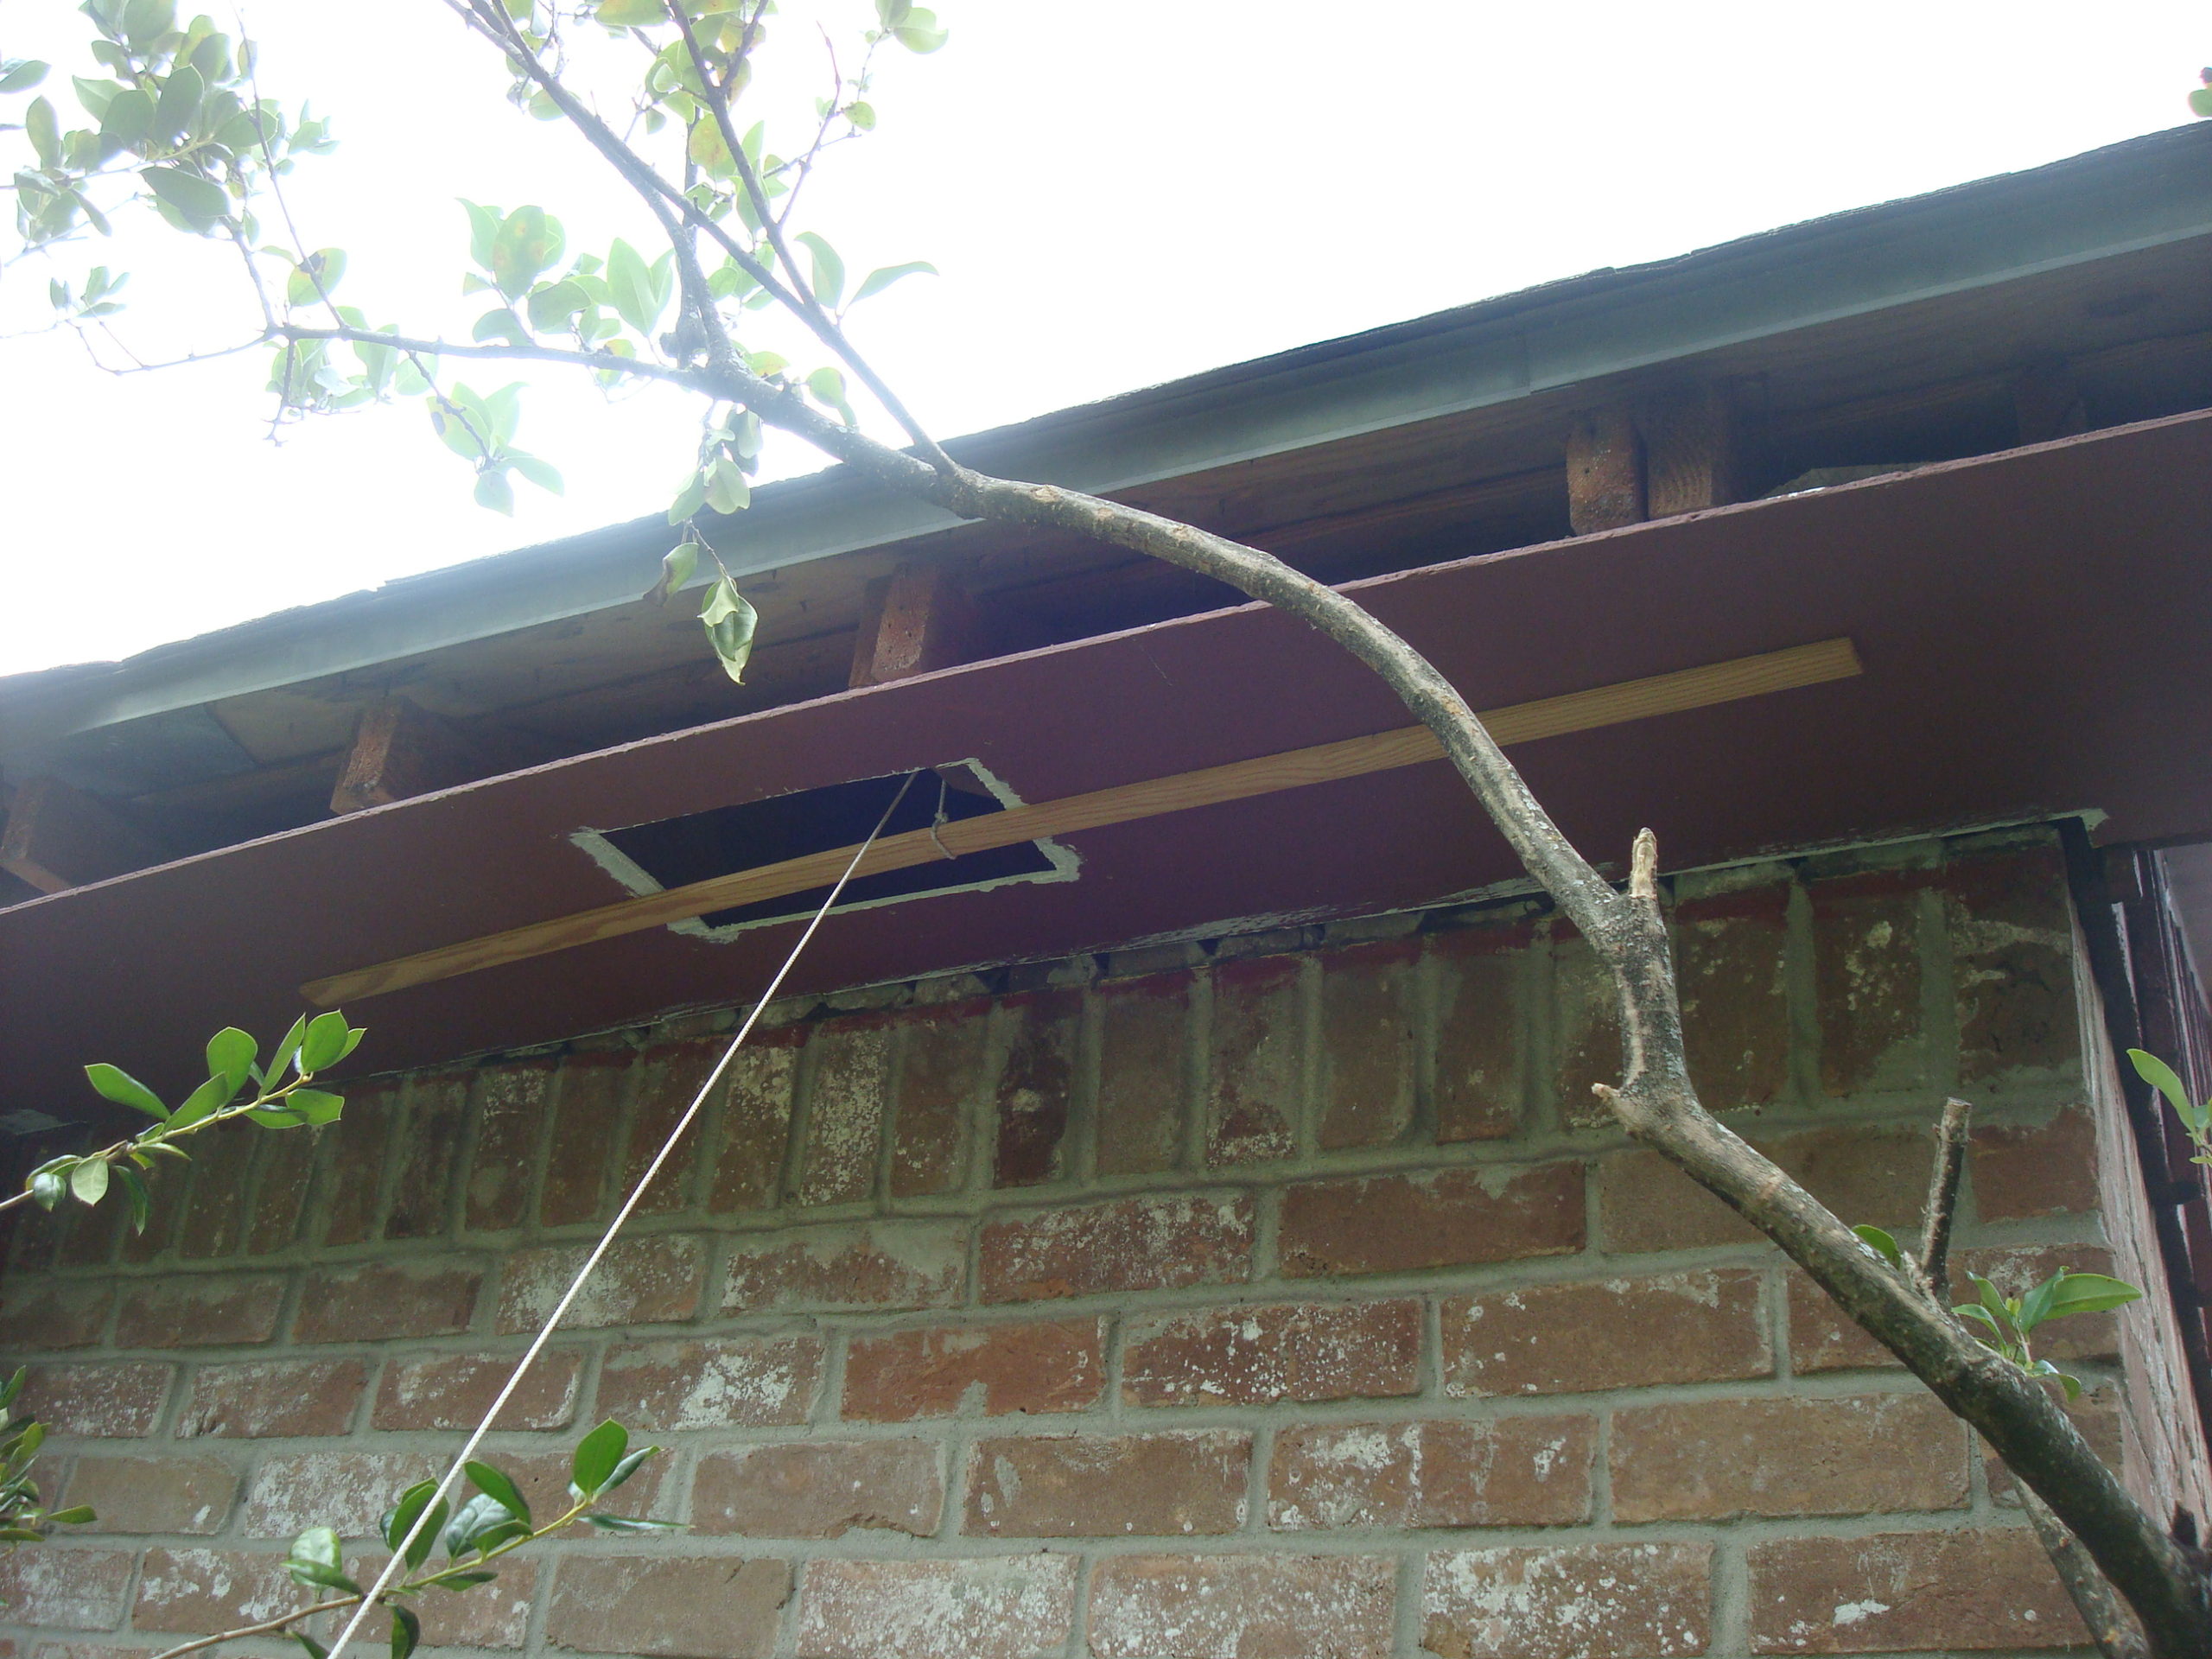 I could then I pull the string downward (making the stick tight against the sheet) and push the sheet up a little with my other hand, causing the sheet to eventually get positioned against the joist boards. I then tied the string to a bush next to the house to keep the sheet up in place. With the sheet close to the position it needed to be in (and about eight feet off the ground), I moved it into the final position and nailed it in place, one nail at a time. I then removed the string (leaving the poor nail to be in the joist board, forever doing nothing). I then put a final coat of paint on all of the boards and later reattached the soffit vent.
 |  |
No water has gotten into the attic since my repairs.
Problem: Clothes washer
Problem #1: Our 10-year old washer began to show error codes (F21, F34, 5d). I found the error code manual on the internet and printed it. Later, of course, I discovered that the manual from the factory was embedded behind the bottom, front panel of the washer. So now I have two manuals. At any rate, it led me to discover that the washer has a filter 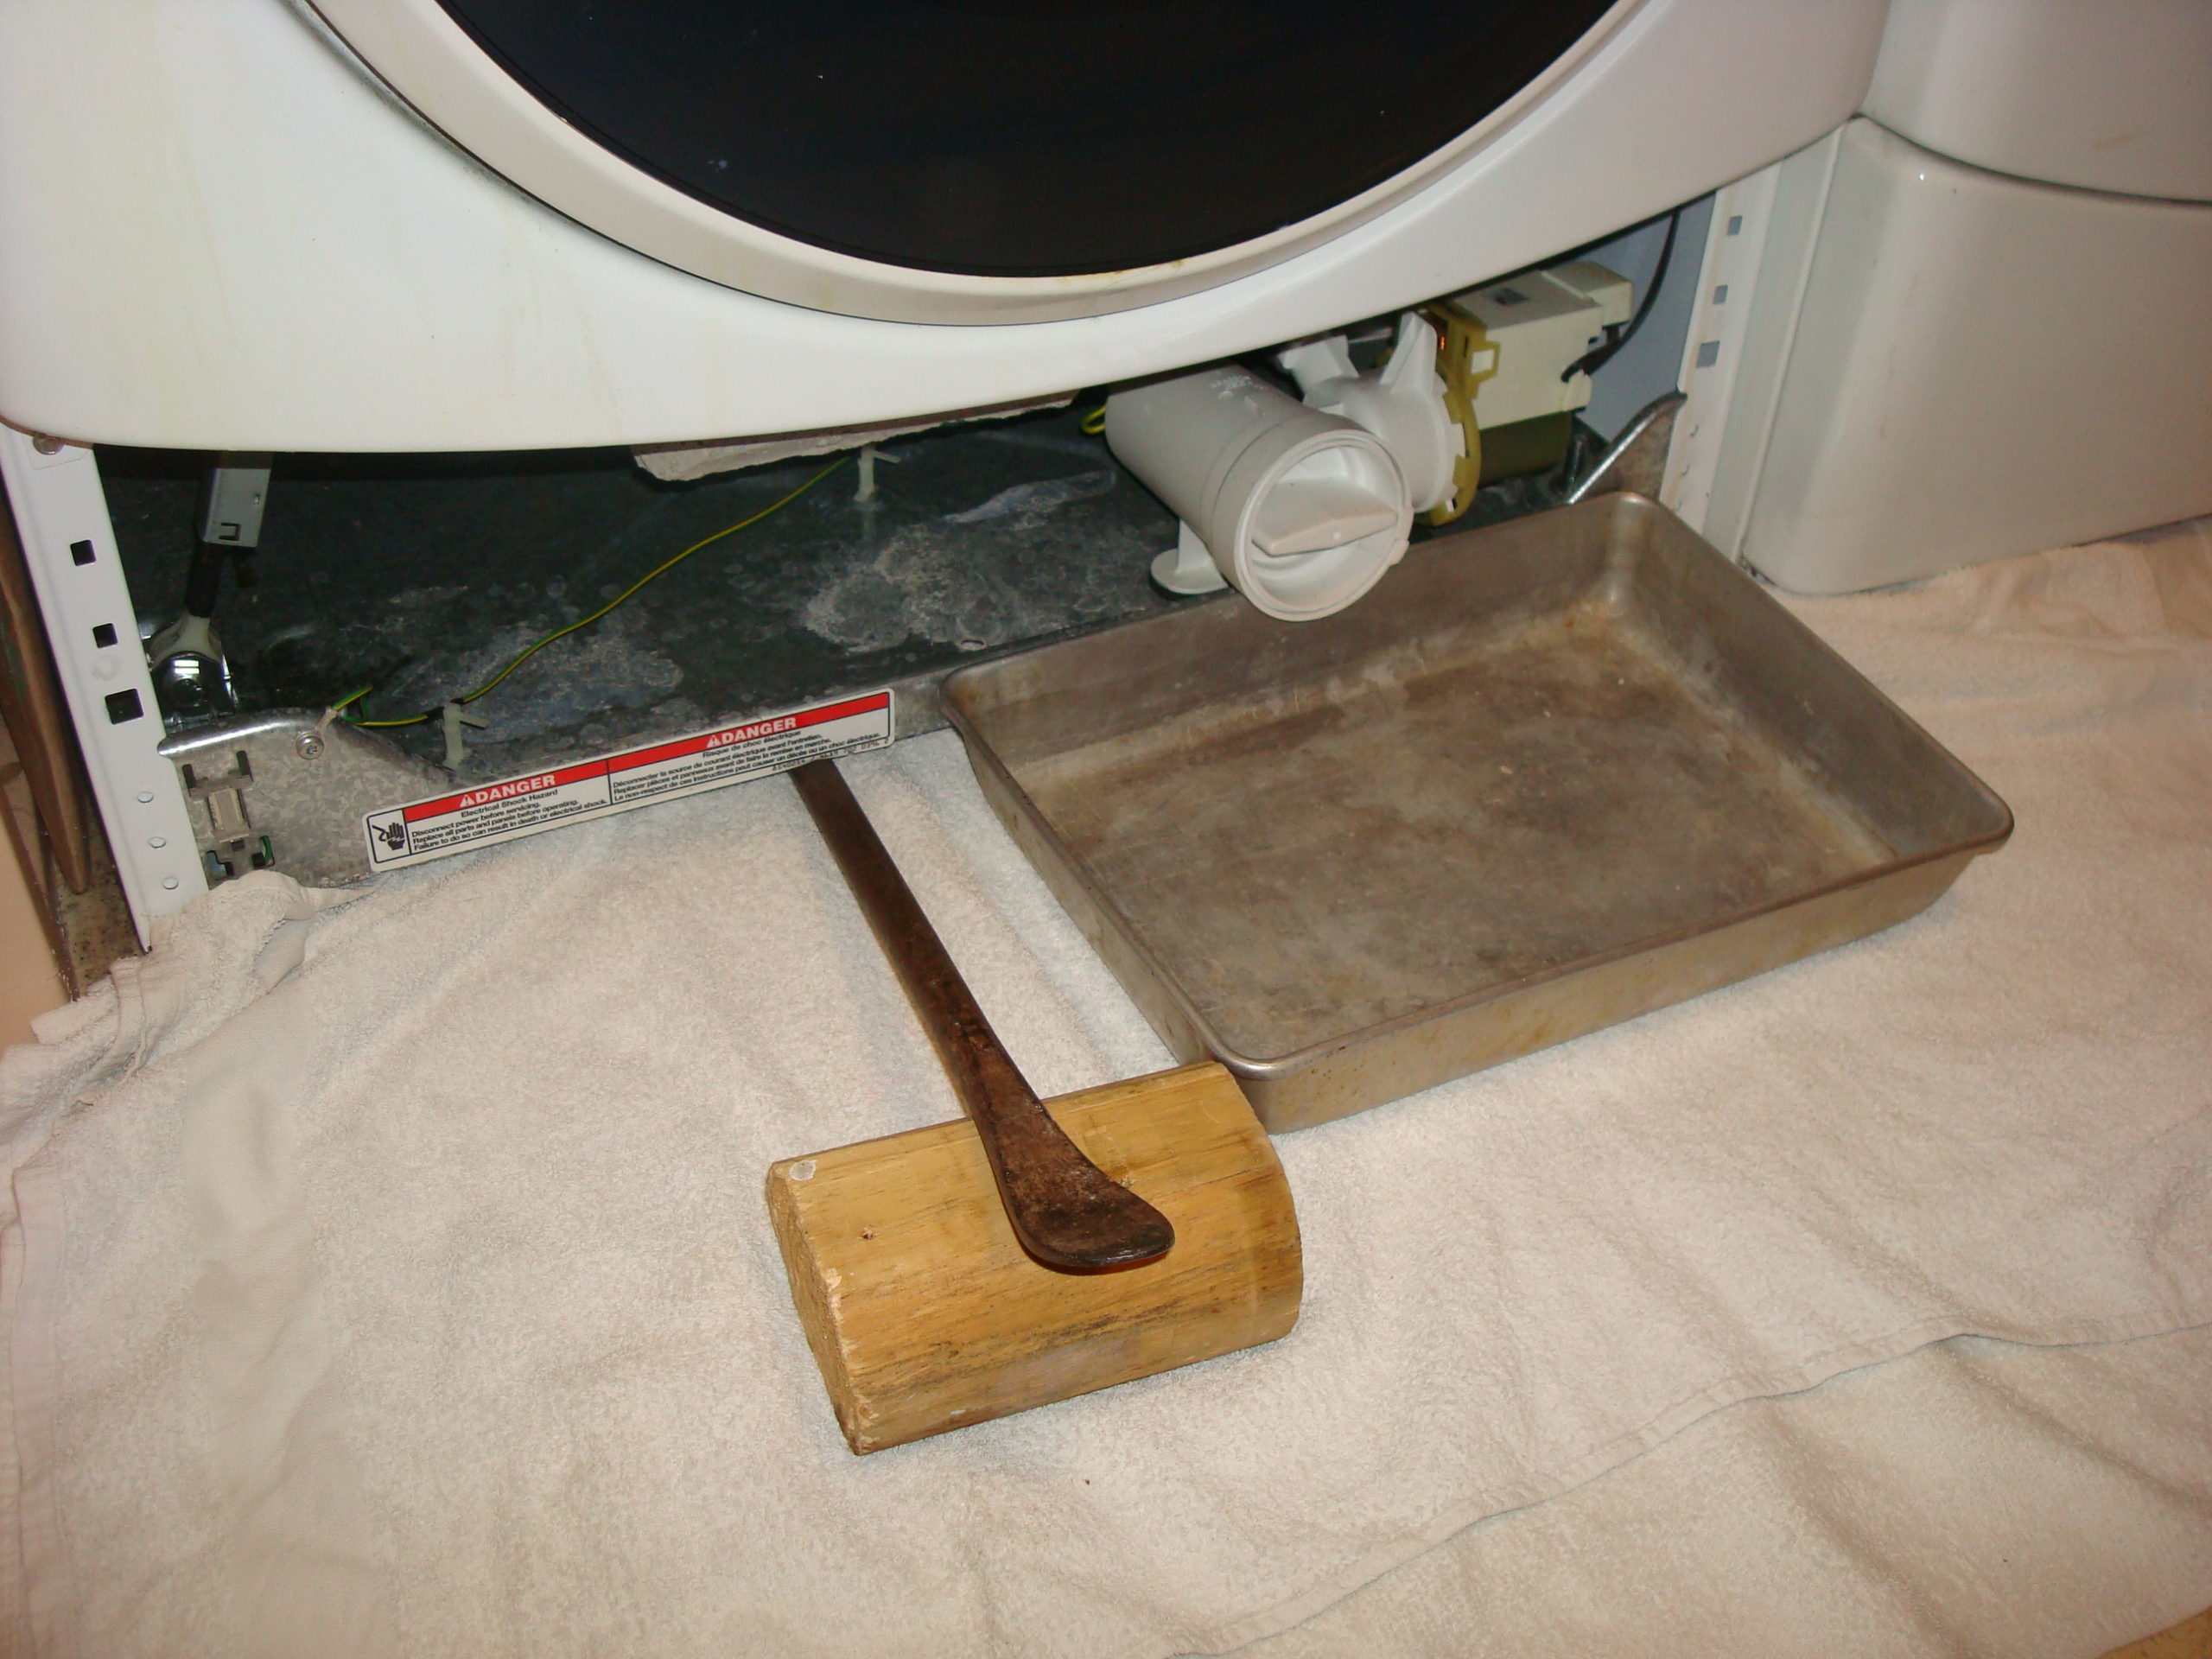 . I unscrewed the cover to the filter (after propping up the front of the washer and placing towels under it) and discovered that the filter cup had some objects in it (a couple of straight pins, a piece of plastic that goes in a man’s shirt collar, a friend’s car key, 52 cents in change, and (this is a mystery) a 10″ x 10″ cloth). The cloth is a mystery because neither my wife nor I recognized it, based on its pattern.
I put the cup back in place and screwed the cover back on. I ran two types of washes (without clothes or soap in the washer). Both washes ran successfully. I checked the filter cup and found it empty.
When I tried the Clean cycle wash, F34 showed. I tried the Delicate cycle but still got F34. Determined to figure out what was the problem, I made two or three more runs, each time getting an error code. Finally, on the next run, no error code showed. I think the washer had some impurities in the line, and those just needed to be flushed out. I then ran the Whitest Whites cycle (without clothes), and that was successful.
About a month later, I checked the cup. It had only a little water in it. No problems after that.
Problem #2: About a year after the first problem with the washer, I noticed that sometimes water would be left in the tub after the cycle ended. This continued on and off for a couple of months. Eventually, a suds-overflow error message appeared. (This turned out to be caused by the underside of a rug coming off during a wash. The small particles affected the pump in a bad way.)
I worked a few hours, testing this and that, to try to determine the cause of the problem. Finally, I had to admit that the pump was the problem. Now, how to fix or replace the pump (and where was the pump located?).
I began my search by watching You Tube videos for the machine’s model number. Very quickly I found two well-made videos that explained the procedure of replacing the pump. (The next day I watched a few more videos just to catch something that I might have missed in the first two. More information is better than almost enough information.)
I went online and found a pump (for around $30) that looked as if it would work (it worked). I ordered it, and two days later it arrived.
Installing the pump was pretty easy (because by then I had removed and reinstalled the original pump a couple of times while seeing how it was put together).
I checked the connections carefully and started a load (no clothes; just water). I got the suds-overflow message. I suctioned out the water in the tub (using my electric drill and a small pump made to fit on a drill 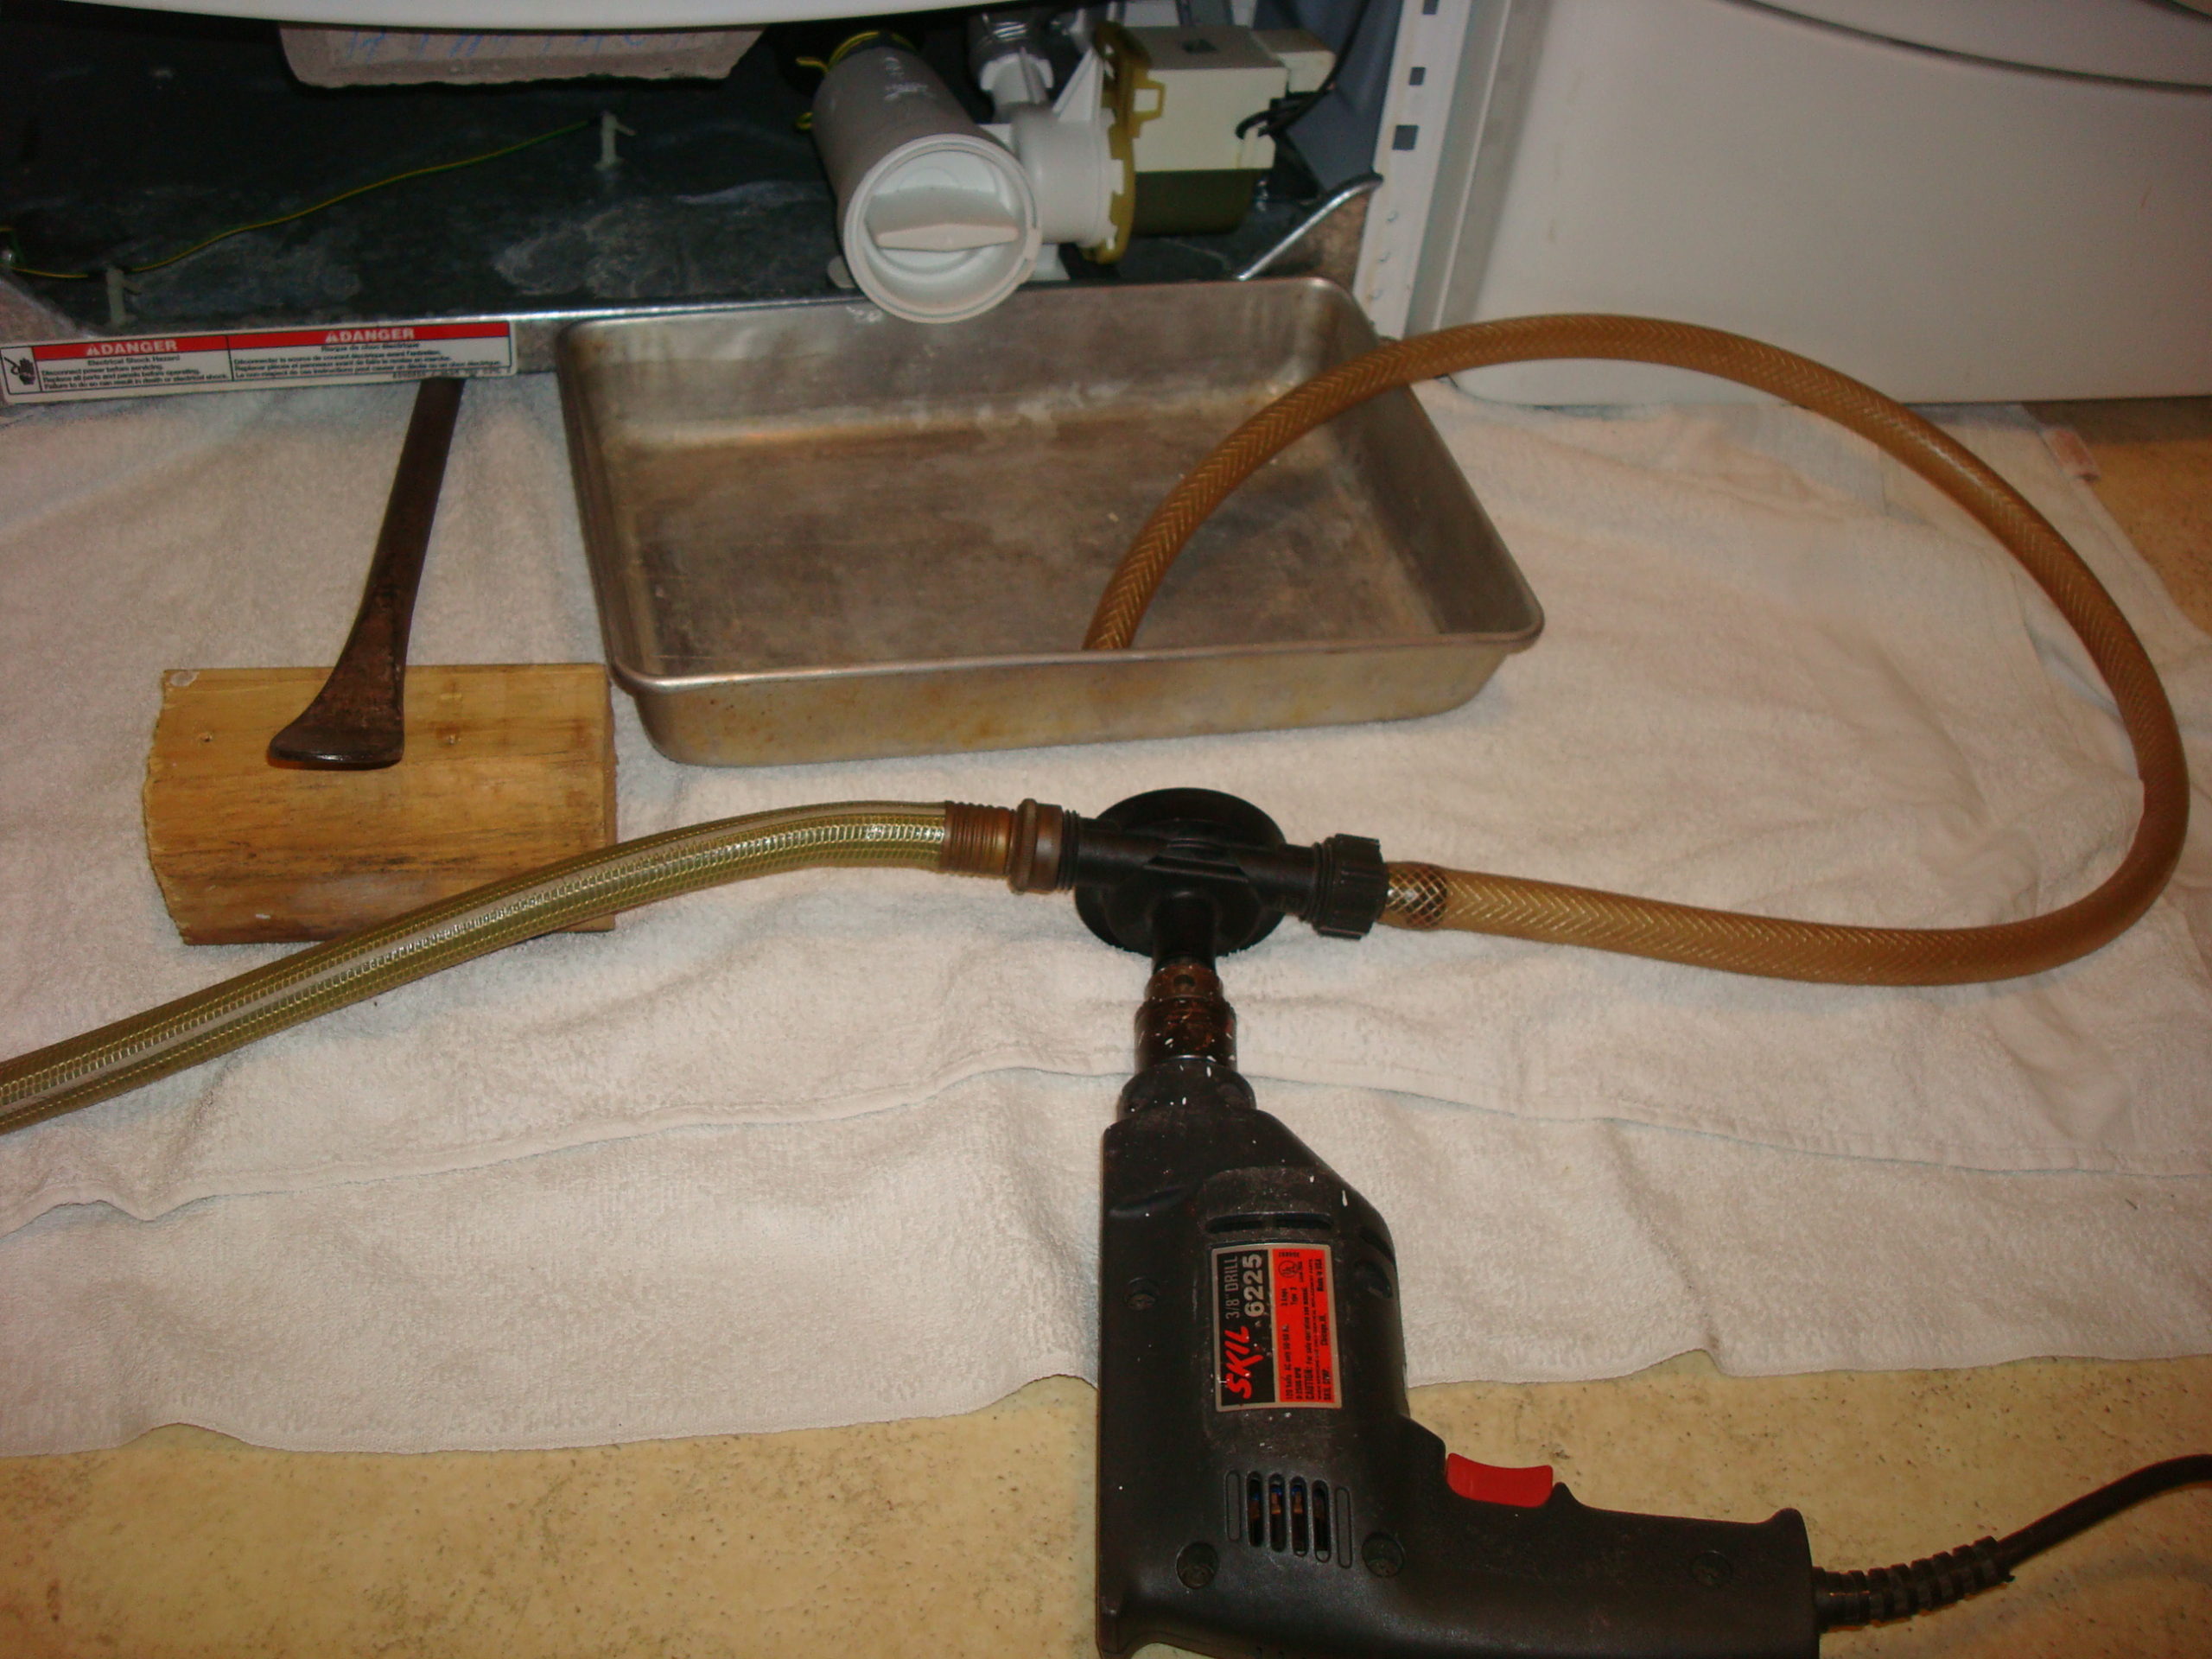 ) and tried another load. The same message appeared, and I had to remove the water manually again. I continued with this approach a few more times until I could hear water actually going into the drain hole in the wall (although, in a small trickle). Encouraged, I continued.
Finally a load ran to completion without any error code and leaving no water in the tub! I was so happy!
I then ran a couple of more loads just to try the pump some more times and to flush out any remaining particles of the rug.
I then ran a load of actual clothes – all thirteen towels I had used in my work on the problem. During the wash, a huge amount of soap suds showed thru the door window. But the load finished (even with a second rinse), and the towels were clean.
After that, I ran a couple of loads of regular clothes and shirts.
I then announced to my wife that the washer was back to normal; back to working condition.
All in all, with my investigating and searching and actual work, this project took me about ten hours. I’m not ashamed of the length of time it took me because I did not have any experience with washer pumps before I tried to fix this problem. I tried, and trying is what I am proud of.
Problem: Lawn mower pull cord
Problem #1: I was trimming my hedges one day, using my lawn mower as a guide for the distance from the fence to the point where I would cut the branches. Normally, I used a long stick with a piece of tape to mark the desired distance. I tried the mower because the handle bars were just about the right distance from the front of the mower. I would push the mower to the fence and then cut at about the position of the handlebars.
Well, that’s good in theory. But in my reality, I didn’t pay enough attention and accidentally let the electric trimmer drop down to the pull cord. The trimmer cut the cord so effortlessly that I didn’t even notice until a few minutes later when I needed to move the mower. When I looked at the mower, I thought (Something is different. Something is missing.). Then I realized, the cord is gone. It all hit me with a slam. “No mower. I have to cut the grass in a few days. Must buy a new mower.” The mower is twelve years old, but it still ran good. I needed time to think. I finished the hedges (at least I could do that right) and put everything away, showered, and later ate supper. The next day I looked at the mower, hoping yesterday had been a bad dream. No such luck.
Once again, I thought I might as well try to fix this problem. In the worse case, I will go to Home Depot or Lowe’s and buy a new mower. I went on the internet and found information about my mower per the model number. I then found YouTube videos about replacing a broken pull cord. [You can find most anything on YouTube.] I watched a few videos two or three times and then went to Home Depot to get a new cord. Found one. I then began to disassemble the cover and other parts of the mower. I took many pictures (here are a few pictures) in each step of the process. I discovered that the inside cover was riveted to the base. Great!, I thought. I had bought one of the few mowers that had a special way of covering the cord parts. I thought about drilling thru the rivets, but that would not work. I thought about cutting some of the metal, but that also would not work. Not knowing what else to do, I unscrewed a few more screws on the low side. Surprisingly (to me), I could then remove that piece and expose the part that holds the cord and its components. NO NEED TO DRILL OR CUT ANYTHING, CARL. By then I had to review the videos again and continue the work.
To make a long story a little shorter, I was able to reassemble all of the parts (spilling only a little gasoline in the process). I adjusted the length of the cord (by tying a knot in the string) the best that I could (later “moving” the knot), checked the oil level, inserted the spark plug, primed it three times and pulled the cord. The engine started!
The work took me about five hours. I have run the mower several times since then, and the cord is still intact. Another case where perseverance pays off.
Problem #2: About a year after the first problem with the pull cord, I managed to cut the cord again. (I guess I just have a special “hidden talent” for such things.) This time, I was mowing too fast and let the cord get entangled in the lower branches of the bushes and then (somehow) get under the mower frame. CUT! “I AM FREE!”
I was very irritated with the situation because I was in the middle of mowing the grass, and I remembered that it took me a long time to fix the problem the first time.
But I had to replace the cord, and so I started removing lawn mower parts after a few minutes.
After I got down to a certain part of the disassembly process, I decided to watch some You Tube videos to refresh my memory. Luckily, the second video that I found described the exact problem I was having. And, this-is-the-best-part, the guy in the video showed an easy way to attach the cord after winding the inner coil. (Naturally, the first time I worked on the problem, I did it the hard way.) With the new information at hand, the job went quickly and easily. I completed reassembling just shortly after dark. (I was also lucky in that I had the right size cord on hand from another, recent project.)
The next morning I attached the gas line and the spark plug, I added some gas and primed it three times, and then I took the plunge and pulled the cord. After a couple of tries, the mower started.
This time, with the new knowledge, the job took less than two hours (counting watching the videos).
Next time (and I know there will be a next time), I should be able to be up and running in under an hour.
Problem: Bathroom mirror
This was not a problem where something was broken; it was just a task. My wife wanted the two mirrored medicine cabinets in the hall bathroom replaced with a single, large mirror. We went to several stores but could not find the right size and style of mirror until we saw one at Home Depot. It was 48″ wide, and the wall in the bathroom for the mirror was 48 1/2″ wide. Close fit! I cautiously began removing screws from inside the cabinets. (The first cabinet almost fell on me when I was removing the last screw.) After removing both cabinets, I measured the distance from the walls to various places where the 2″ x 4″ vertical boards were. I figured I might need that information for the support for the new mirror.
I practiced on a board in the garage to set the right distance from the bottom support to the top support.
My wife told me where she wanted the mirror to be placed on the wall, and I marked one bottom point. I used my level to mark the other two bottom support points. I drilled small pilot holes and put the inserts in them. Then I carefully marked one of the top points. I was ready to try to attach the mirror to the wall. With my wife’s help, I set the mirror into the three bottom supports. The mirror lined up perfectly with the supports. The top support seemed just a little too low at first, but when I rotated it a bit, the mirror “popped” into place. I positioned the support arm over the mirror, and there was no distance between the support and the mirror. That, luckily, was a perfect fit. I added the remaining two top supports and screwed everything tight in place.
We now enjoy having a large mirror in that bathroom.
Problem: Bathtub drains
My wife wanted to “redo” the bathrooms, including the fixtures in the bathtubs. We searched the stores for the right color and style of handles and faucets and finally found a box set that would do. [It later turned out that we did not like that style, and so now we are continuing our search.]
I decided that the first step I needed to take would be to remove the drain plug and the handle that controls the water leaving the tub. 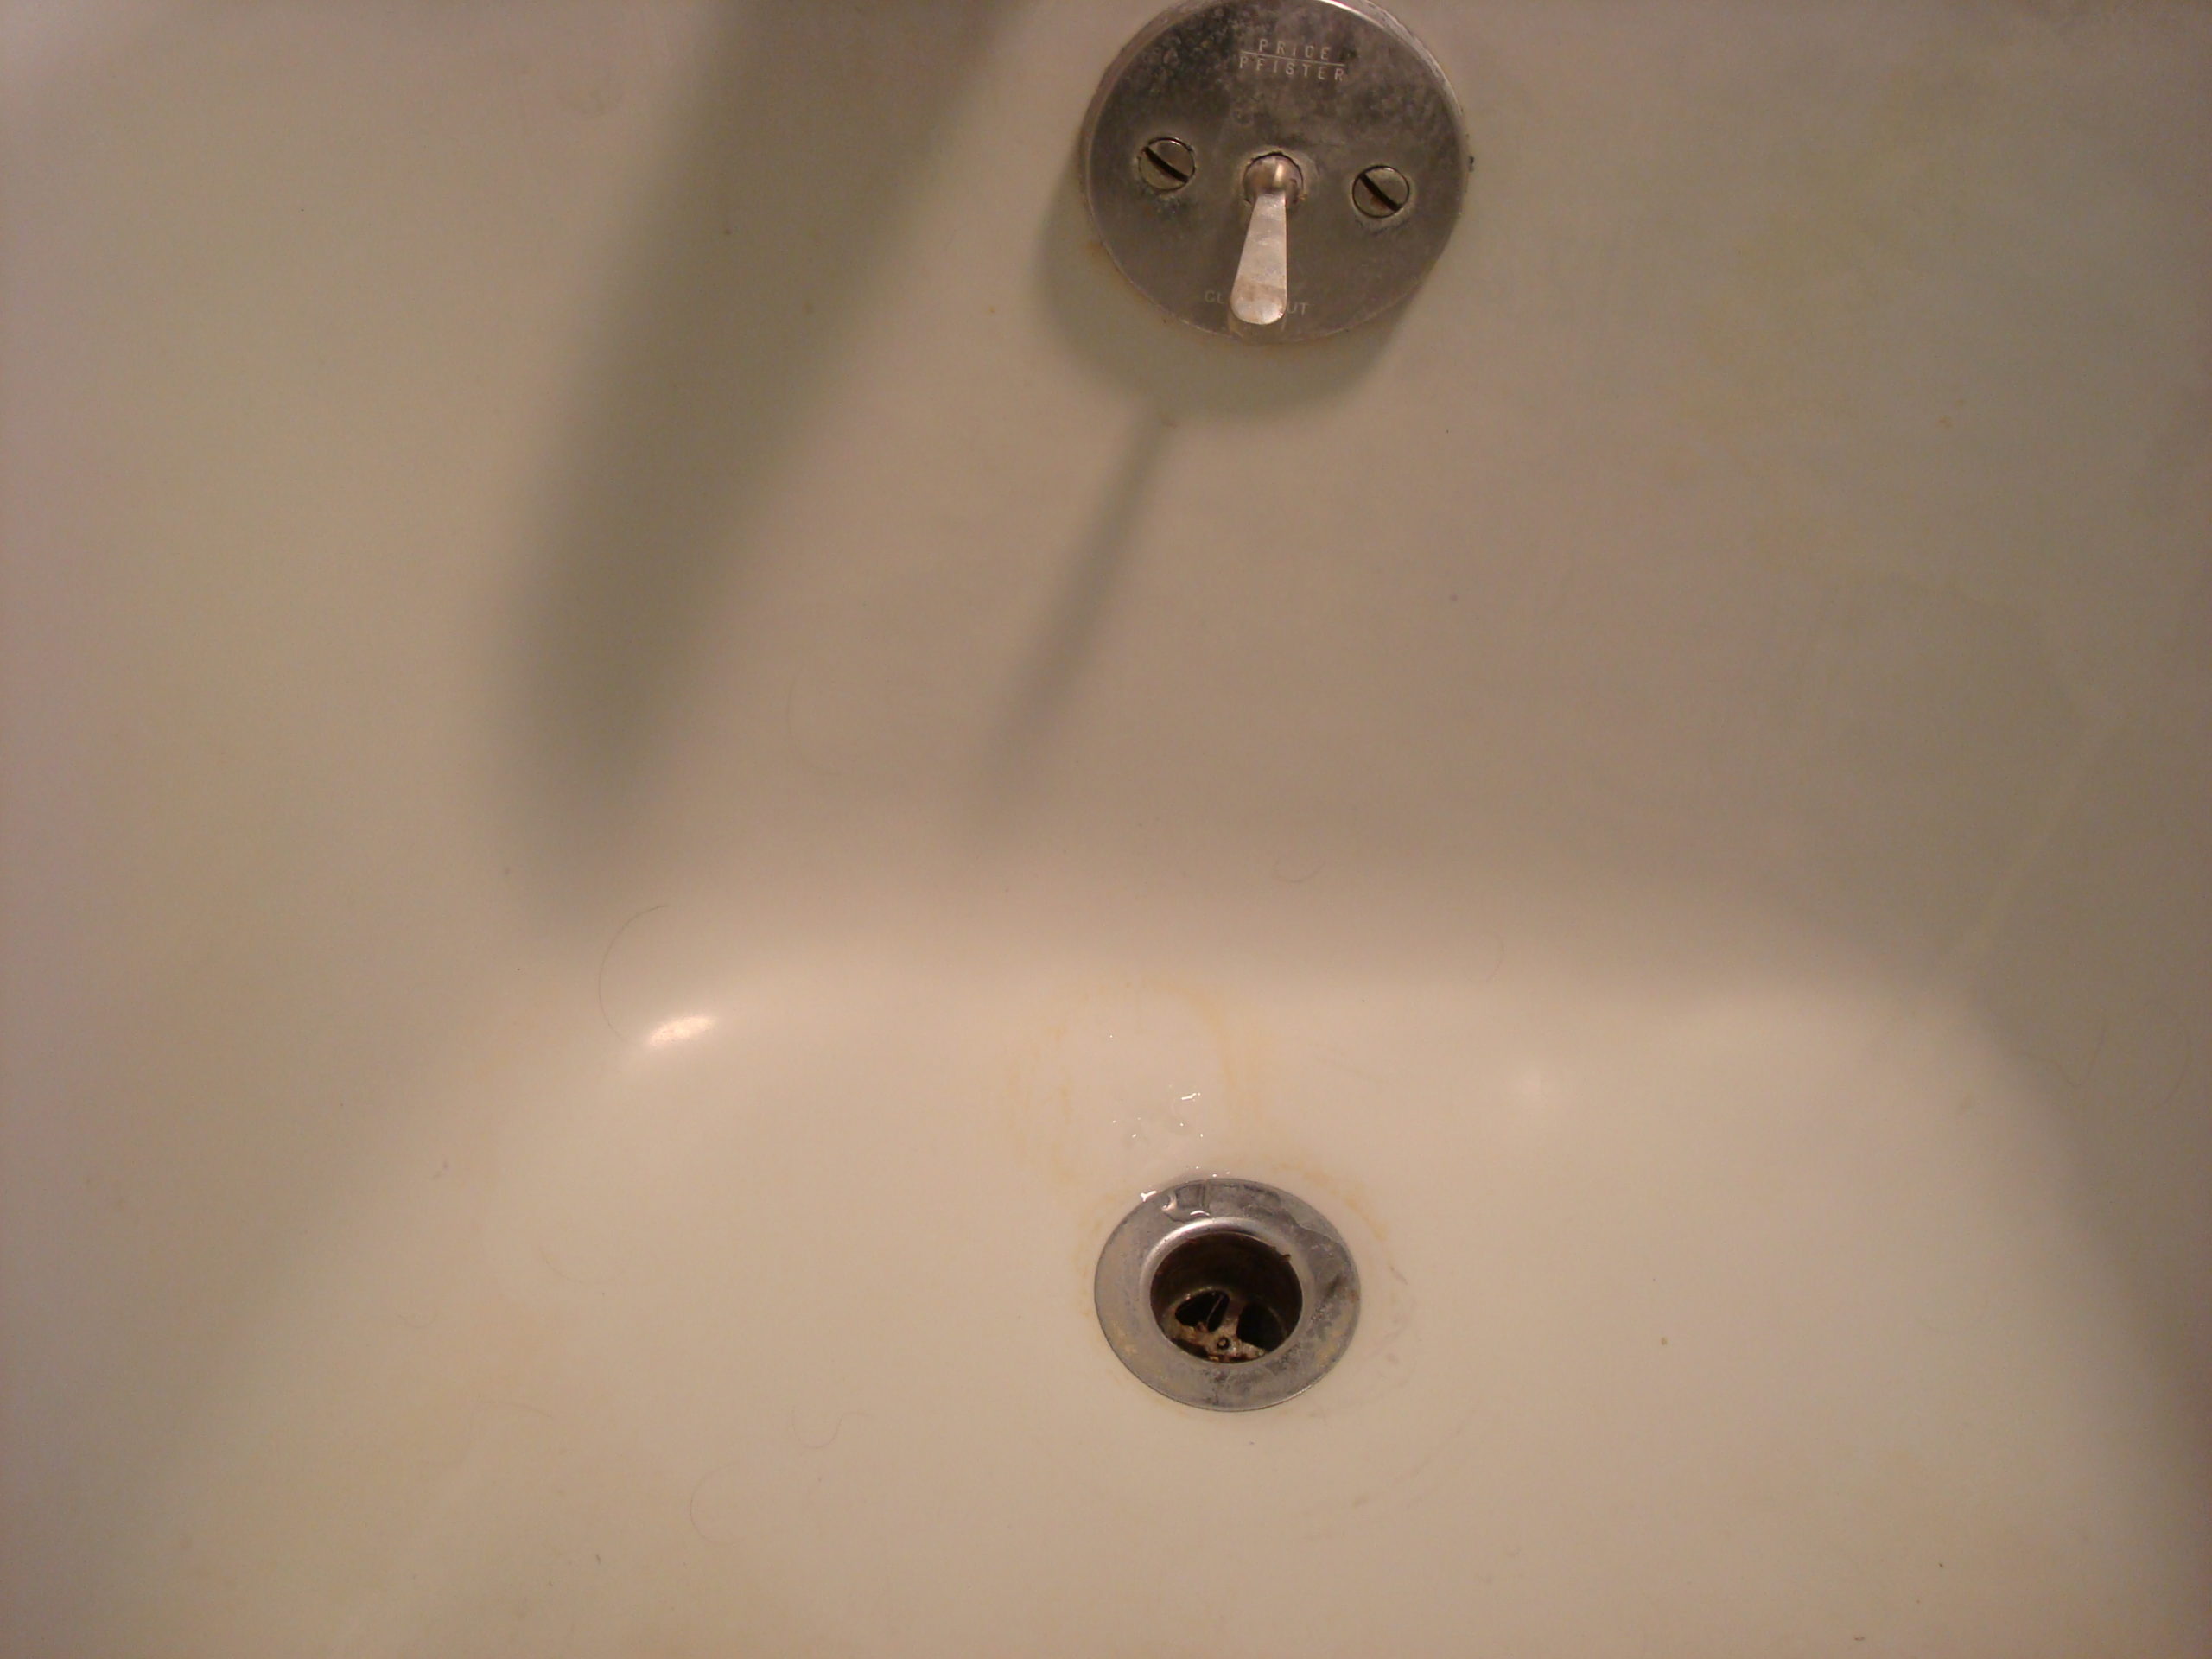 The new drain plug that I bought is one that stops the water at the drain hole, and so the new, upper part would just be just a decorative piece. [Shortly before that time, I did not know that the drain hole piece actually screws into a piece of metal immediately below the bathtub hole.]
So, how to remove it?
Once again, YouTube to the rescue. After watching several videos, I was ready to start my attempt. Immediately, I discovered that I did not have the right tool to remove the drain. I did not want to buy a special tool (one-time use), and I remembered seeing something on one of the videos, and so I decided to make my own tool. [Yes, I can be pretty frugal about some things, but I just hate to waste anything. And it’s fun to explore and create.] The “tool” I wound up making consisted of a large crescent wrench with a 1 1/4″ x 1/2″ bolt and corresponding nut. 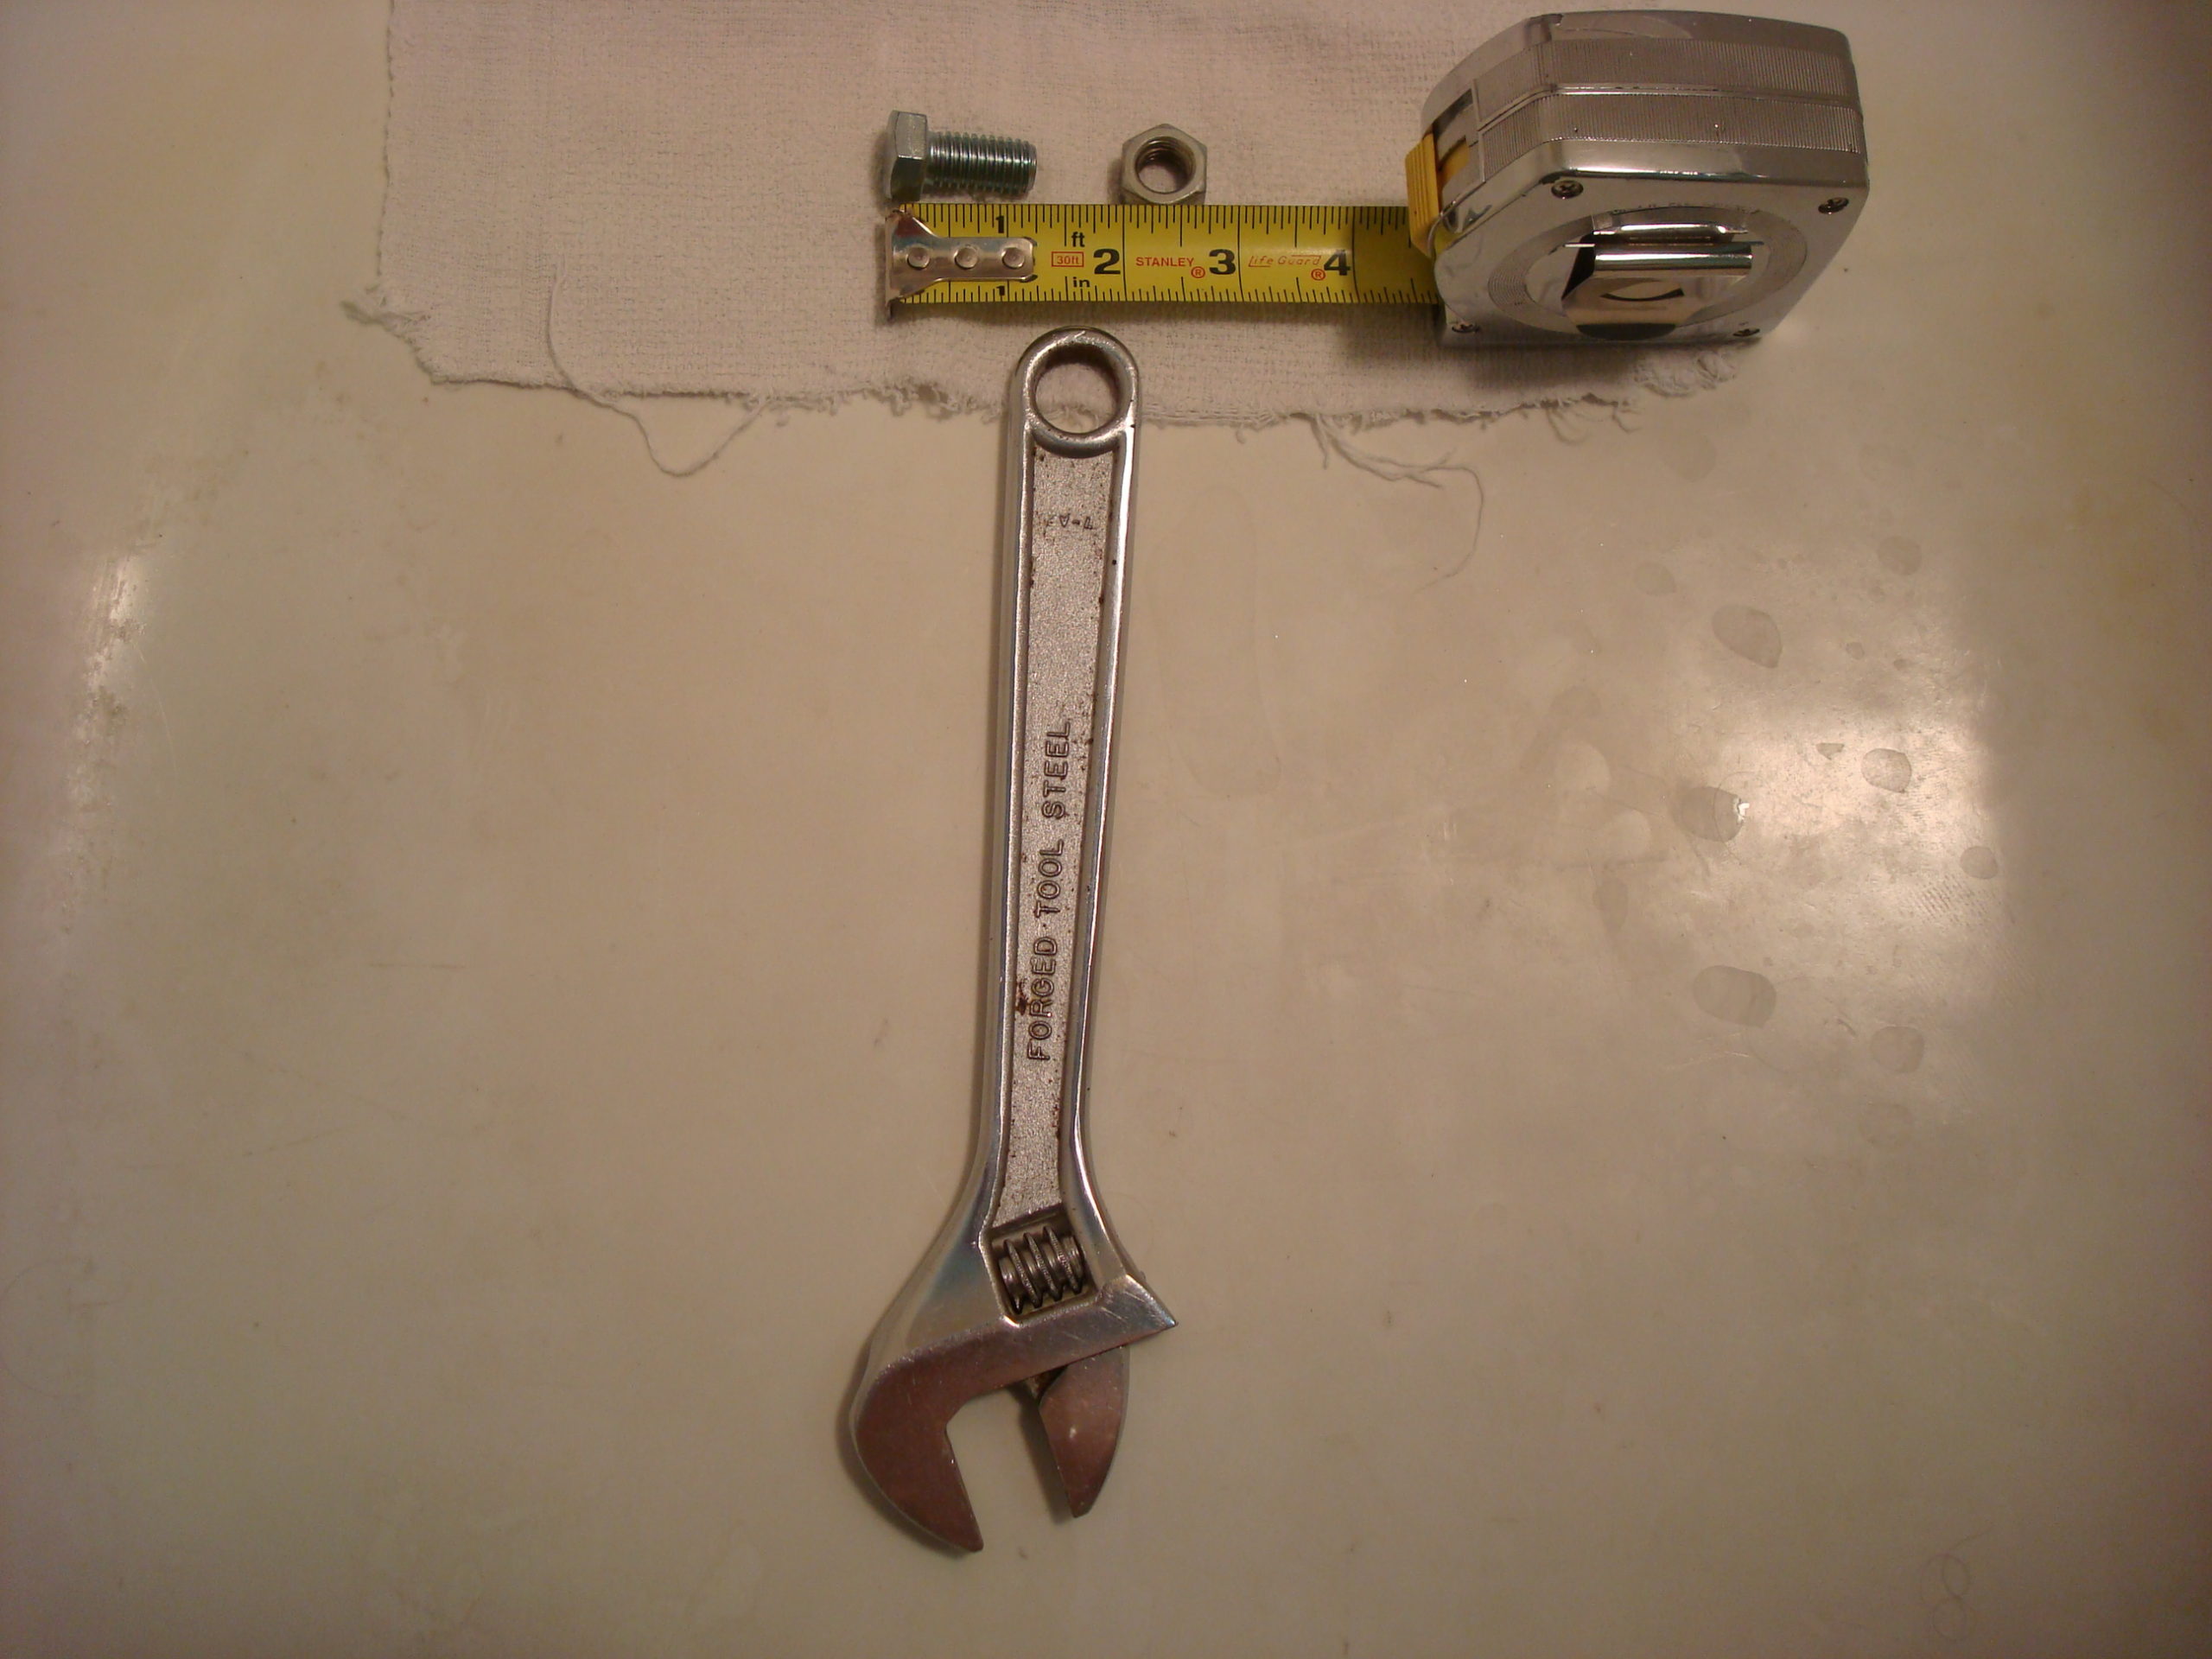 The drain hole was 1 1/2″ wide, and the bolt and nut had to fit inside it. I put the bolt thru the hole in the back end of the crescent wrench and then put the nut on the bolt. The purpose of using such a large bolt was to prevent the bolt from coming off the wrench and possibly falling into the drain hole. The length of the bolt then was almost 1 1/2″. I put the wrench into the hole (using my rubber hammer to tap the bolt in)
 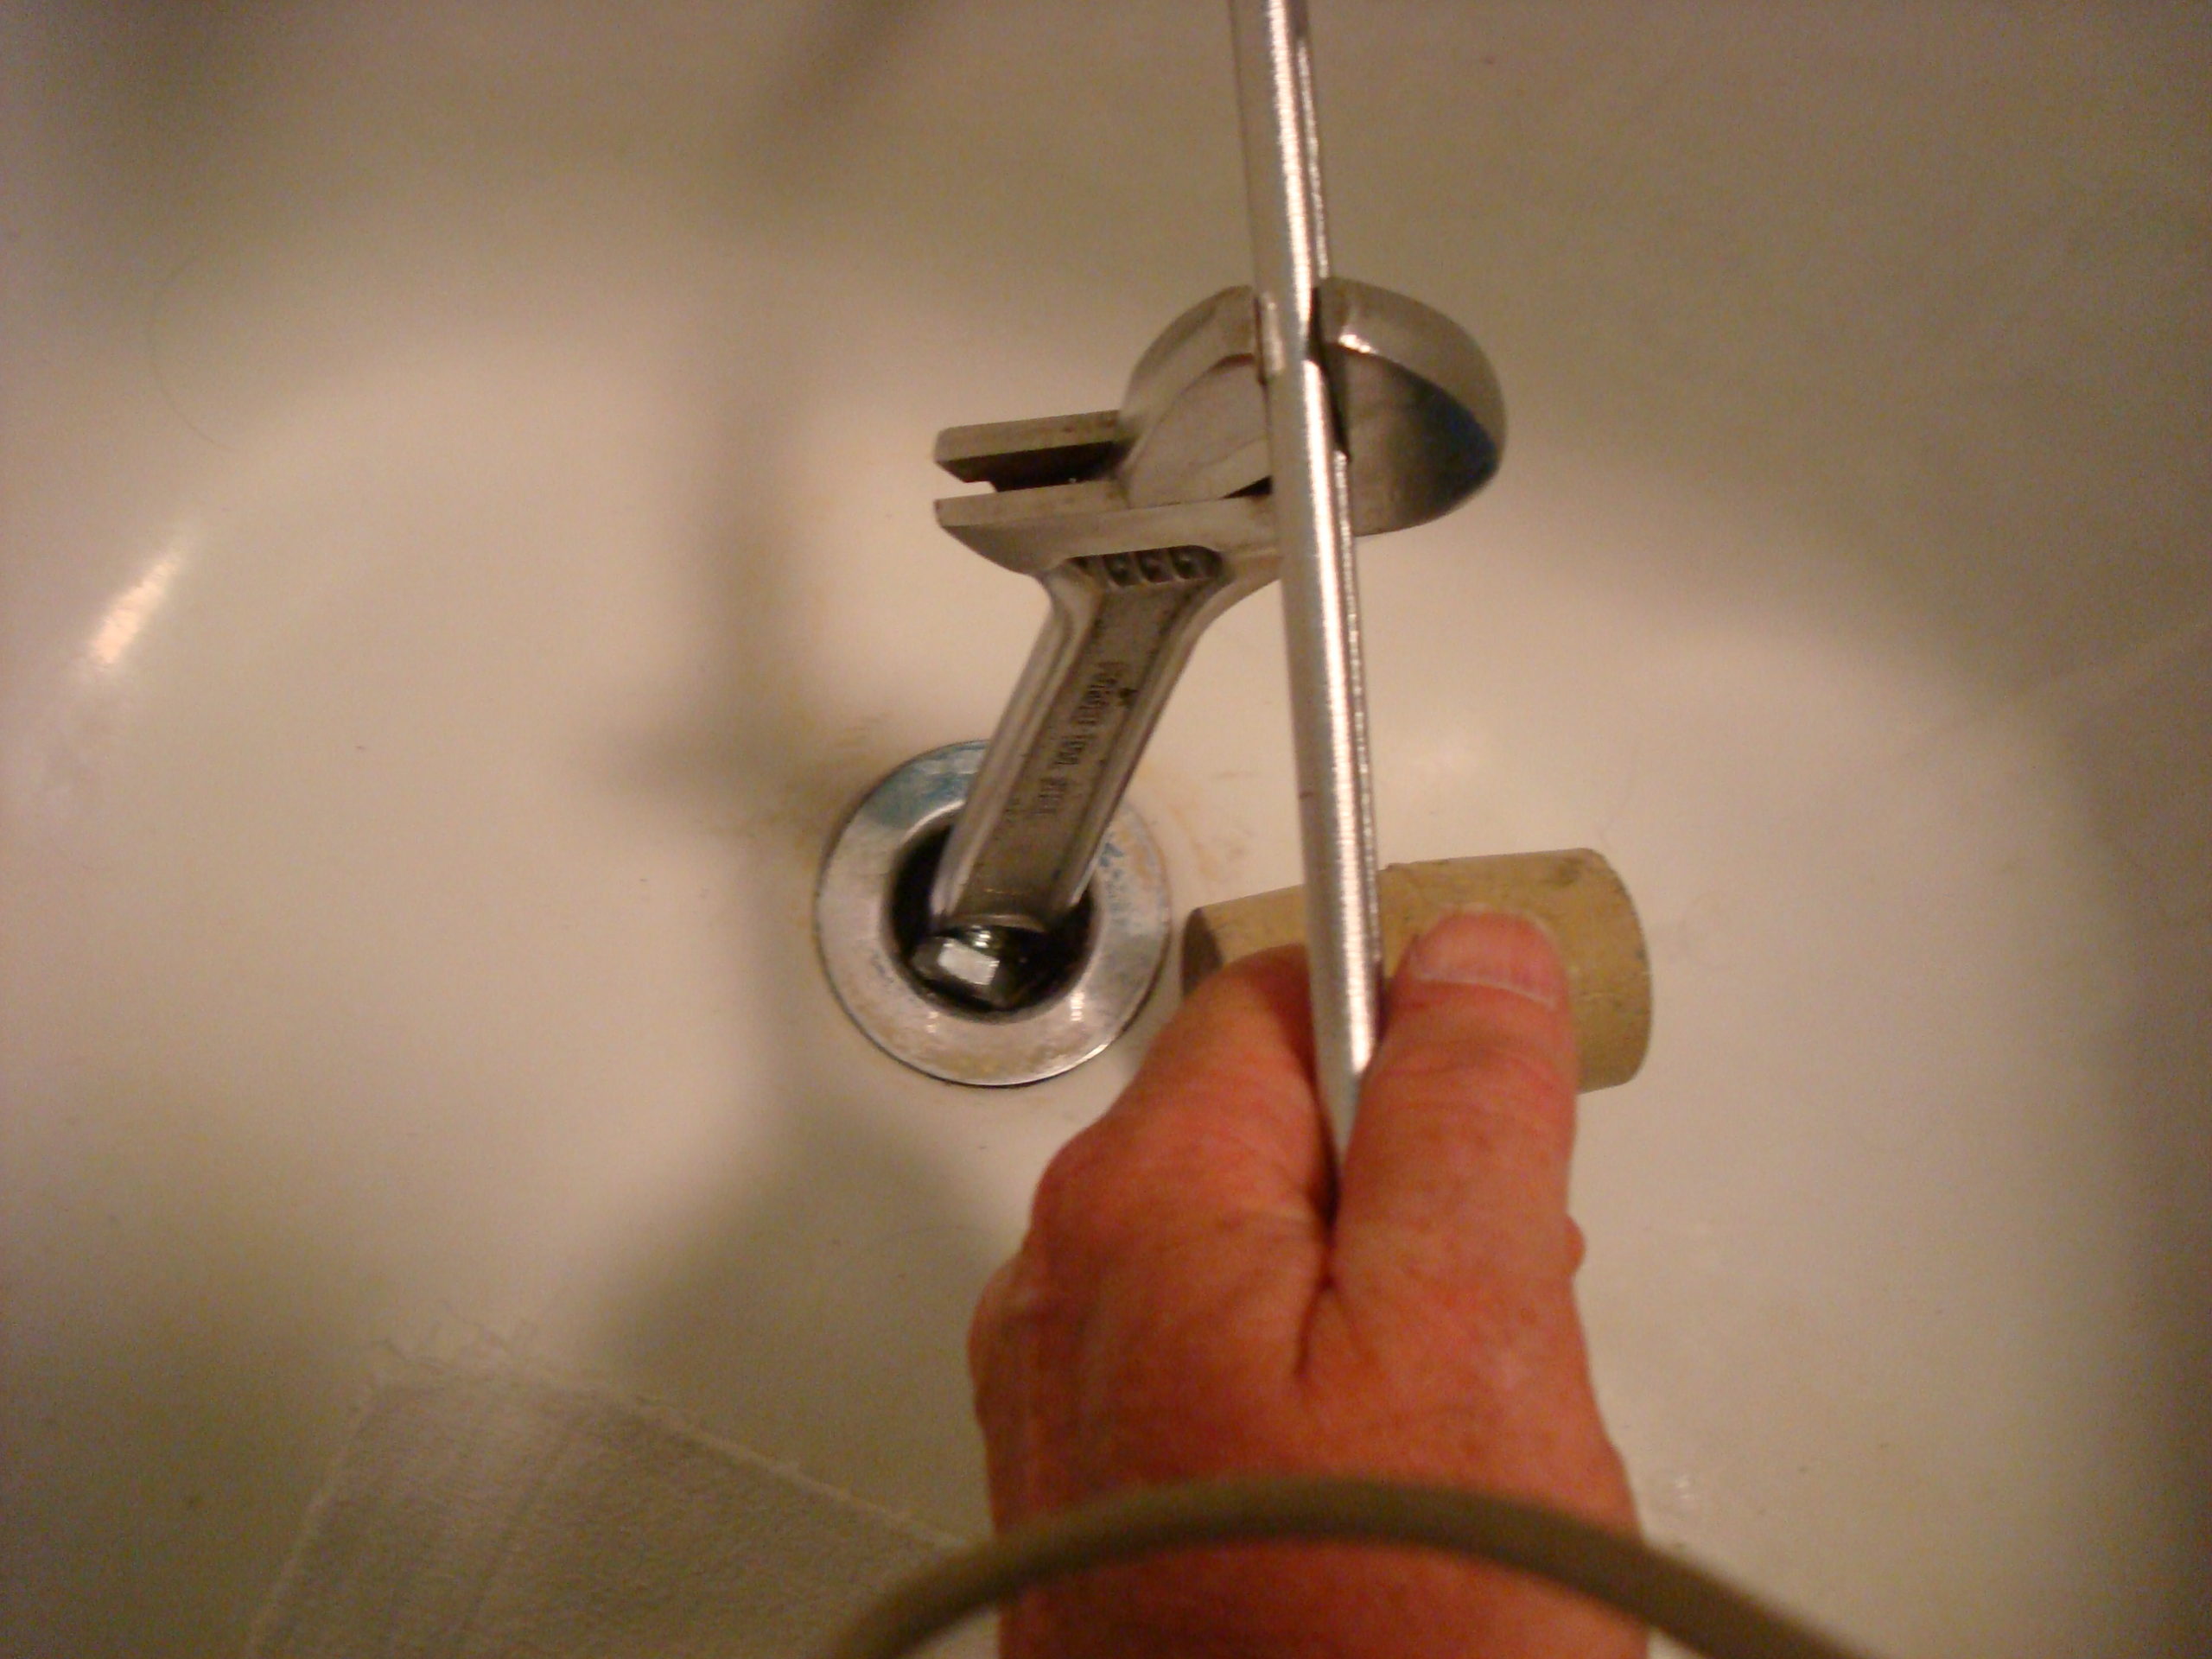 , checked for tightness, removed the wrench, increased the length of the bolt by unscrewing the nut a little, and reinserted the wrench. I repeated this process until I had a lot of trouble putting the bolt into the hole. I would then turn the wrench (with the help of a metal bar). On the first two or three times, only the wrench would turn. Eventually, after unscrewing the bolt a tiny amount, the bolt made good contact with the inside of the hole, and the drain began to turn. I was then able to unscrew the drain and remove it.
 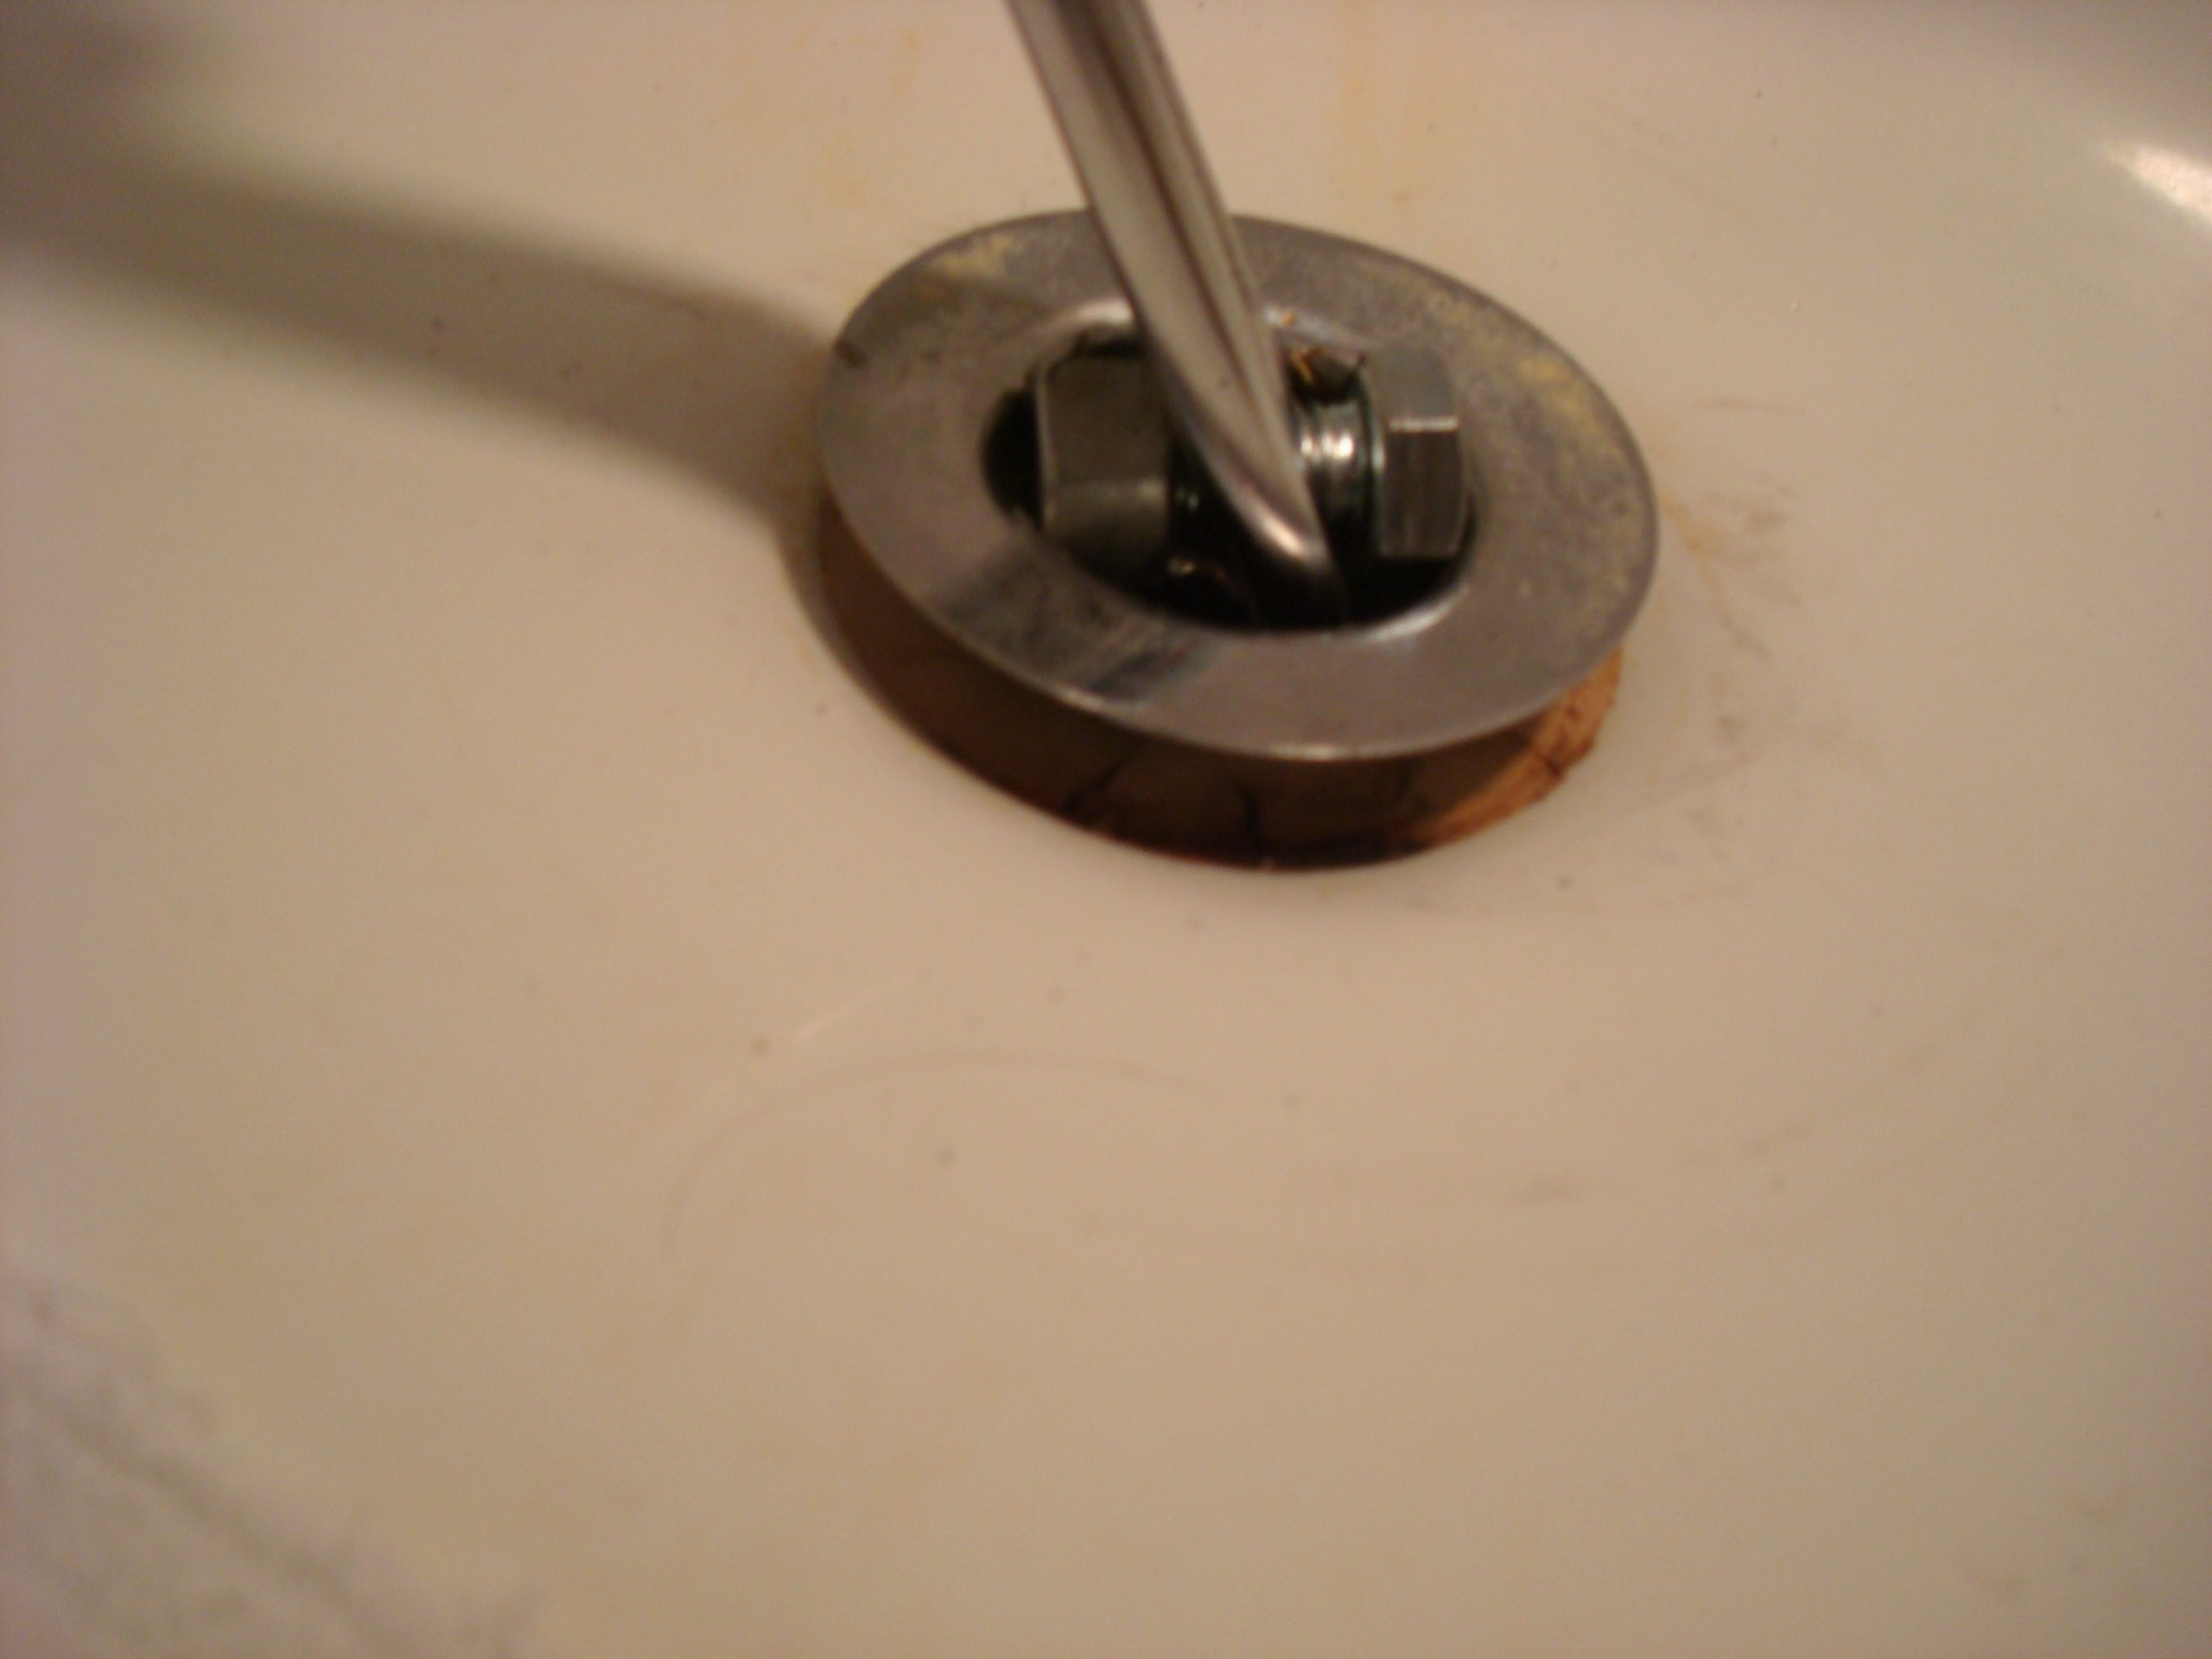 Success with a primitive tool!
[Just a side note: When I worked at removing the drain in another bathroom, I discovered that the metal cross hairs were broken (due to age). So even if I had owned a tool to fit inside the drain hole, it would not have been able to connect with anything to let me turn the drain. So in that case, my primitive tool was my only choice.]
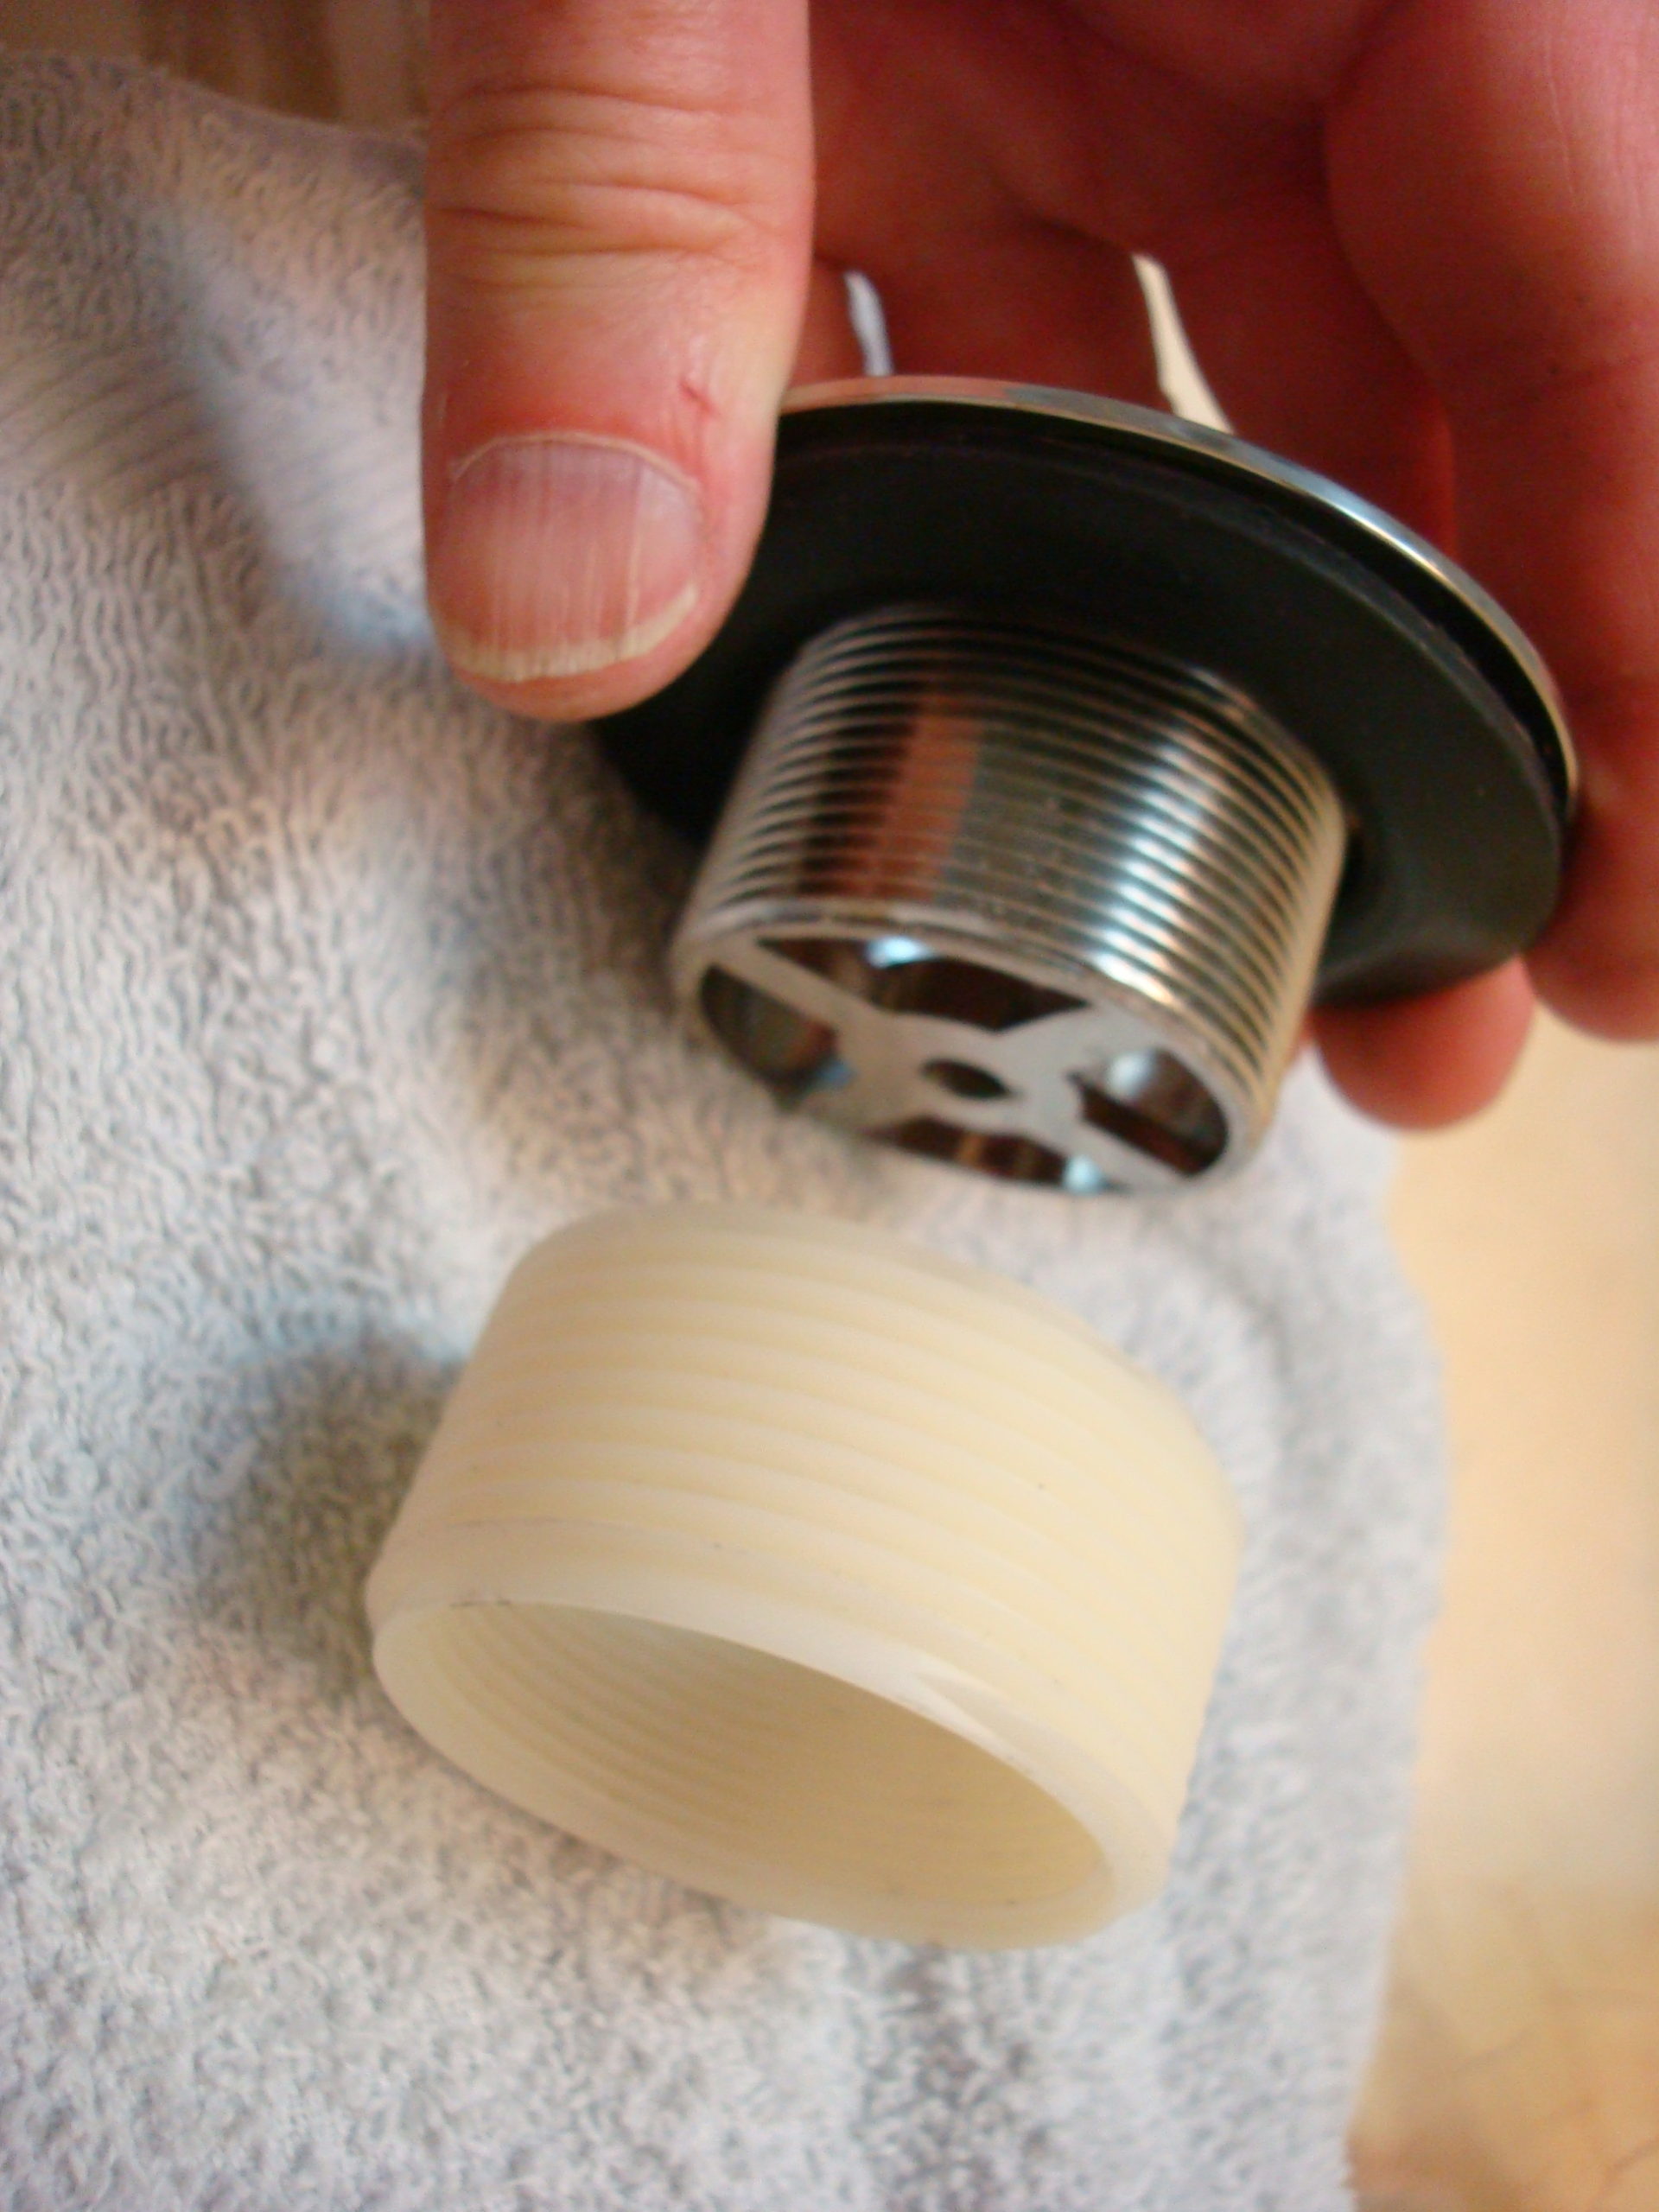
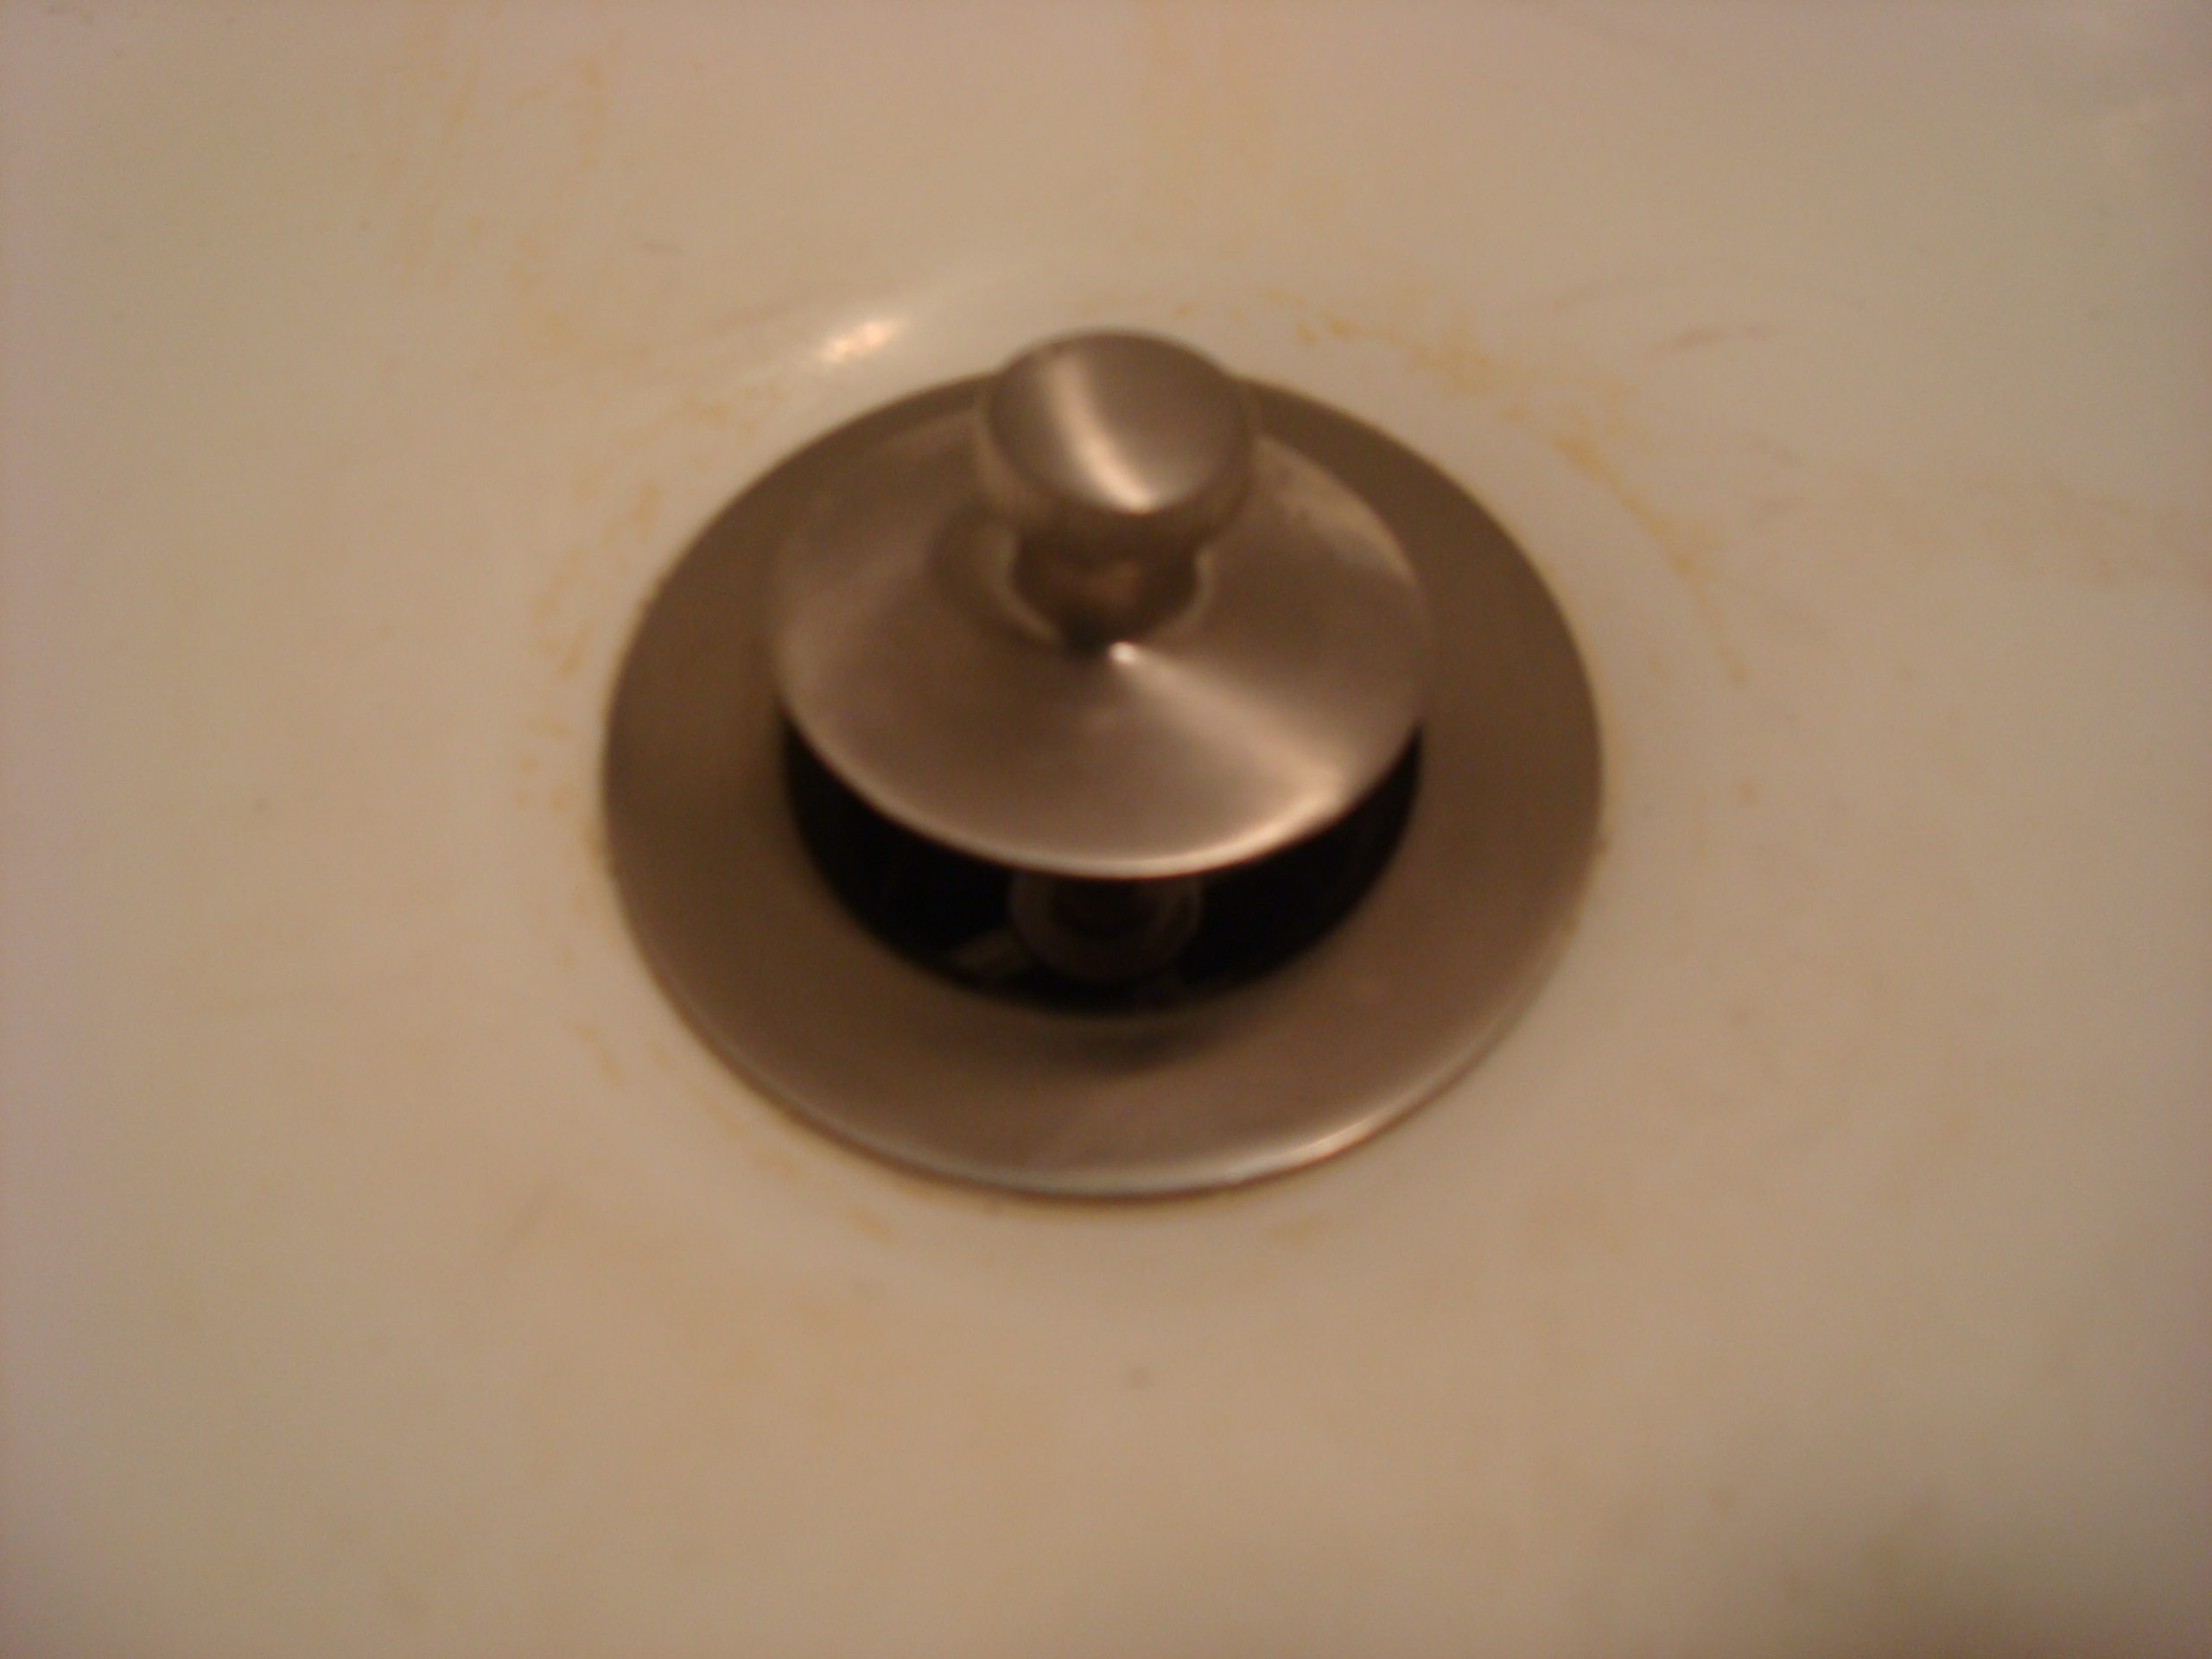
I cleaned the hole, prepared the new drain hole area with plumbers putty, screwed the new drain in place, and made it all tight.
 |  |
Then I worked on the old handle. That part was relatively easy. I removed the old piece (the visible front part and these three inside parts: two short lengths of wire and the bottom heavy piece 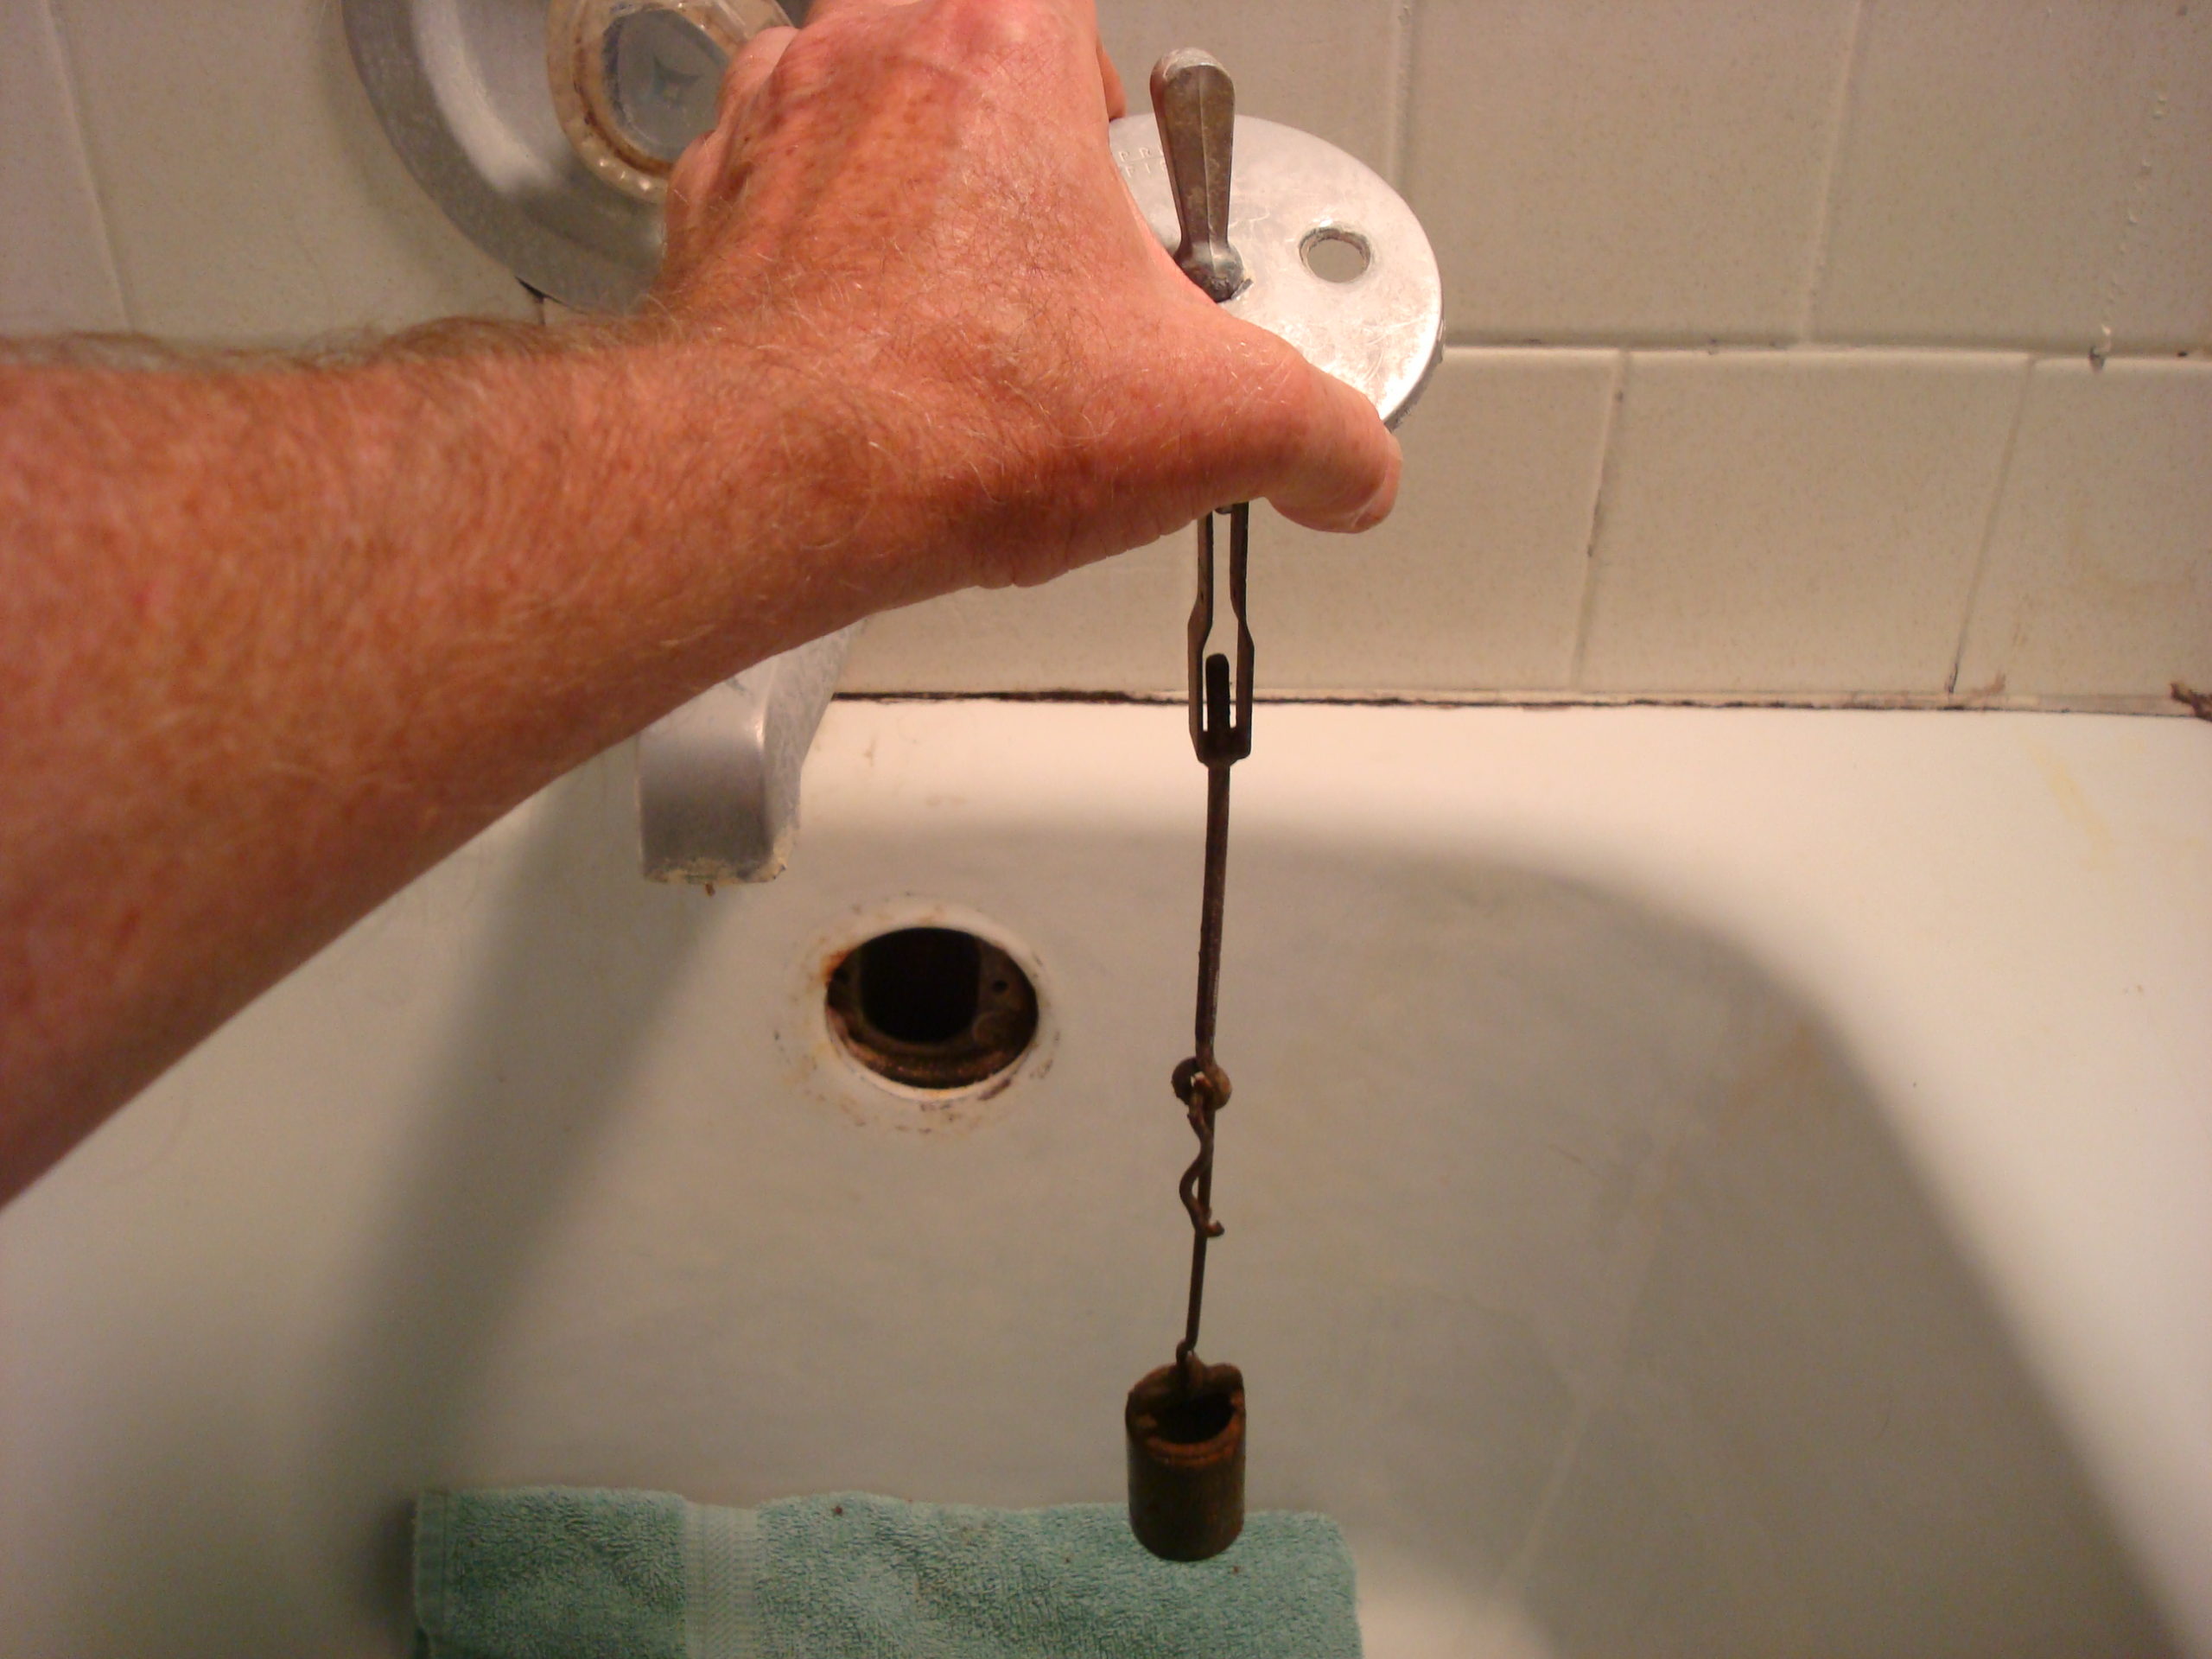 ). The new face cover had a single center hole
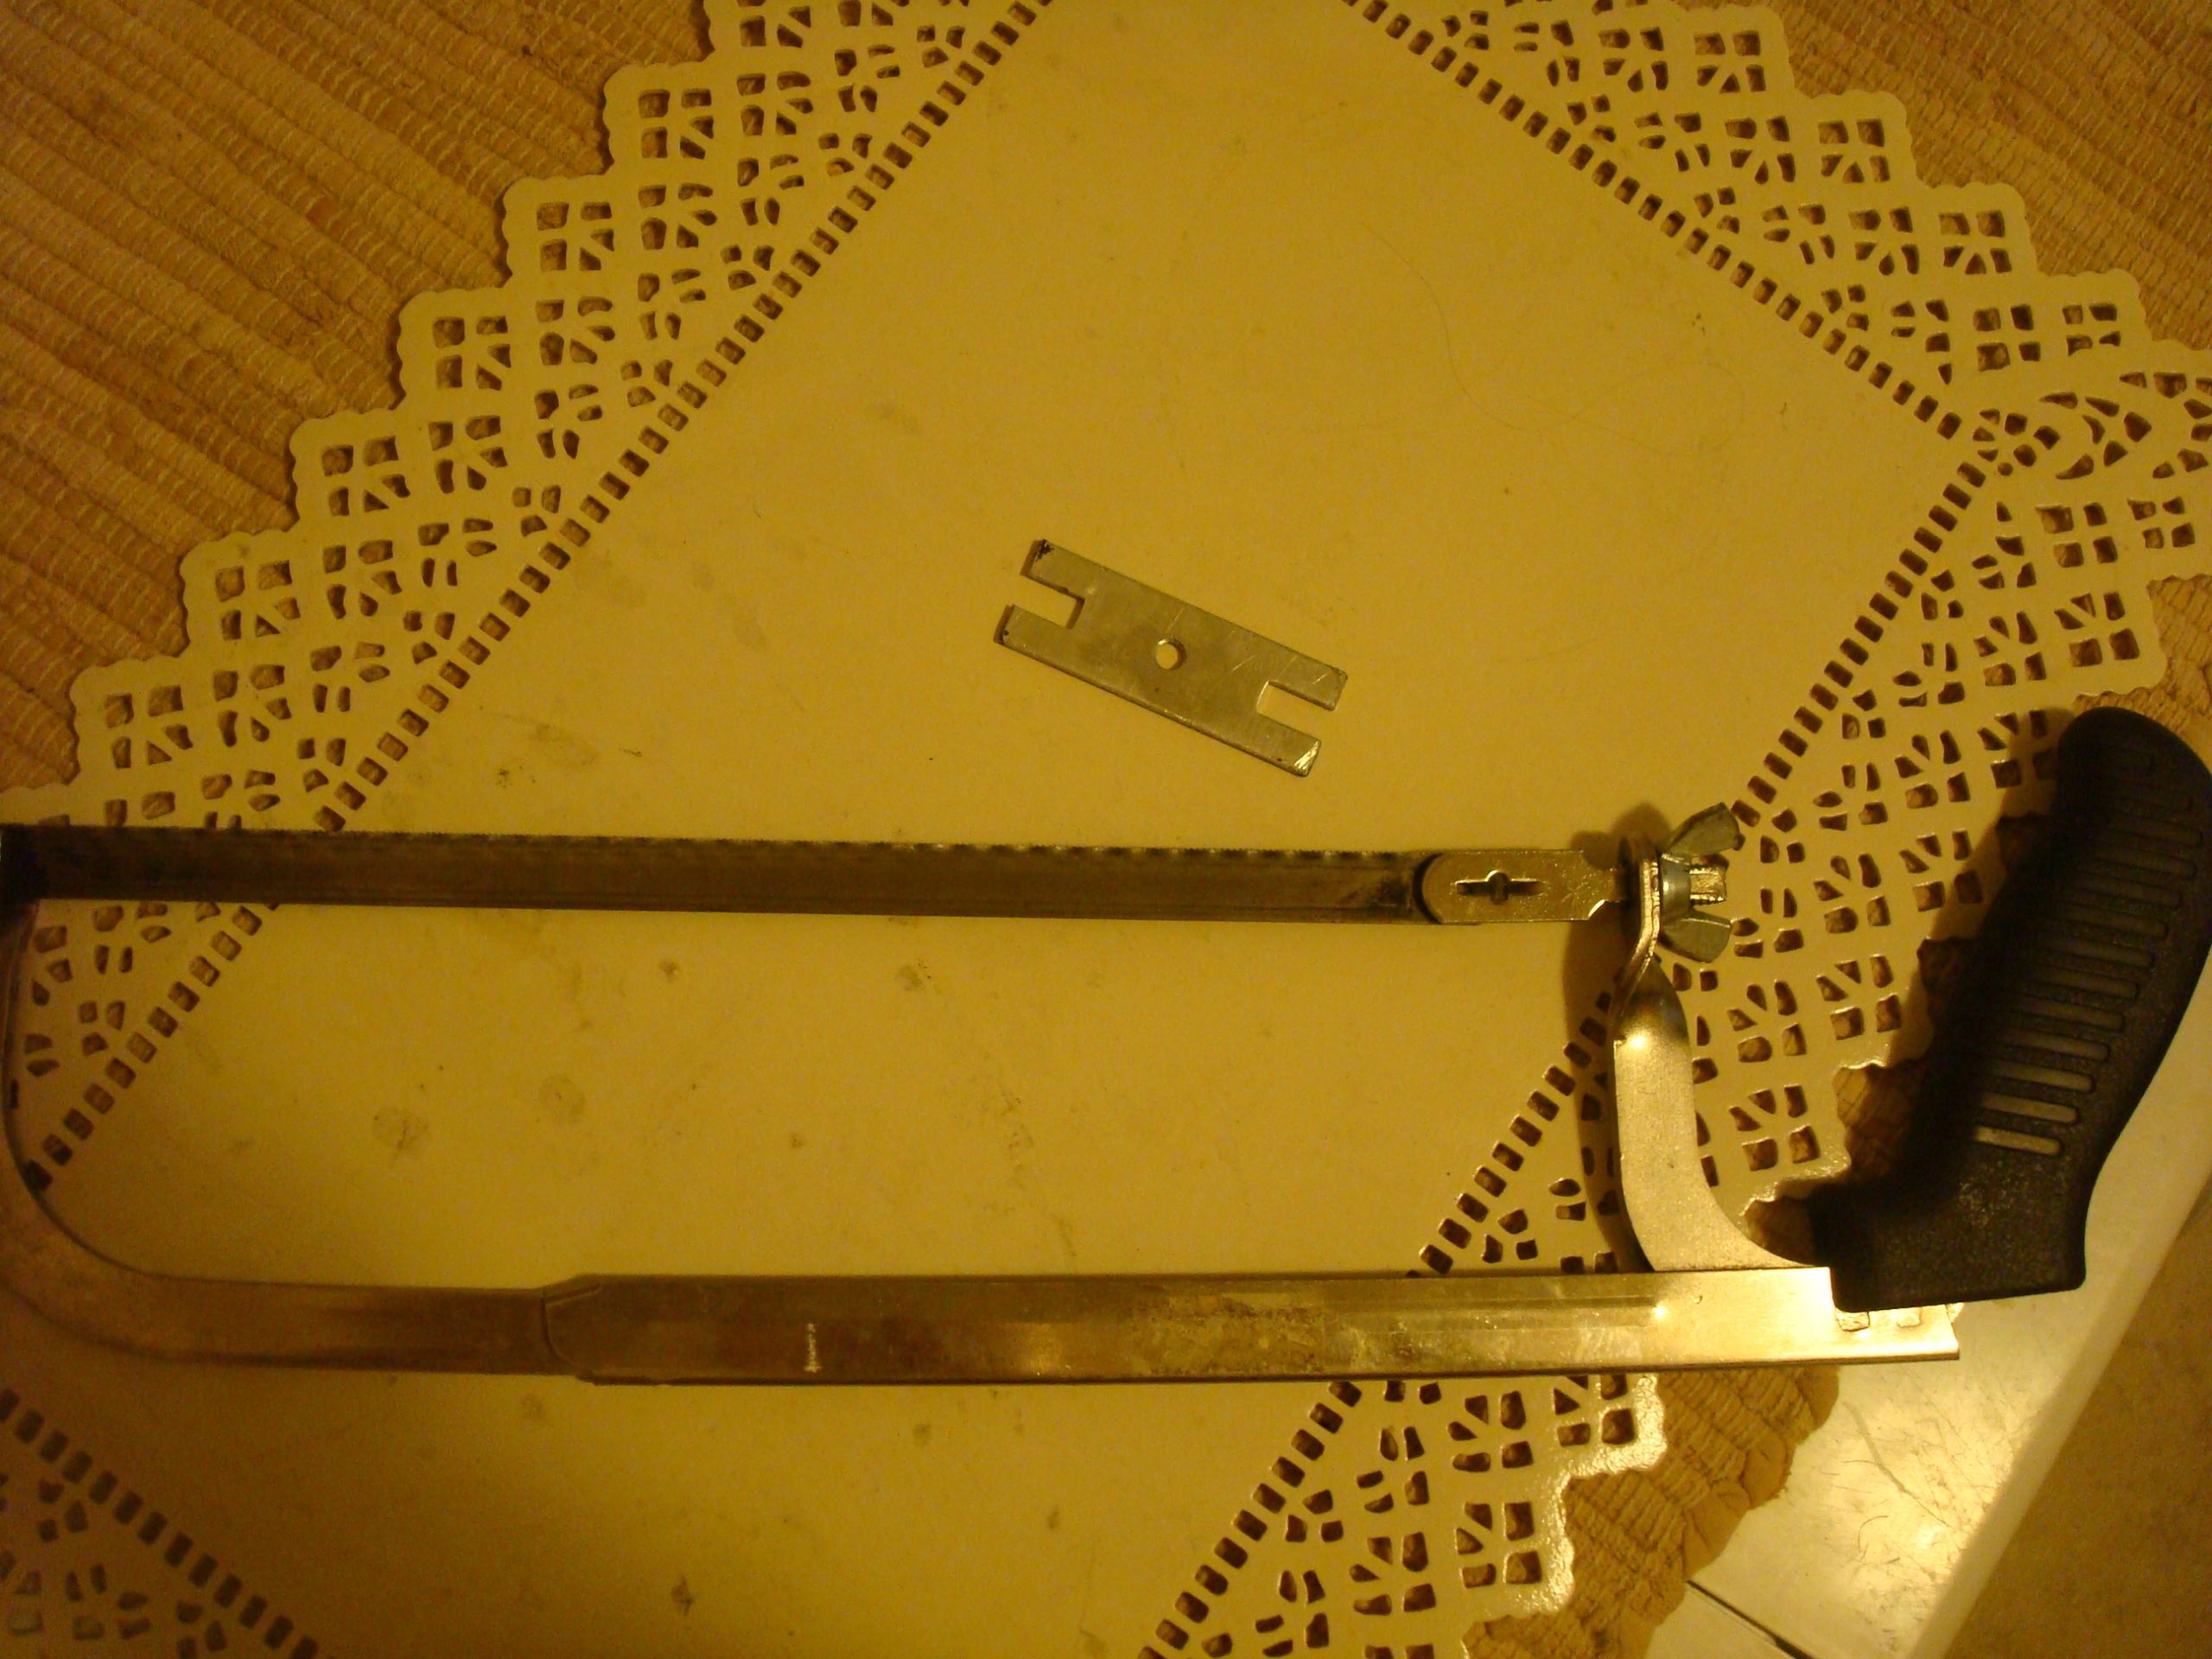
 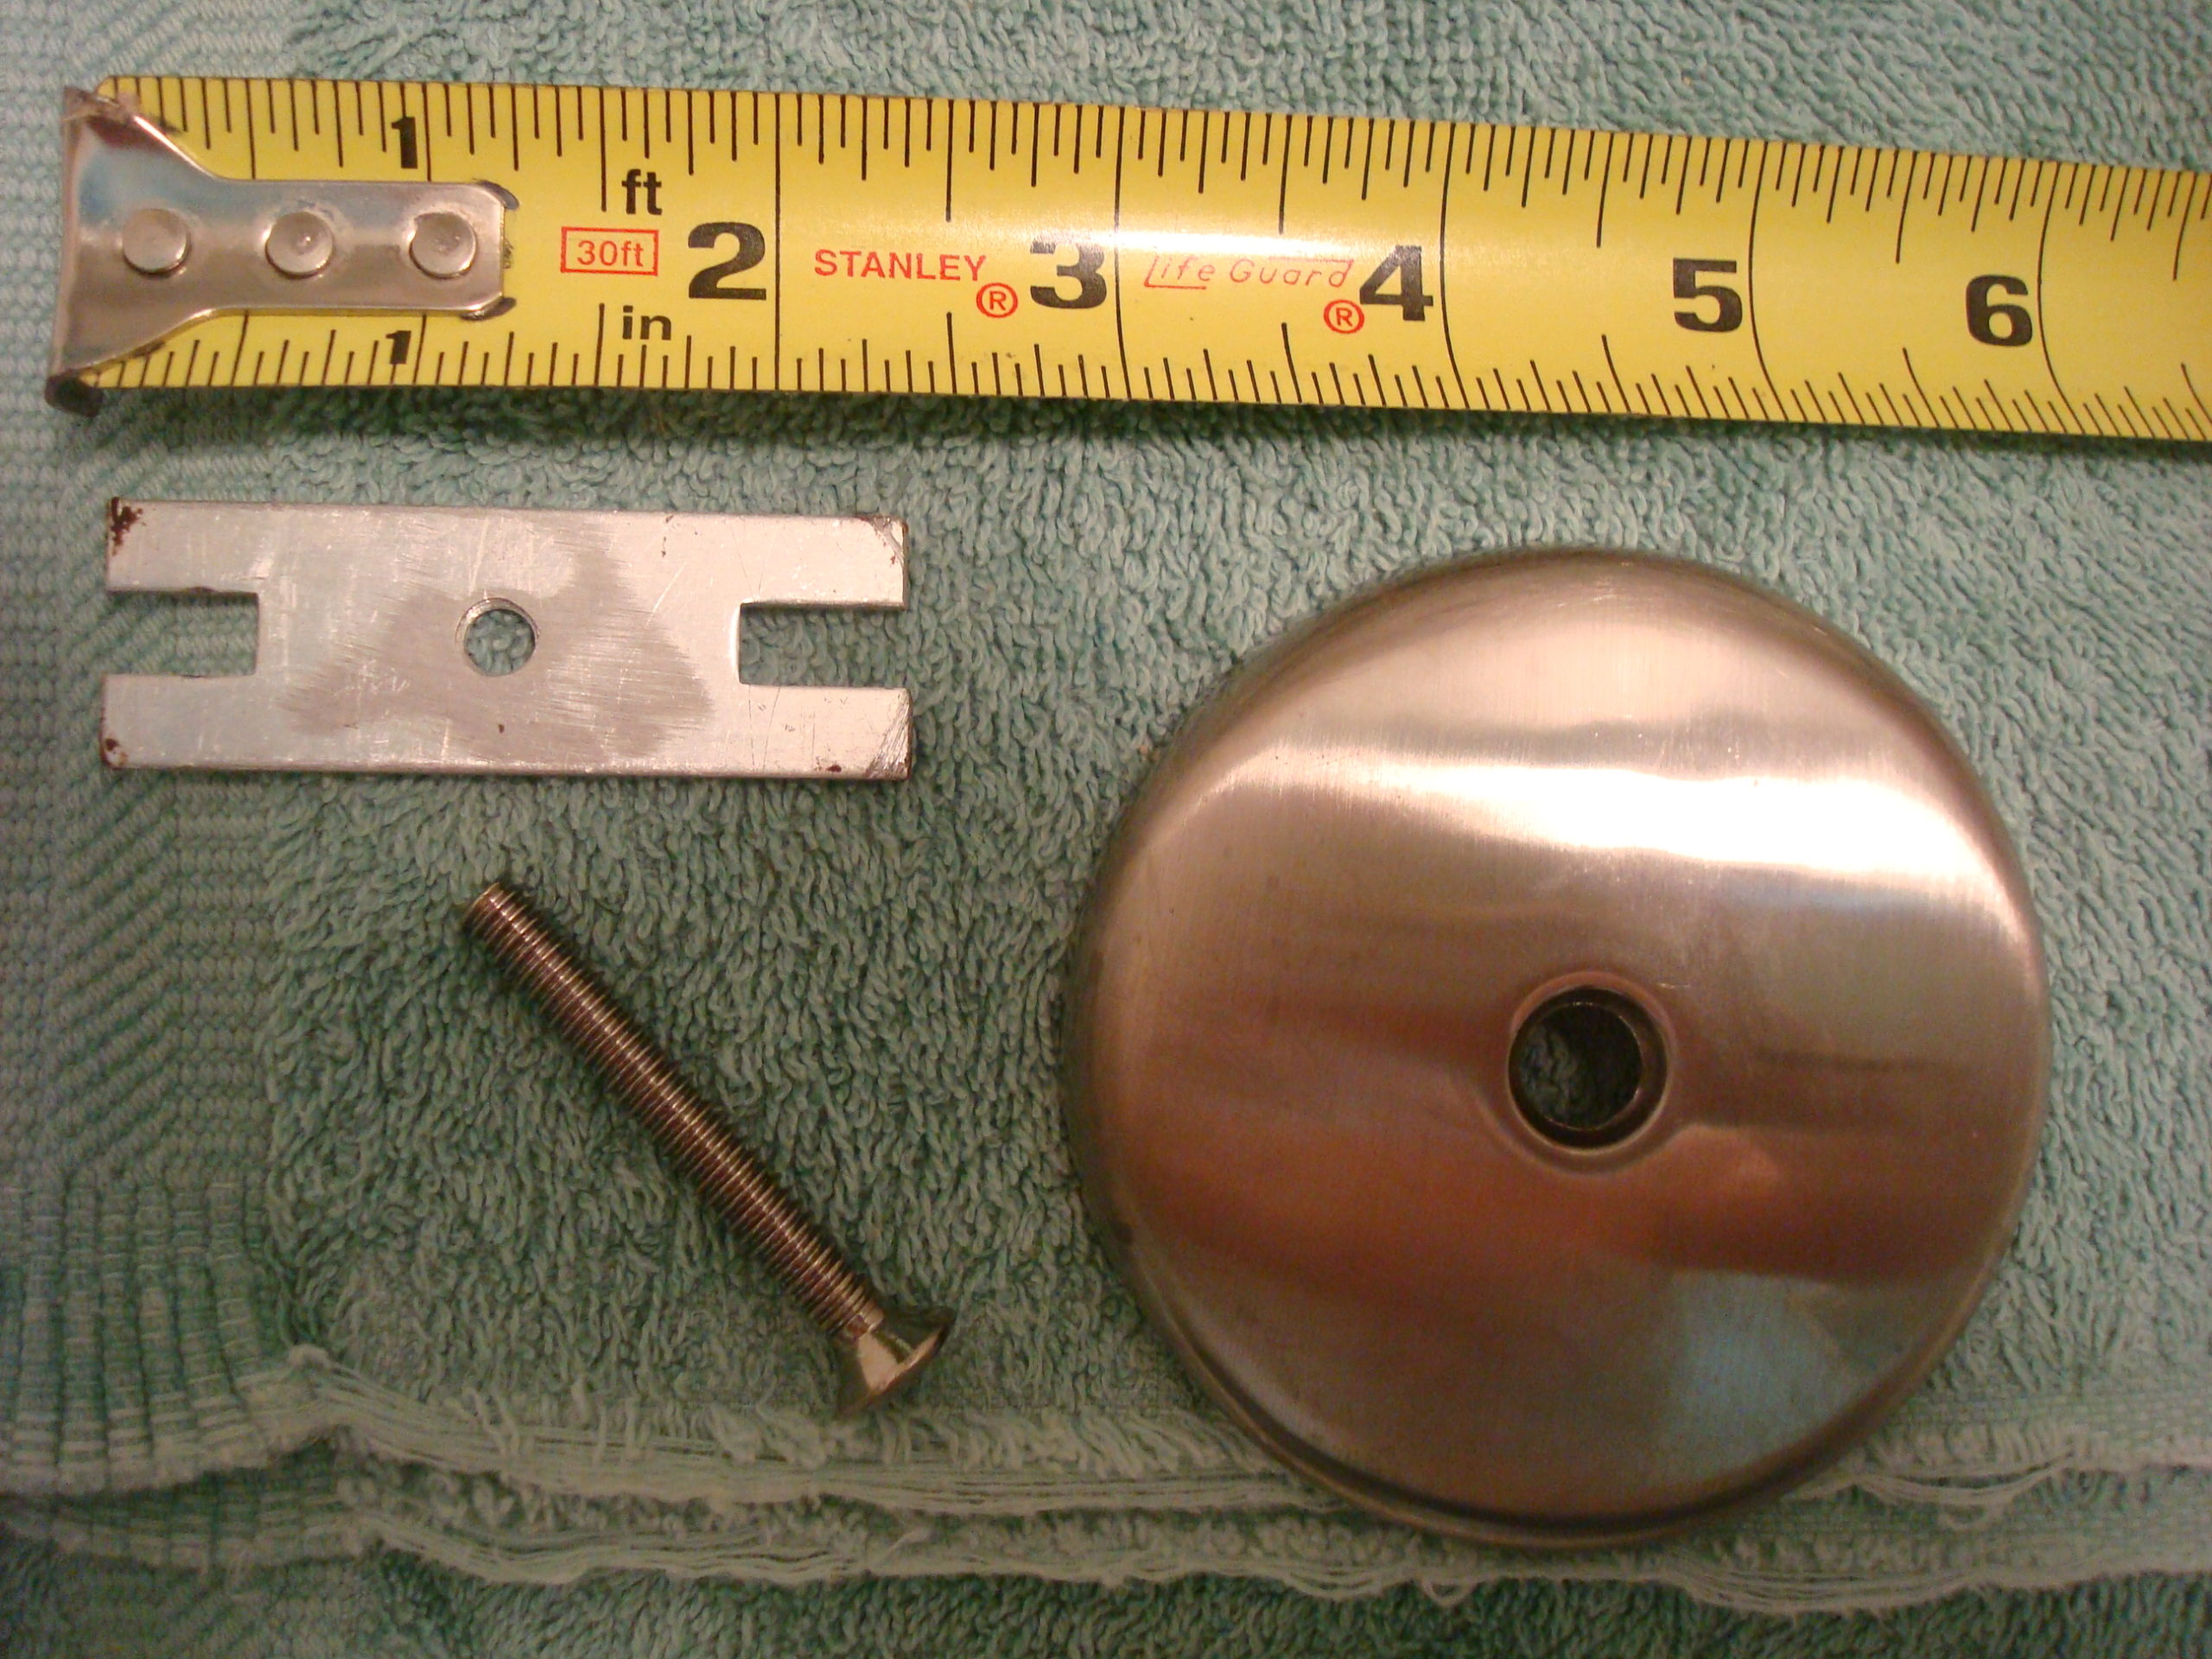 . The old cover had two, non-centered holes. An insert piece to hold the new face cover was included with the cover, but it was too long. I had to measure the inside distance and then use my hacksaw to cut the insert piece to a shorter width
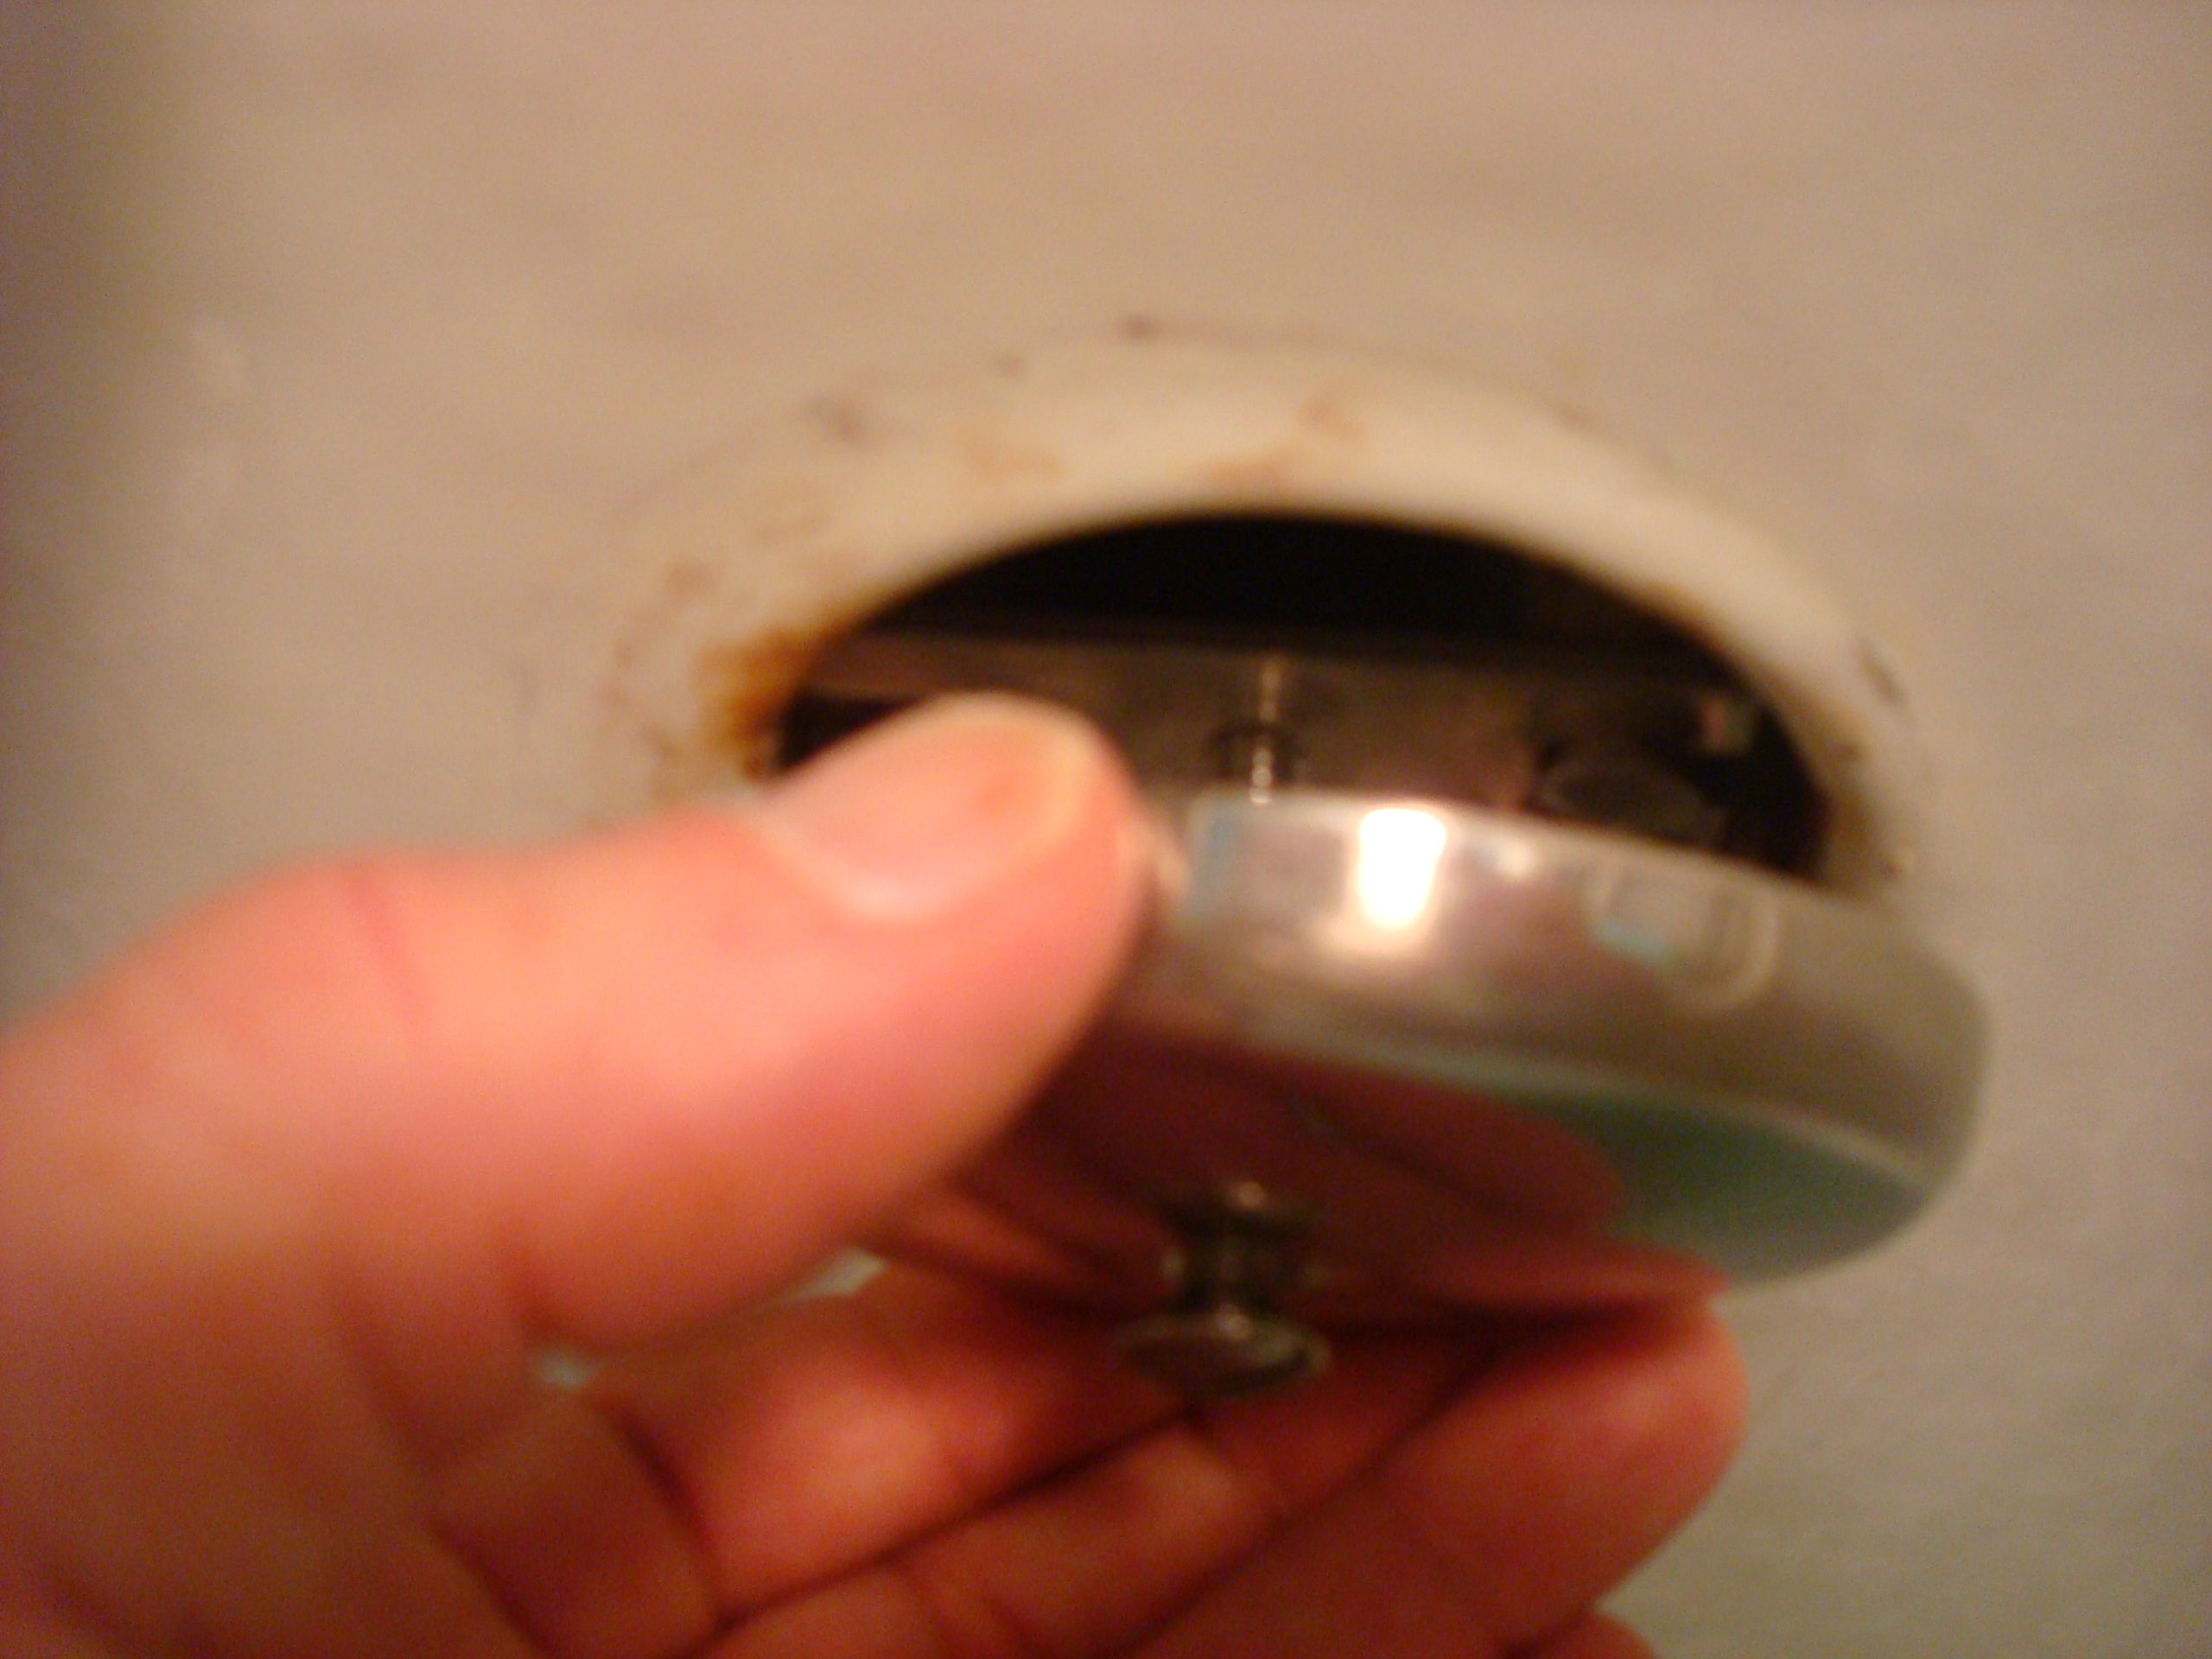
  . I attached the “tailored” insert piece using the two original screws and holes. I could then attach the new cover using the new insert piece
  . The new bathtub look:
 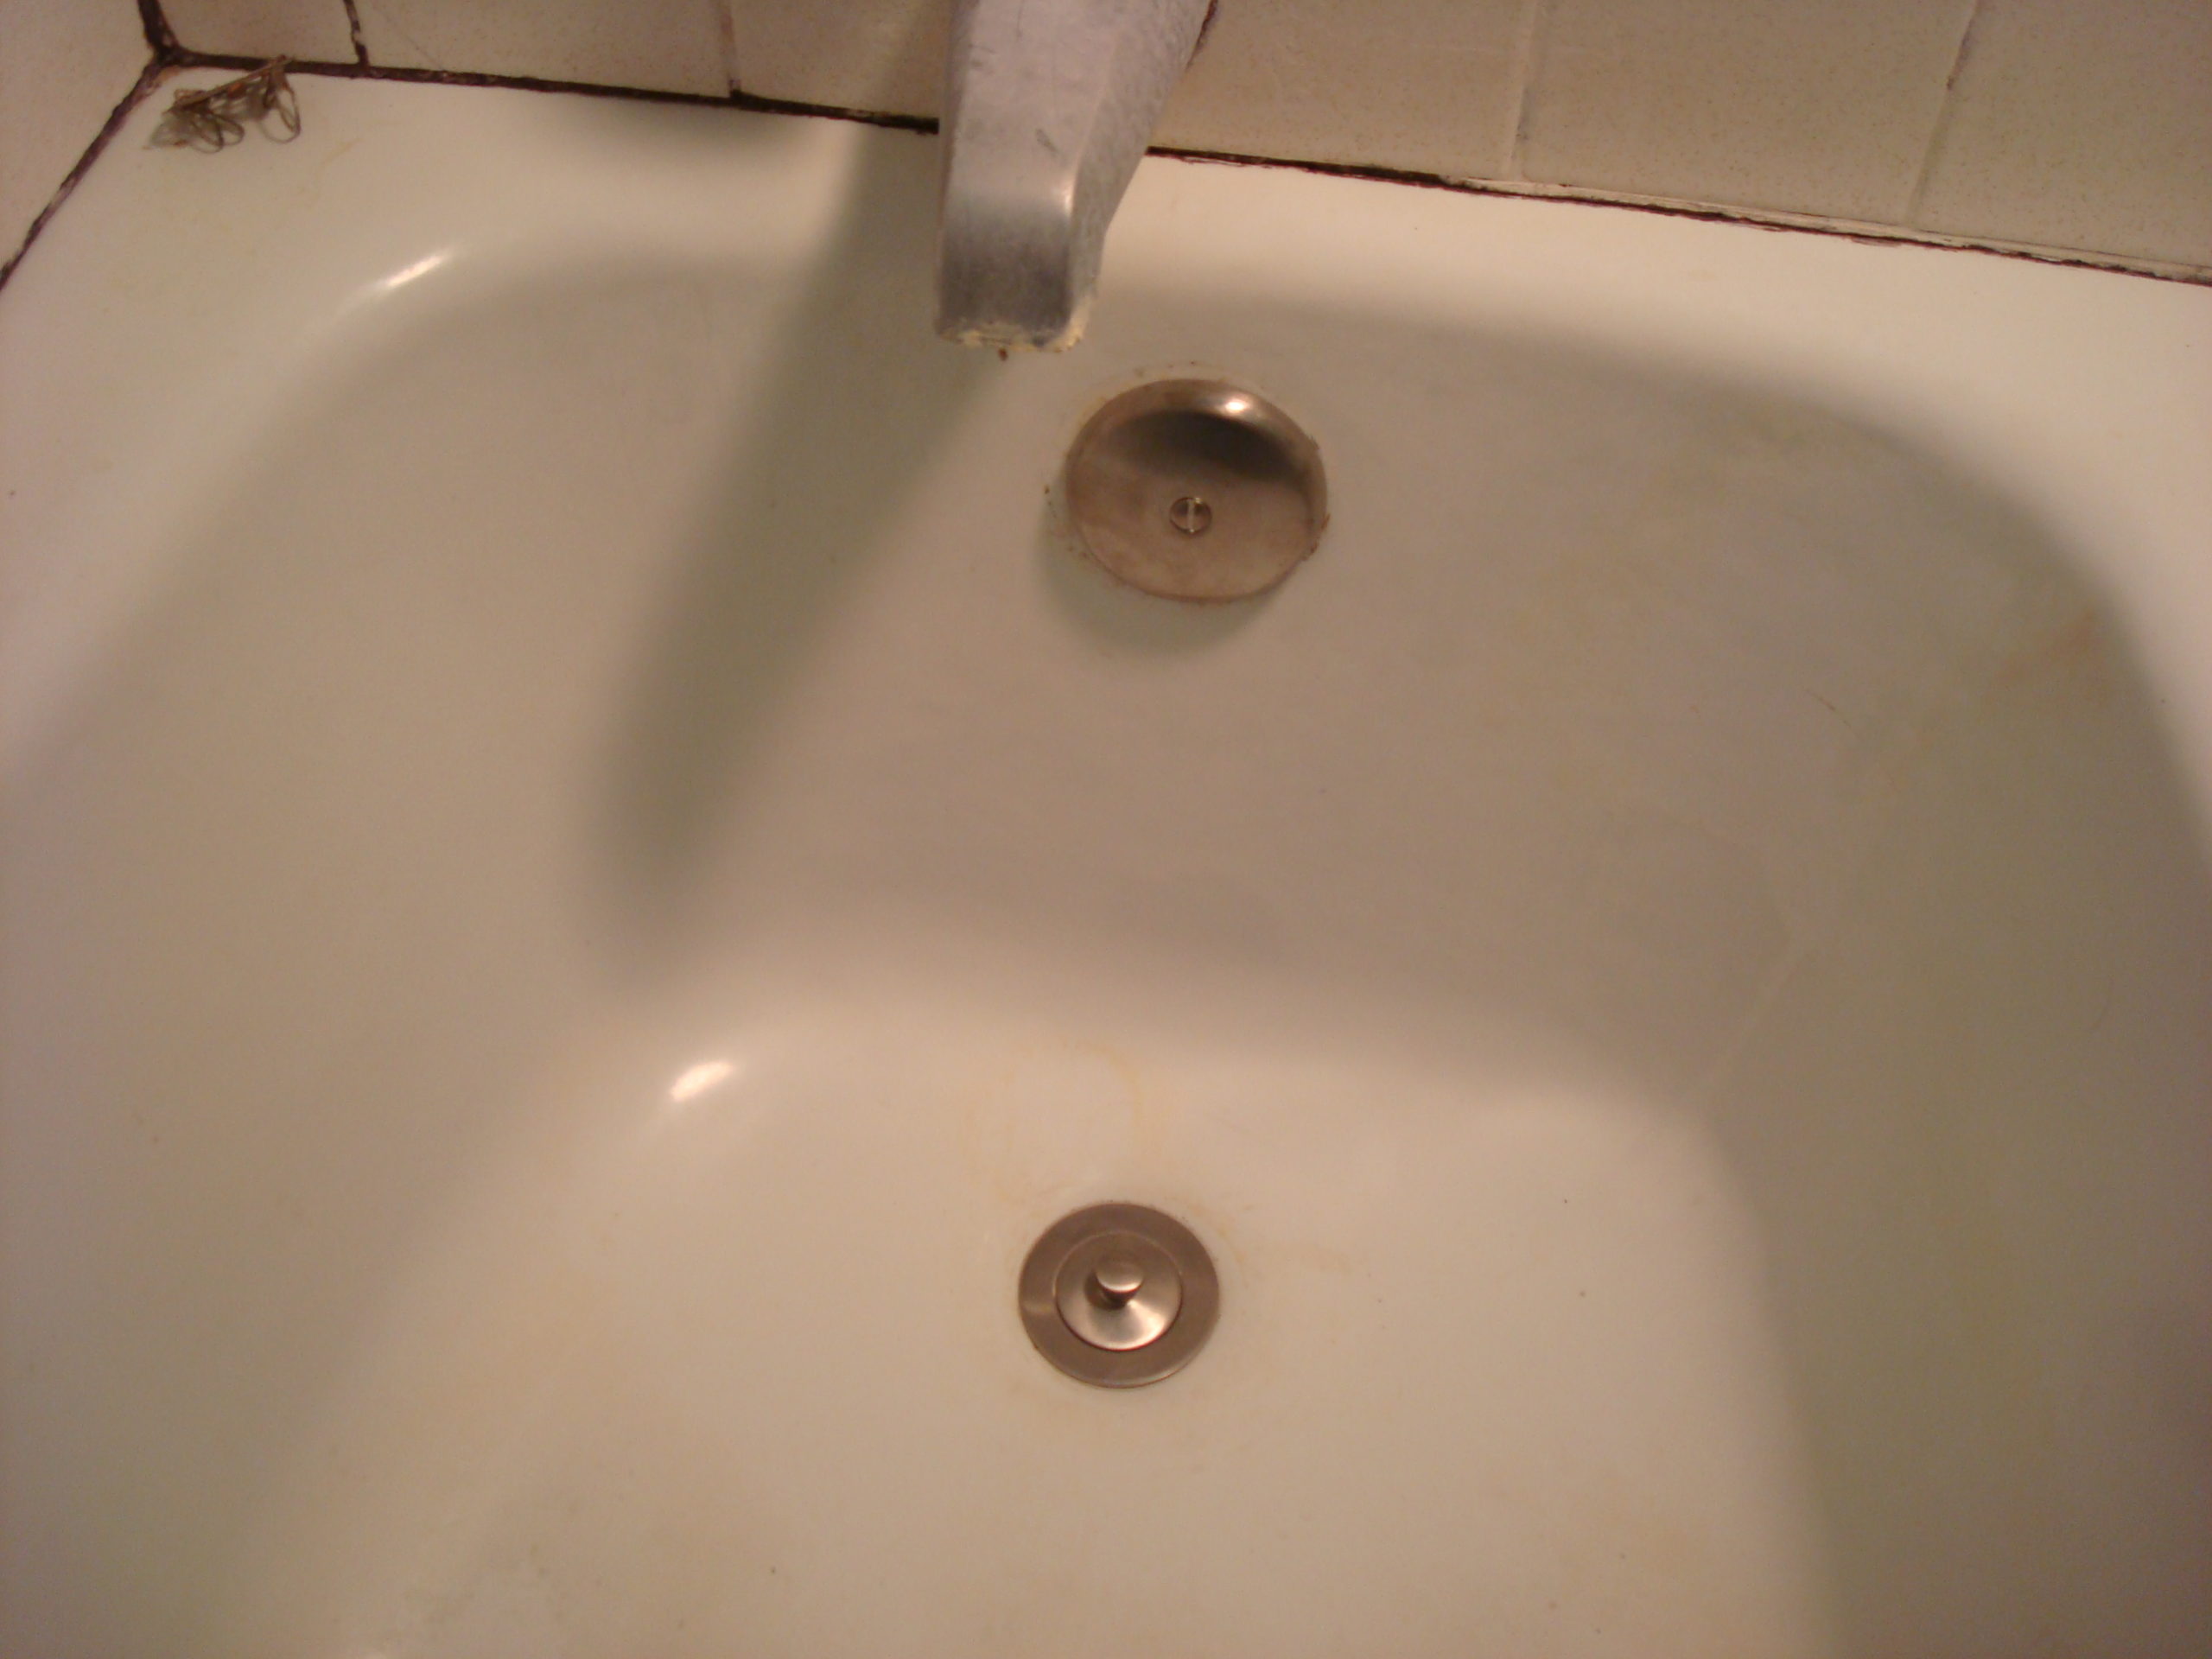 .
.
The remaining parts of the bathtub (handles and faucet) will be replaced later.
I then repeated the above work on the other two bathrooms.
Problem: Living room lamps
Lamp #1: A lamp with a cantilever pole. The piece of metal that held the top pole to the bottom vertical pole broke. After many months of looking at it in that way, I decided to try to fix it. I wound up taking it apart and seeing how it was put together. I removed the broken part and figured out a way to put the top pole down a few inches into the bottom pole (without going too far inside the bottom pole). This made the lamp be vertical (except for the extreme top part, which could still pivot), and the middle place (where the two poles met) look a little strange (because there is a gap). But the lamp works and is useful. Hopefully, some day I will find something to put in the gap to hide it.
Lamp #2: A regular table lamp in size. Touchable to turn it on and off. The lamp quit working. I “investigated” and found the switch was bad. I found a proper switch on the internet and replaced the old one with the new one. The lamp now works.
Lamp #3: An upright lamp. Its problem was that the light flickered. Upon taking it apart, I discovered that the contacts were loose. A little tightening of the screws fixed the problem.
Problem: Door latches
The house has seventeen inside doors (counting closet doors). Each one of the doors has the original handle (with its inside latch). The problem with most of the latches was that when I would turn the handle (up or down) to open the door and then release the handle, the handle would not return to its original, level position. Usually, the handle would stay slightly drooped. That didn’t look good. The latch would do its job, but the way the handle looked was not what I liked.
Actually, I lived with that annoyance for many years because I did not know how the inside of the door locks worked. I was afraid to venture into that unknown territory. But one day, when we had company over, someone mentioned to me that the lock to the hall bathroom door did not work. At first I thought “Who gives a rat’s *a!^? Just close the door. No one is going to open a closed door (at least, not before knocking).” But I really knew I had to do something about that problem.
So here I go again. Another problem of unknown components. I gingerly removed the handle and outer covering and exposed the inside screws. I removed the piece held on by the screws and saw the latch. I removed it and noted the number on it. I then drove to one of the local hardware stores in search of a replacement latch. The first latch fit into the door frame but would not let the remaining parts fit into the door; the latch was slightly too long. I looked on the internet and found a store in town that seemed to have the part I needed. I called them and looked on their website and found a latch that might do. It cost $16 (but would it be the exact size?). I then decided to try to contact the original manufacturer of the lock. I was successful with that and sent them a description of my problem. They responded quite soon but had to tell me that the latches in my house had not been manufactured in twenty-five years. Sorry.
I was now in a corner. What to do? I decided to try to fix the problem myself. Plan #1 would be to oil the latches. If that did not work, Plan #2 would be to put the tools away and have a beer.
Fortunately, Plan #1 worked pretty good (I’ll still have that beer later, though). Most of the door handles now work as they should (some, “just like downtown”, I like to think). Only one latch had a broken part, but the latch still works acceptably.
All in all, the three days I spent working on this project were good for me. I now have a good understanding of how door handles work on the inside. I’ve gained another piece of knowledge about something practical in this world.
And, by the way, the hall bathroom lock (and the other locks in the house) now actually protects the occupant inside.
Problem: Outdoor Sodium Light
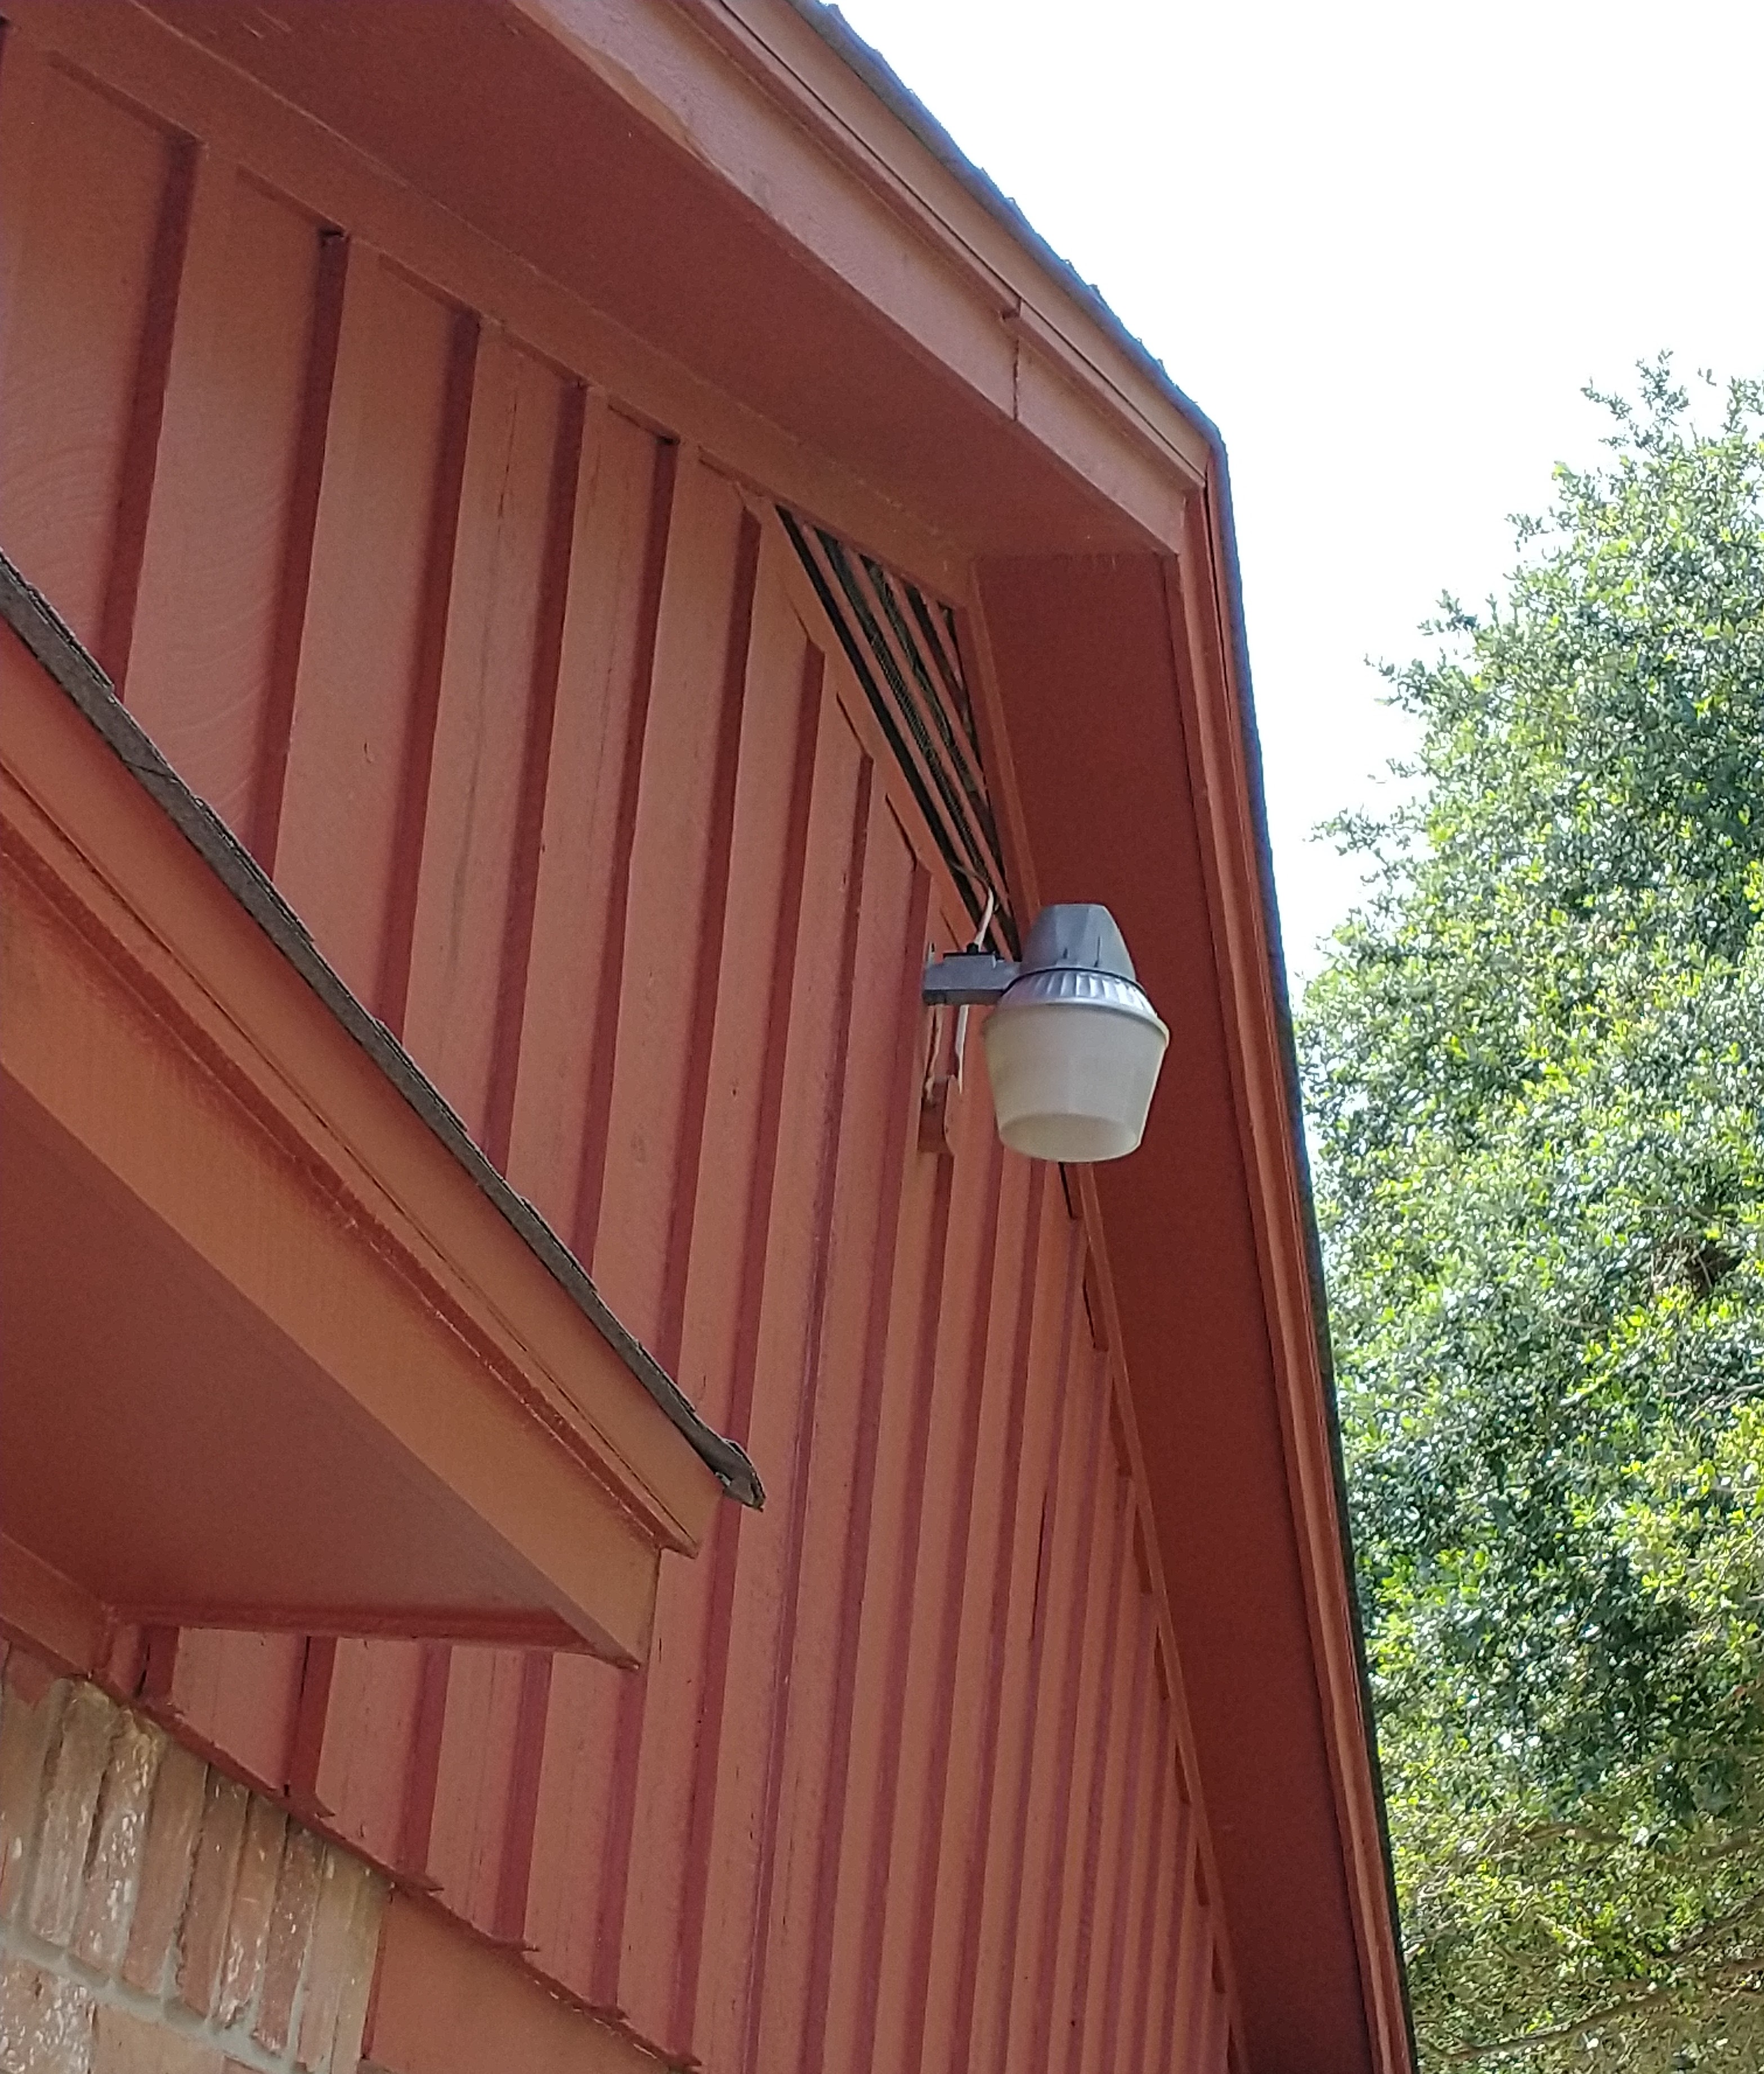
Right-click the image to get a larger one in a new tab.
The light that shines at night over the driveway began to flicker off and on. This has happened several times over the past twenty-five years. Each time I would simply buy a new high-pressure sodium bulb, climb my ladder, and replace the old bulb with the new one. (The light fixture is about thirteen feet over the driveway and was originally installed by my dad, who was an electrician. My ladder extends just enough for me to reach the bulb without any problem, although, I’m a bit shaky up there.)
This time, though, the problem was different. Replacing the bulb did not stop the off-and-on annoyance. In fact, before I figured out what was actually causing the problem, the light began staying on all the time (24 hours a day).
I determined that the problem must be the photocell. After all, it was twenty-five years old. I tried getting in touch with the manufacturer, but the company had gone out of business. I tried finding the photocell at stores in town and online, but nobody had that exact cell.
I thought I might have to buy a new apparatus (the structure that is attached to the side of the house and has the photocell and light) and replace the old one with the new one. I did not like that approach. Replacing a bulky thing with another bulky thing while on a ladder does not appeal to me. Too much to handle.
I thought I might have to hire an electrician to install a new apparatus (let him do that balancing act). I did not like that approach either. At least, I wanted to think about the problem a bit longer.
Enter the means for a solution: A few days later, while we had people over to celebrate July birthdays, I mentioned my problem to the people at the table. One of the guests said that he thought any photocell would work. I thought “If that’s true, then I should be able to change out a small photocell, even while balancing on a ladder.” I decided to work on that.
After a bit of thinking and experimenting, I was finally able to replace the bad cell with the new one. Sealing the cell from future rain water took a bit of work, but I completed that with a few tries. The problem has now been solved.
P.S.
I got a lot of exercise climbing up and down the ladder multiple times while I worked on this problem.
Problem: Window Blind in the Game Room Needed a New Cord
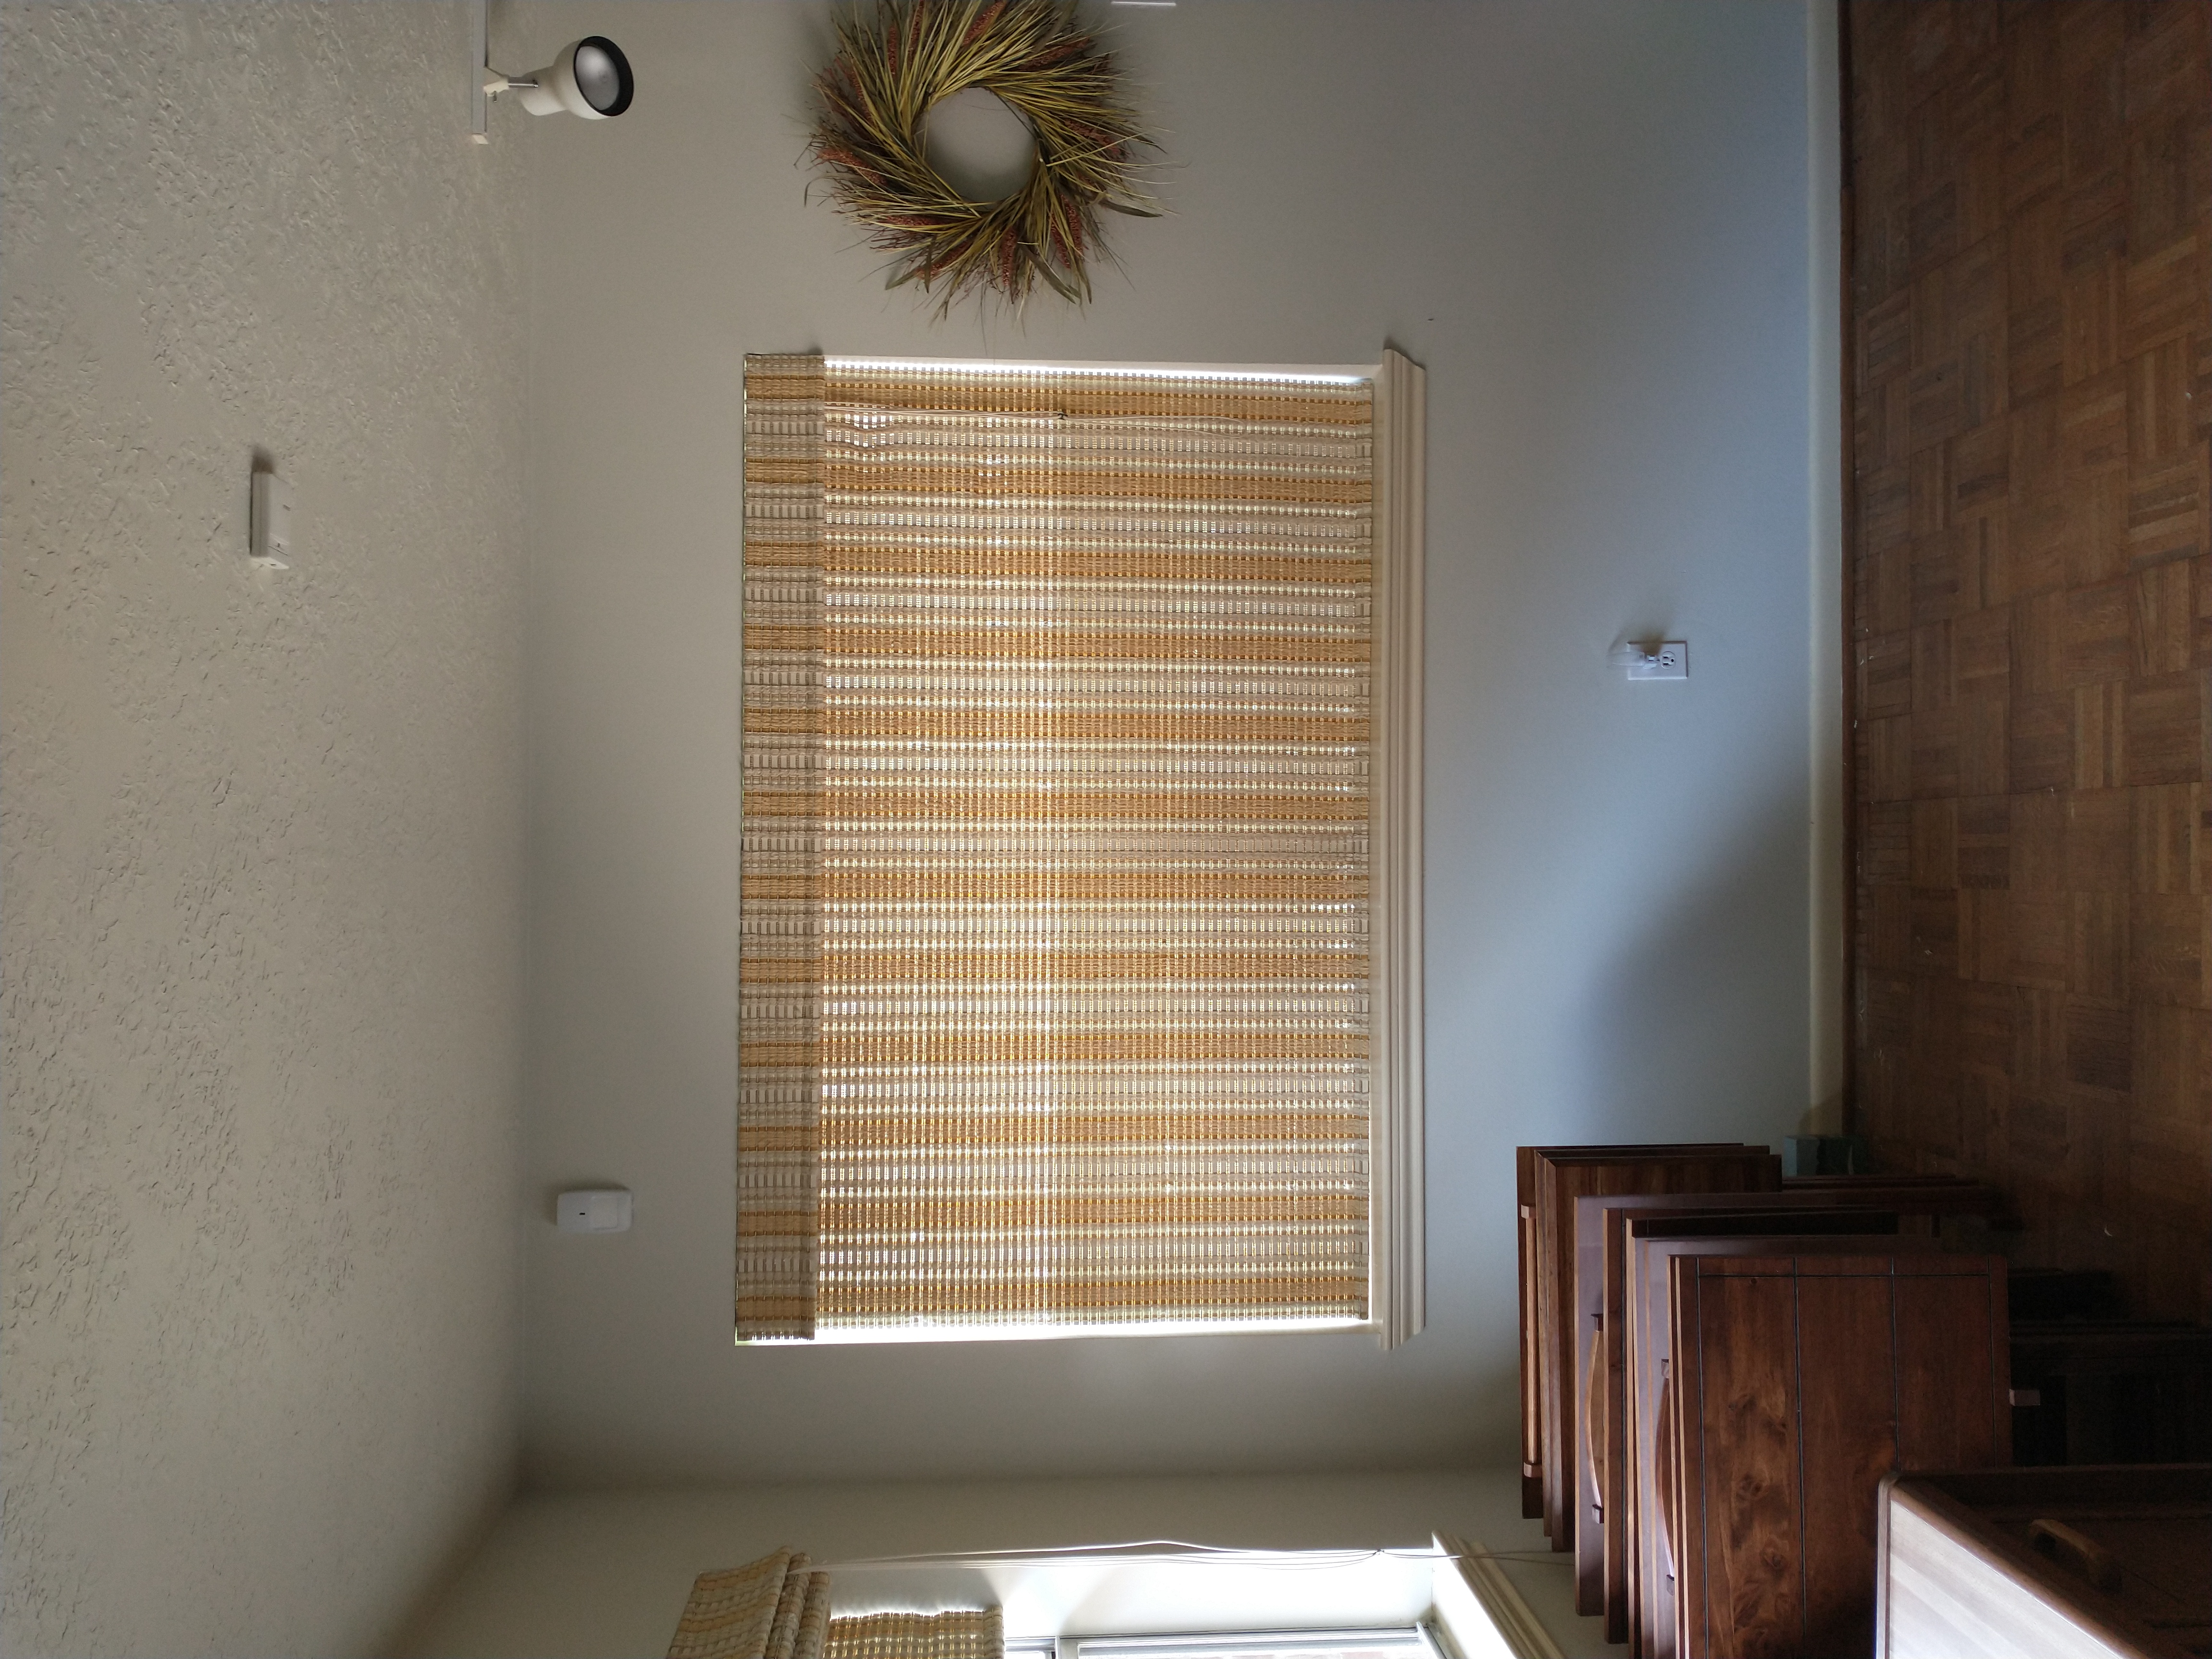
Problem #1: The windows in the game room are covered by woven woods window blinds (as stated in the inside area of the blind). I pull a cord on the side to raise the blind; I angle the cord to the side and release the tension a little to lower the blind.
I decided to write about this problem because this problem was one I had never encountered before.
The problem was that the pull cord for one of the window blinds in the game room had worn down so much that raising and lowering the blind was becoming a problem. One day, in fact, out of frustration (because the cords would get stuck), I pulled the bundle of cords and broke one of the lines. That did it: I had to fix that blind.
I pondered about the steps I might need to perform for restringing the arrangement of cords. Finally, after a couple of weeks, I decided to try to fix the problem.
I found a site online (www.fixmyblinds.com) that told me how to determine the diameter of my existing cord (by wrapping the cord around a pencil and then counting the number of wraps in one inch). That is important because cords that are too thick or too thin will not run through the rollers properly. That site connected me to the place where I could buy cords. I selected the right size and placed the order for 50 feet of cord. (It was either that or 300 feet!) I suppose I could have found a store in town that has the cord, but no big deal.
I studied the existing blind as much as I could and then began my work. Actually, I first set up a place in the garage where I could hang the blind. That gave me easy access to both sides of the blind.
The first thing I learned was that two separate cords are used to raise and lower the blind. One cord connects with the outer left and right holes, and the other cord connects with the two inner holes. Both cords link up in a tiny metal “equalizer” so that the person can pull just one set of cords.
Once I learned about the number of cords, I felt that the task would not be hard. And, as a fact, it was not hard. As I worked, I realized I just needed to be a little careful about the length of each of the two independent cords. The two independent lengths determine how the blind goes up and comes down as a single unit (as one might observe the motion at the bottom of the blind).
I finished the job in about two hours, and now the blind moves up and down properly and level.
P.S. Once I got into the work, I actually liked the problem (as strange as that might seem).
Problem #2: About a year and a half after I fixed the first blind problem, the blind for the second set of windows in the game room began to have almost the same problem as with the first blind. This time, the frayed cord prevented one side of the blind from going up as far as it should go.
So here I go again. I could not remember exactly how I had fixed the first blind, but I figured I could fix this one with a little investigation and work. The procedure turned out to be the same as with the first problem.
I ordered the cord and (a couple of days later) moved the blind into the garage. I suspended the blind from the joists so I could have access to both sides of the blind. I carefully changed each of the two lines. When I felt assured that the problem was solved, I got my wife to help me hold the blind in place in the game room window alcove while I connected the wing nuts to the upper support rod.
We tried the blind. Success! It goes up and down as it should.
Total work time was less than two hours.


Problem: House Window Screens
Some of the screens for the house windows had small tears in them. I decided to replace all of the bad screens.
I got the motivation for doing this because a friend of mine was getting new screens for her house.
All of this work was done after I had hired a professional installer and his helper to replace the old, white, plastic inserts (with PVC inserts) in almost all of the house windows. The inserts (four in each window) help to hold each glass pane in place.
After checking all of the screens (except for the two windows that have the security wires in them), I found nine screens that had a tear in them. The other six screens were still good. However, the frame of one of the six good ones was warped a little on the bottom. I did not have to replace its screen, but I had to add some filler to the bottom of the frame to keep bugs out.
I measured each window to determine the widths of them. I found all but the front two windows were a maximum of 35 inches. The front two were 42 inches. I added up the heights of all of the windows to see how much screen wire I would need for each of the two widths. Directions for the process said to overlay the screen wire 2-3 inches beyond the frame edges. I didn’t have much leeway with the sides, but I did have control for the top and bottom of each frame. I added an extra amount (and some more for mistakes I knew I would make) to the total of all of the heights.
I went to Home Depot and found rolls of the screens in both widths. I figured one roll of each would be enough. It was.
I didn’t know the thickness of the spline (the rubber-type cord that holds the screen to its frame), and so I bought only one packet at that time.
I started the project with a window in the back of the house (just in case I messed up big time). That turned out to be a wise decision since I messed up three times before hitting my stride (such as it was).
My three initial mistakes were these: (1) The spline-pressing tool slipped from my hand and tore the new, nearly-finished screen, (2) I pressed too hard and tore the second screen, (3) I tried a different approach for the third screen and didn’t see that the screen had moved after I had pressed some of it into the spline channel. It wasn’t torn, but it looked bad after I straightened the screen.
I realized while working on the first window that I should replace the pull tabs while I replaced the screens. Home Depot, Lowe’s, and Ace Hardware did not have the tabs in their stores. That makes sense since that item is not a normal seller. I had to search the internet for the pull tabs. I finally found them after figuring out what they are called (“little black things at the bottom of a screen”, “gray grabbers”, “lifters”, what???). I ordered two packs (just to be sure to have enough). They arrived after a few days.
During my waiting, I returned to Home Depot to get more spline.
Finally, I was able to resume my work.
I progressed slowly (since mistakes had been made previously) with each window. I did not want to ruin a screen because I was tired. The work took two days + wait time + six days + one day for a little touch-up work.
Now, all of the screens are doing their job of keeping bugs out. I will probably have to replace some of the other screens in the future, but I will do that as needed.